
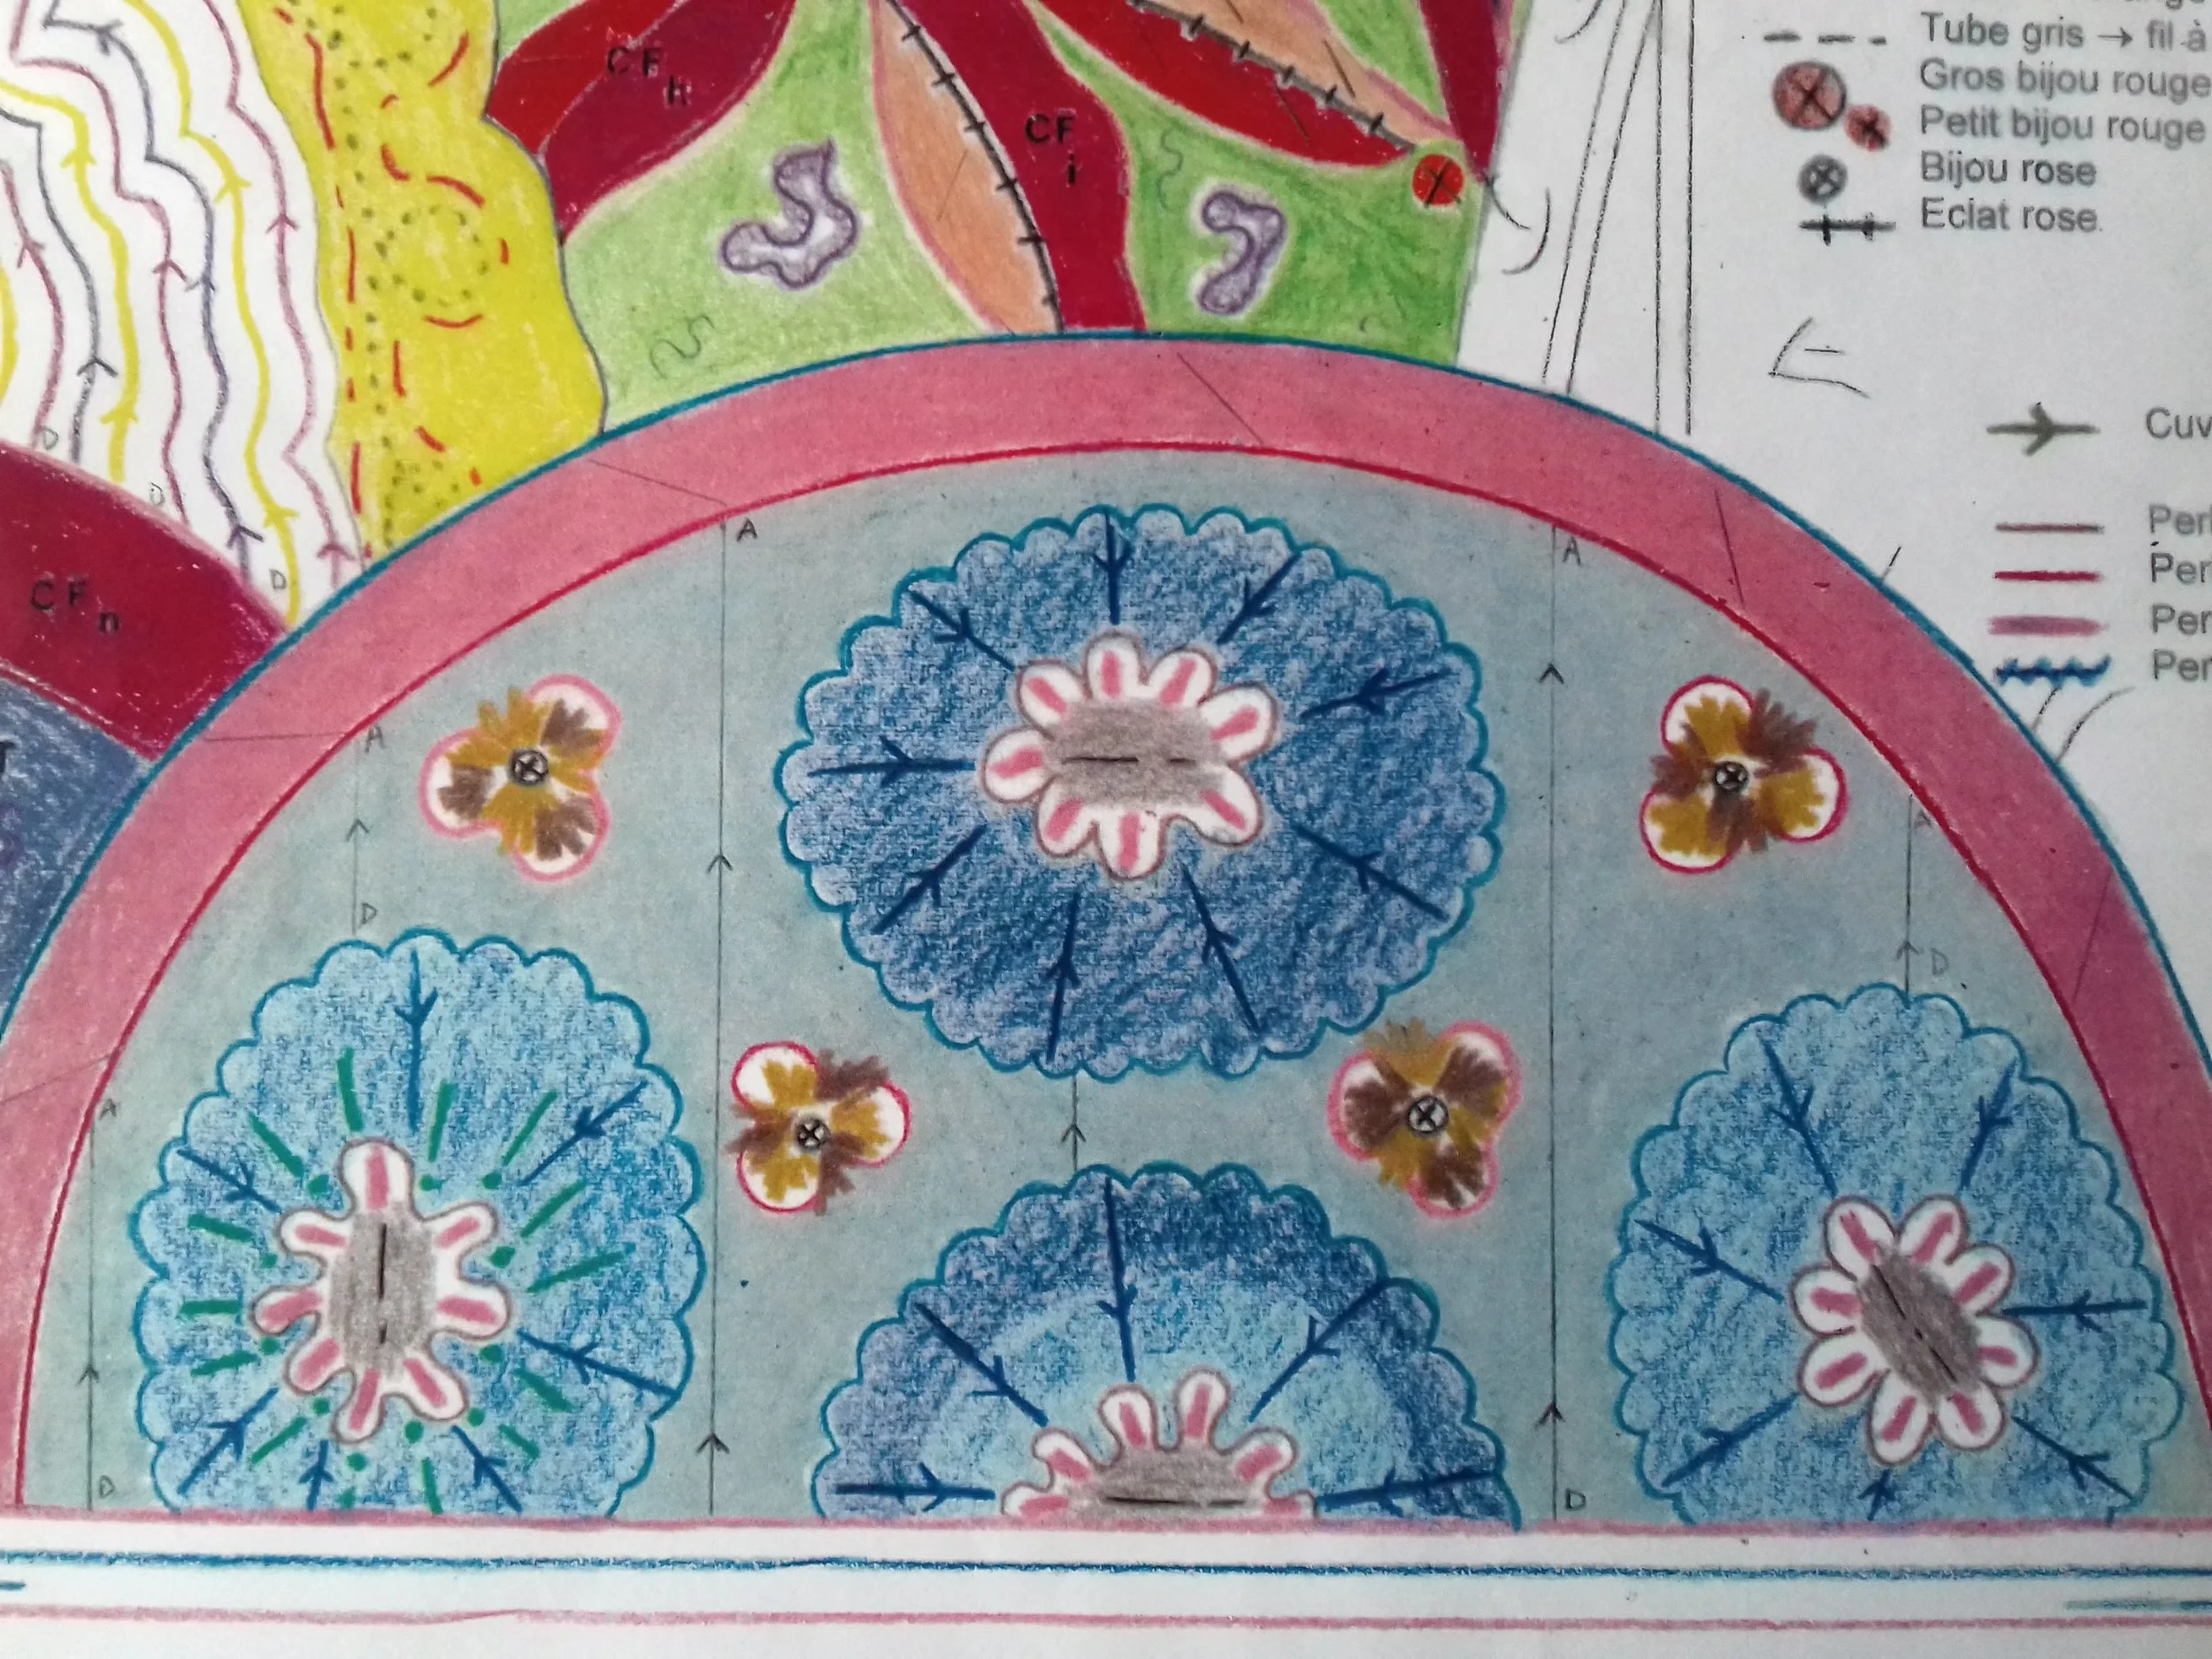
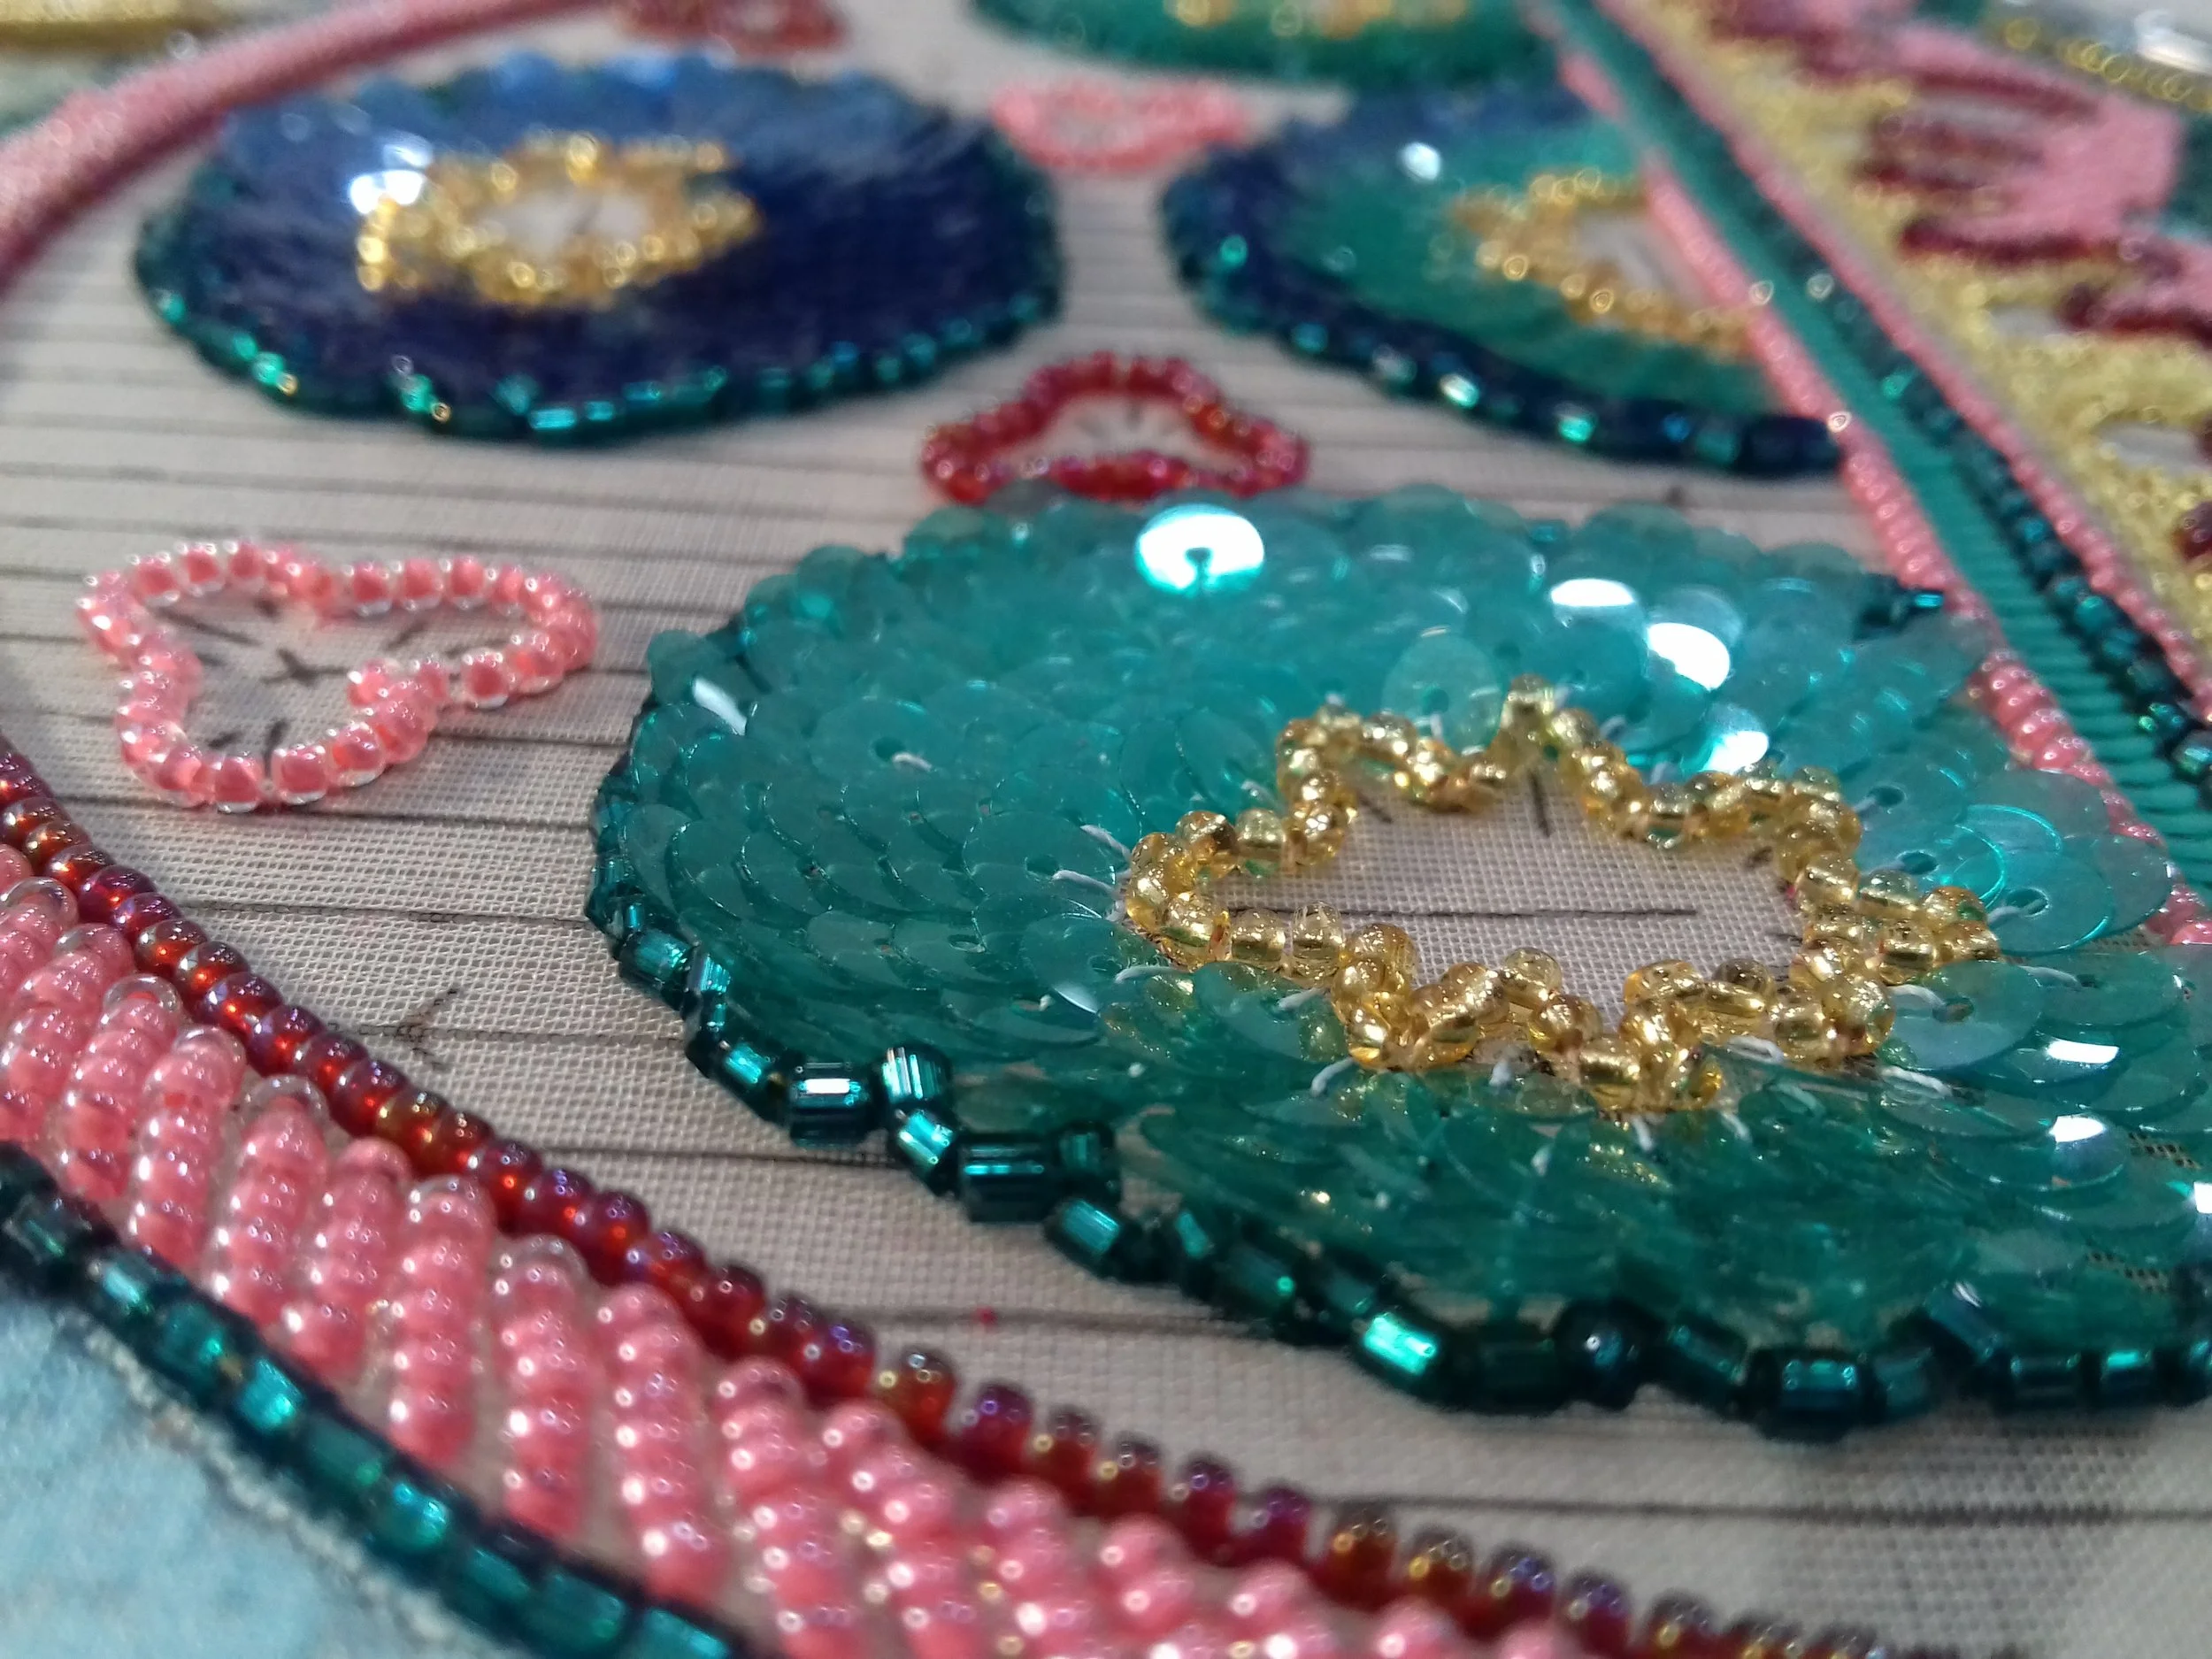
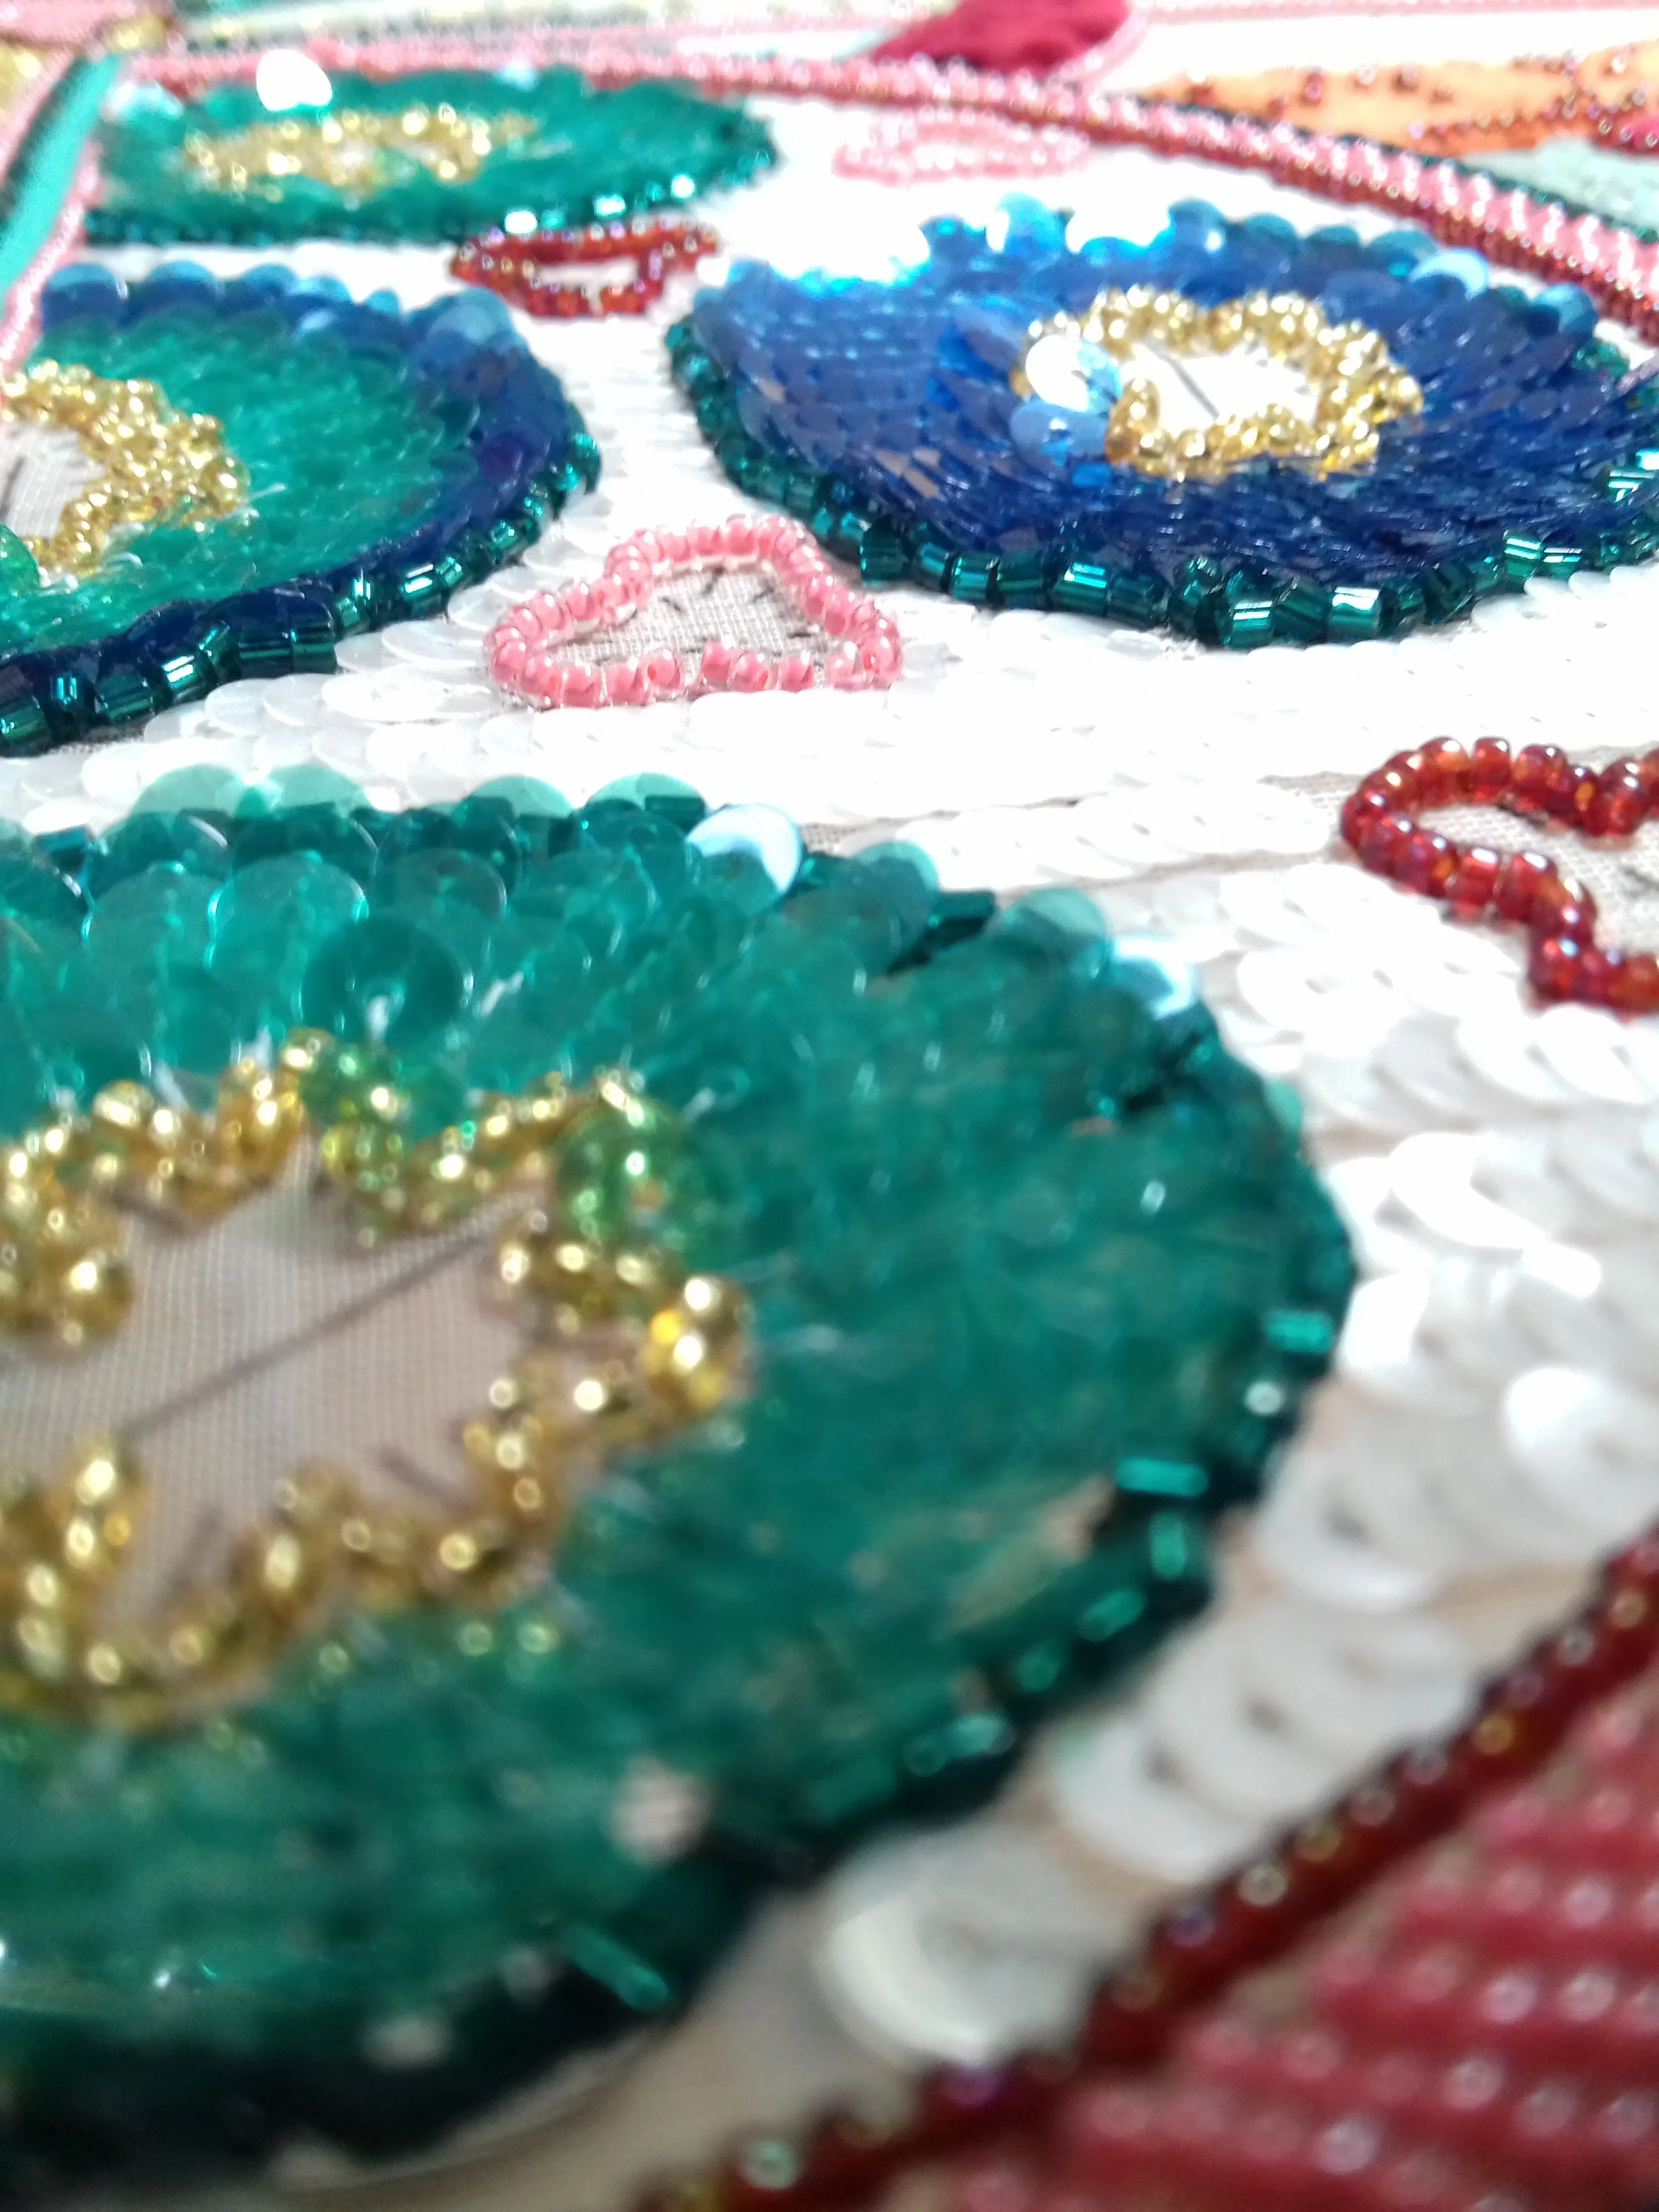
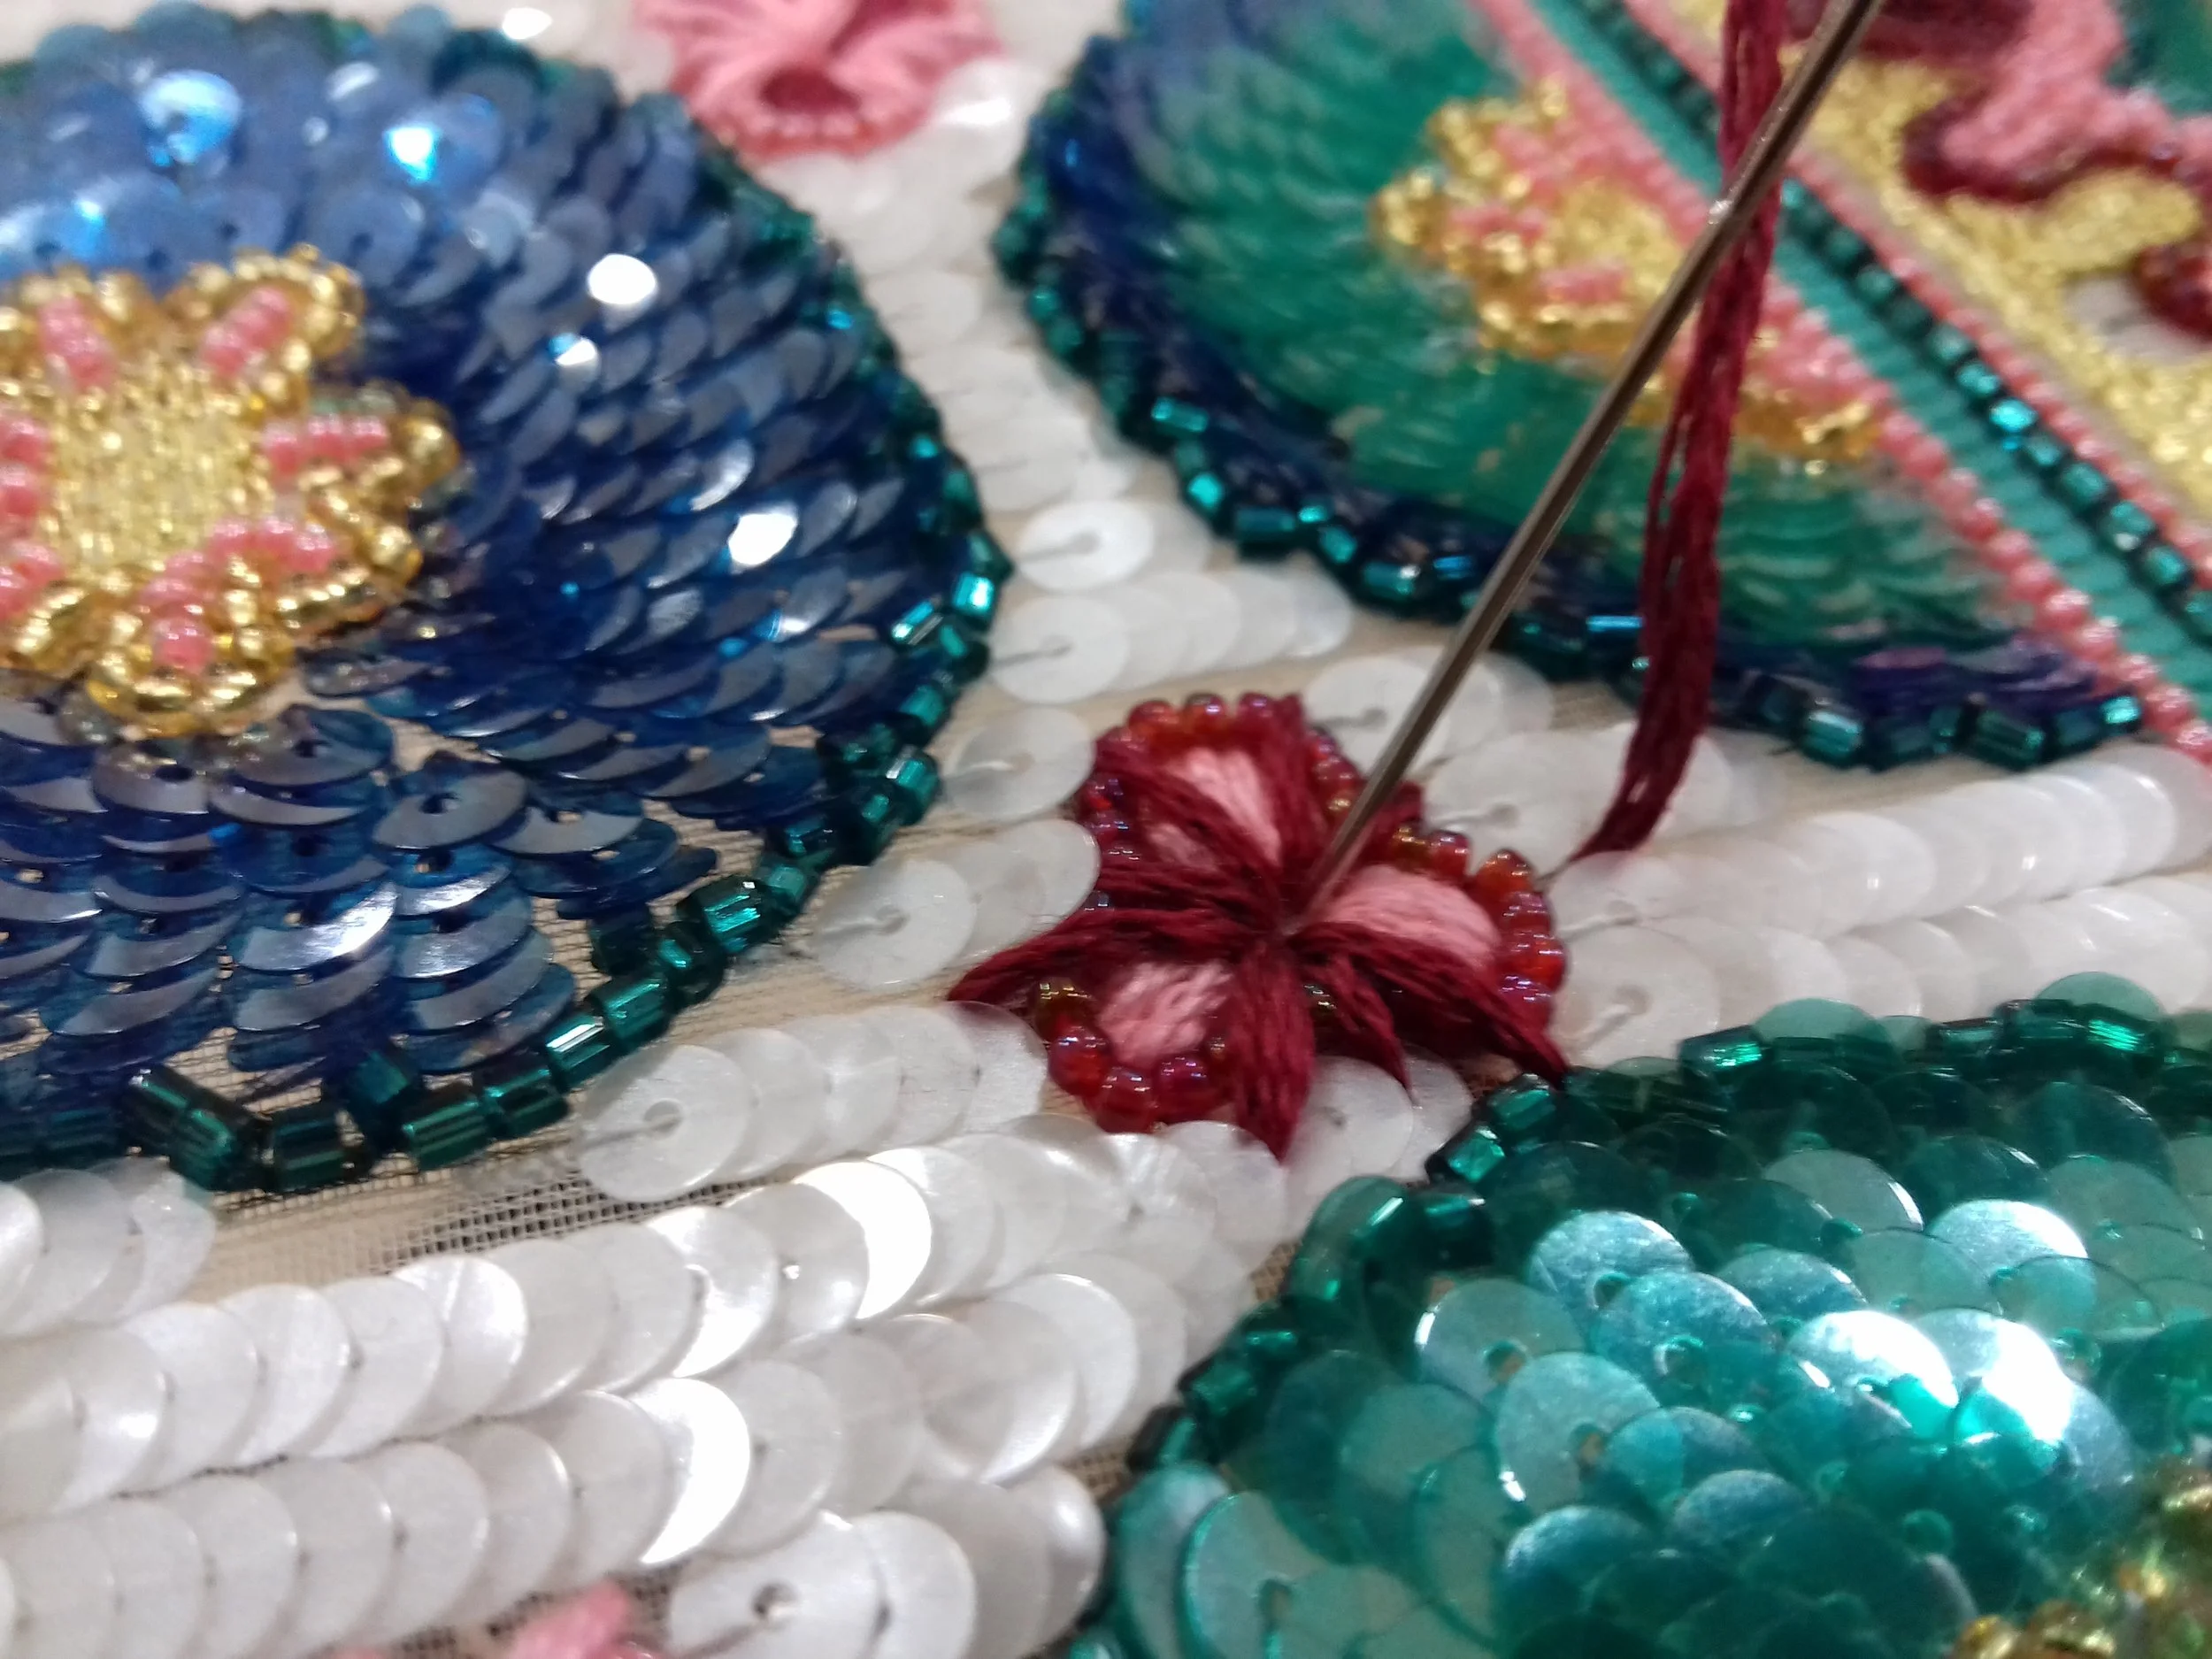
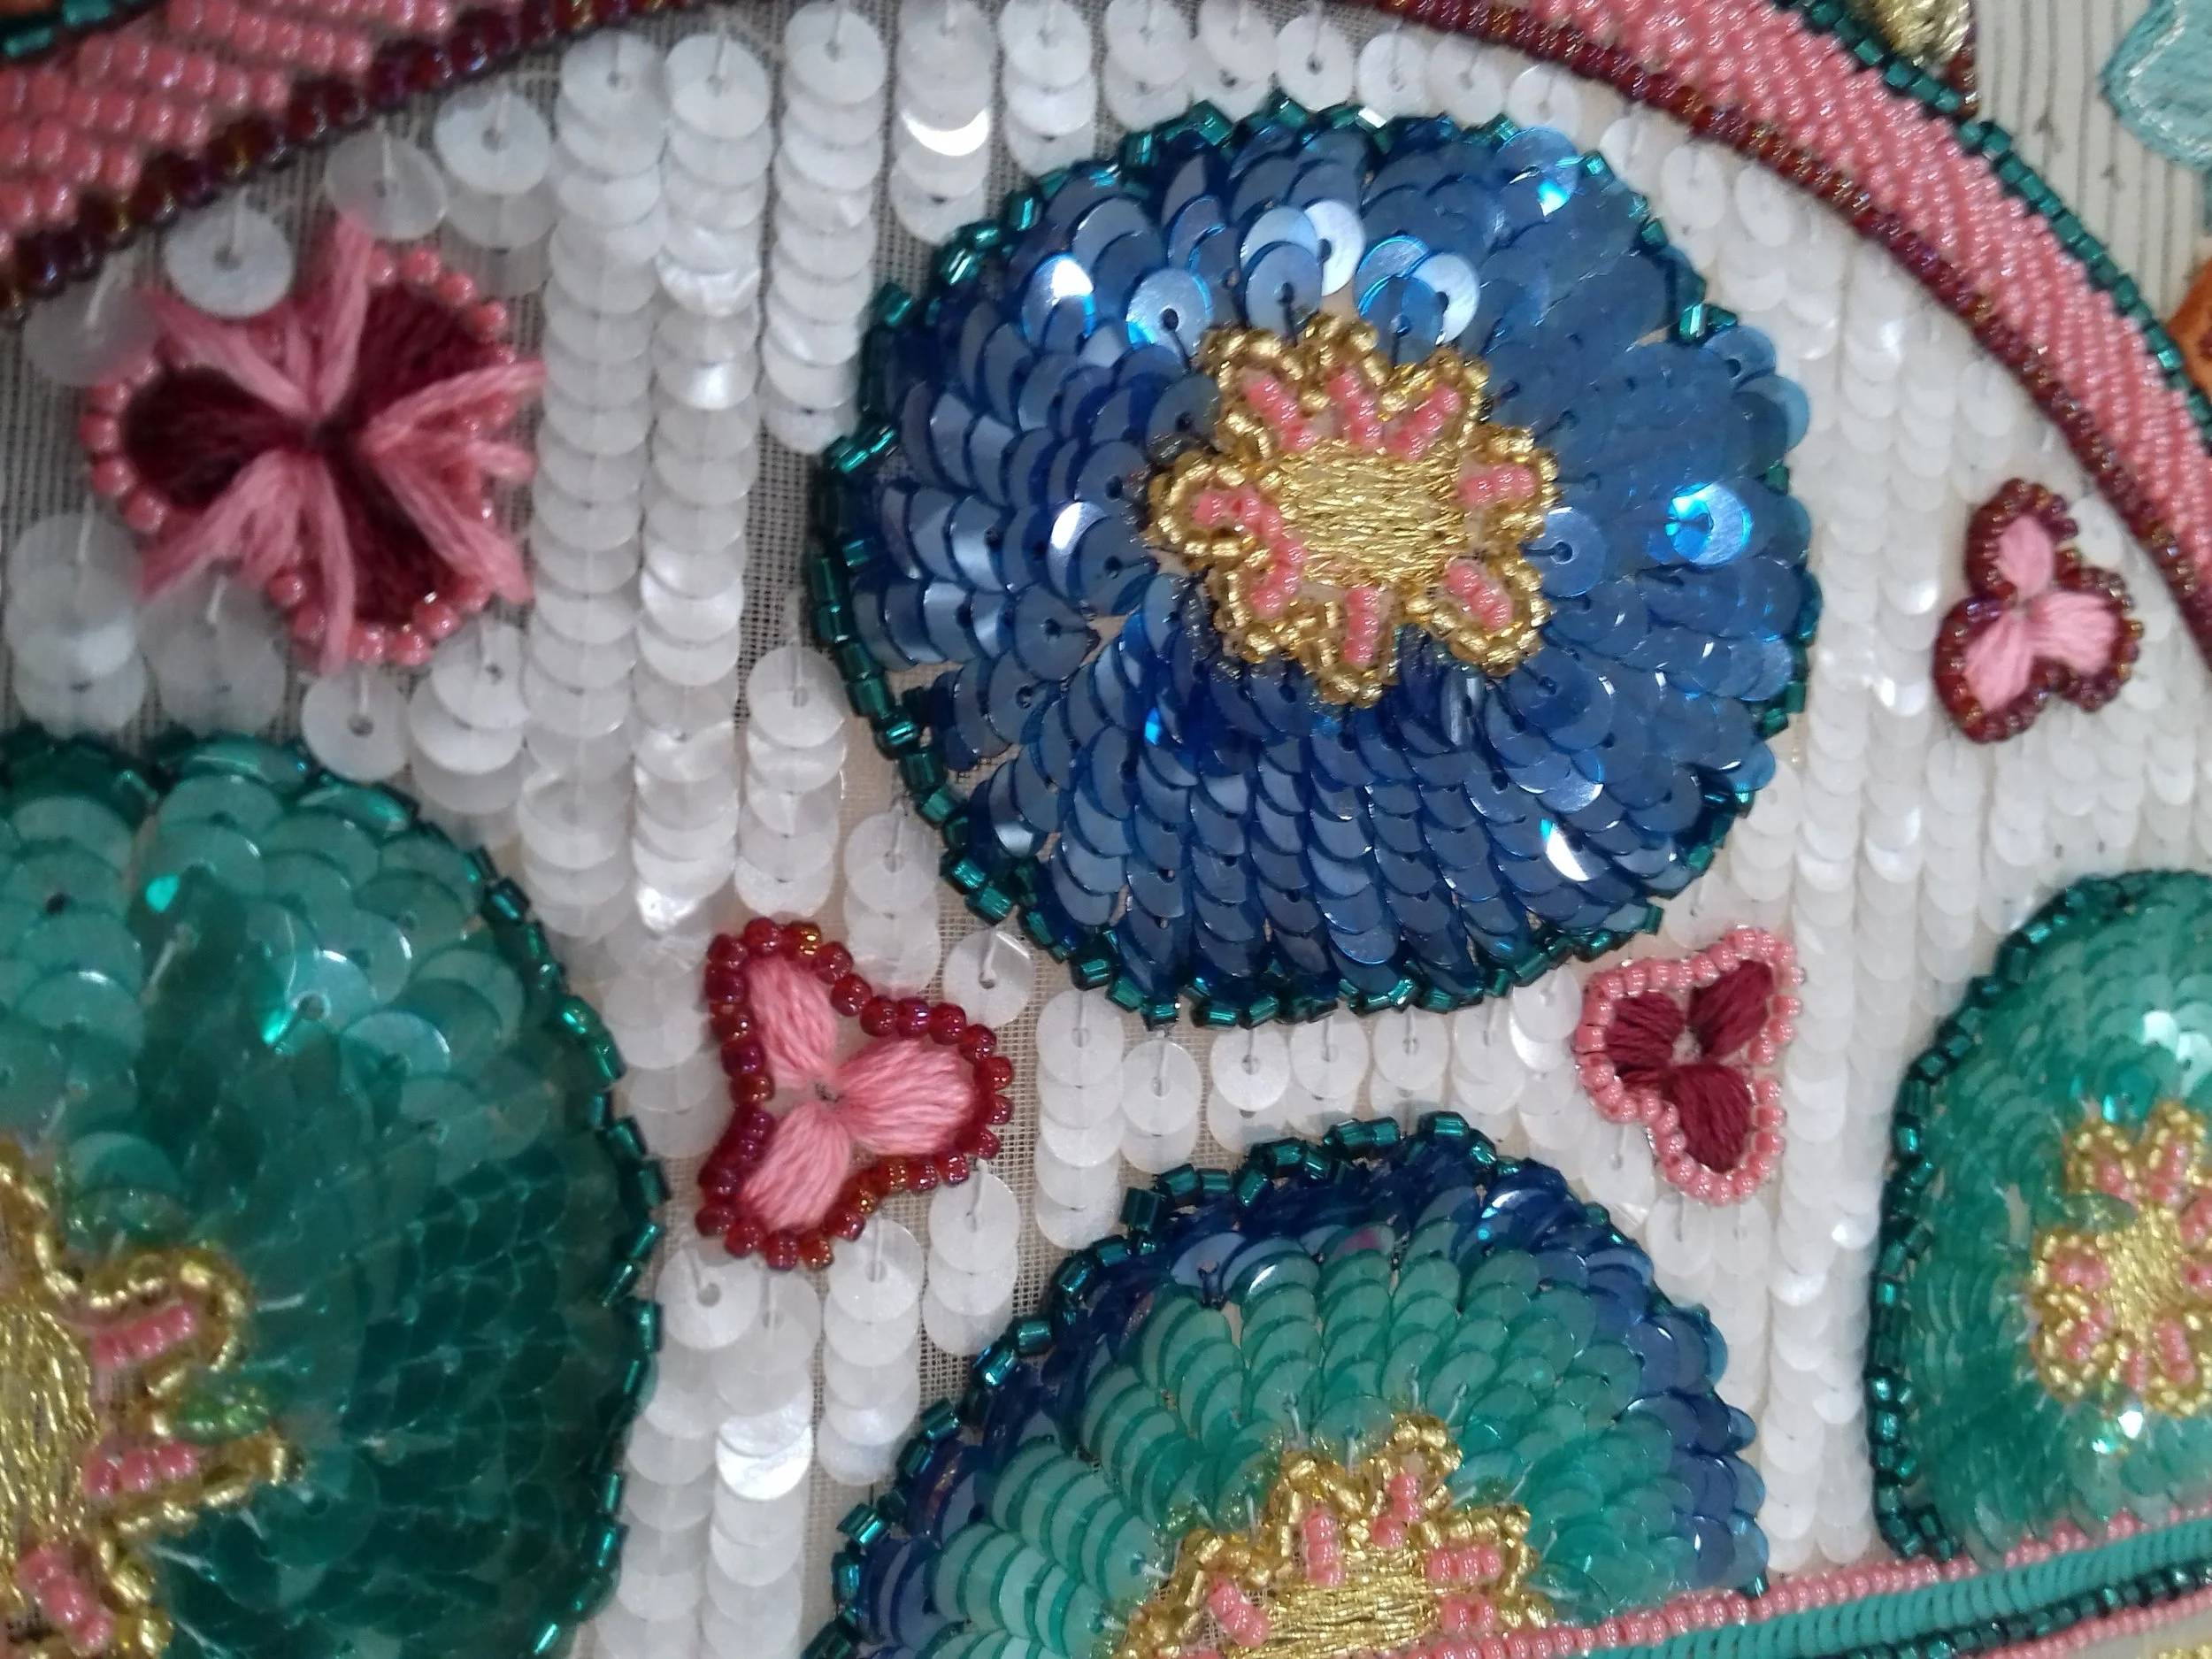
This was one of my favourite sections to create as the effect of the overlapping sequins is so dramatic and the technique turned out to be surprisingly easy! There were two of these sections that featured flowers made entirely with sequins, with a background of linear rows of iridescent sequins that were interrupted by tiny blossoms created with traditional needlework. The first featured a rich colour scheme of dark turquoise, navy blue, gold, raspberry red and bright pink. The second used light pink, salmon, coral, raspberry red and a light green.
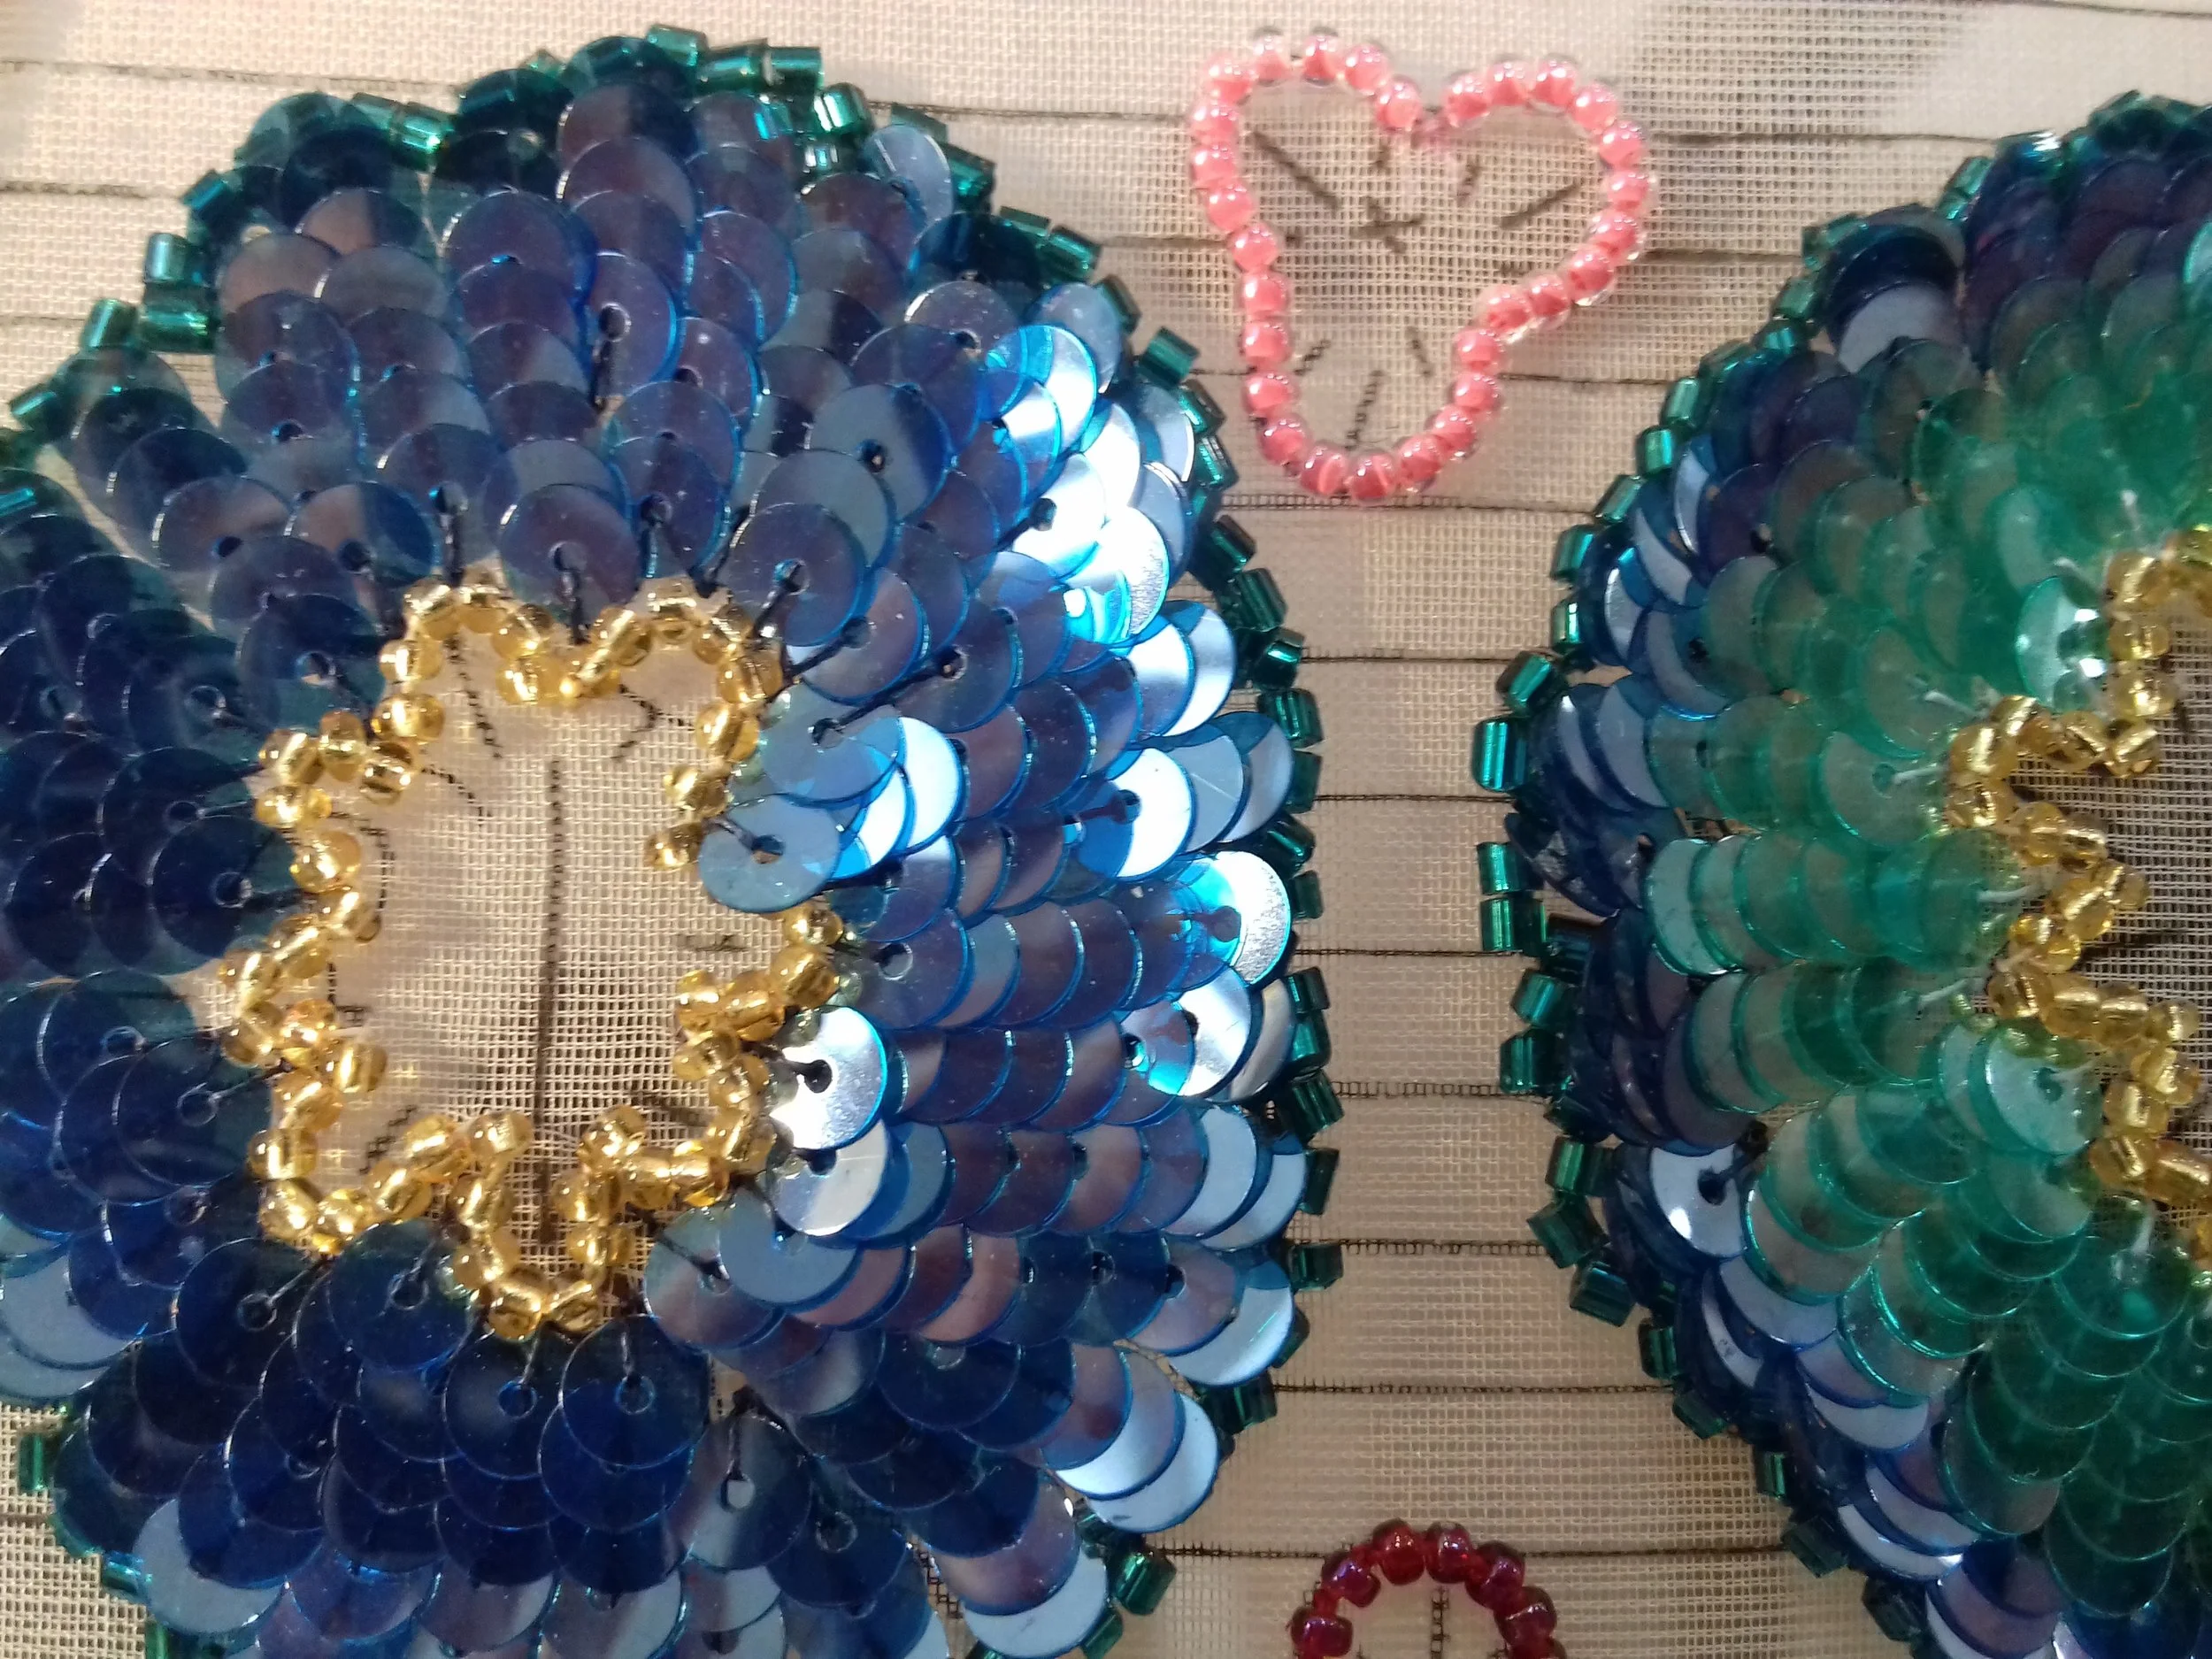
The little arrows in the pattern denote the direction of the sequins and the change in colour tone within the two central flowers indicates the areas to use the graduated sequin technique.
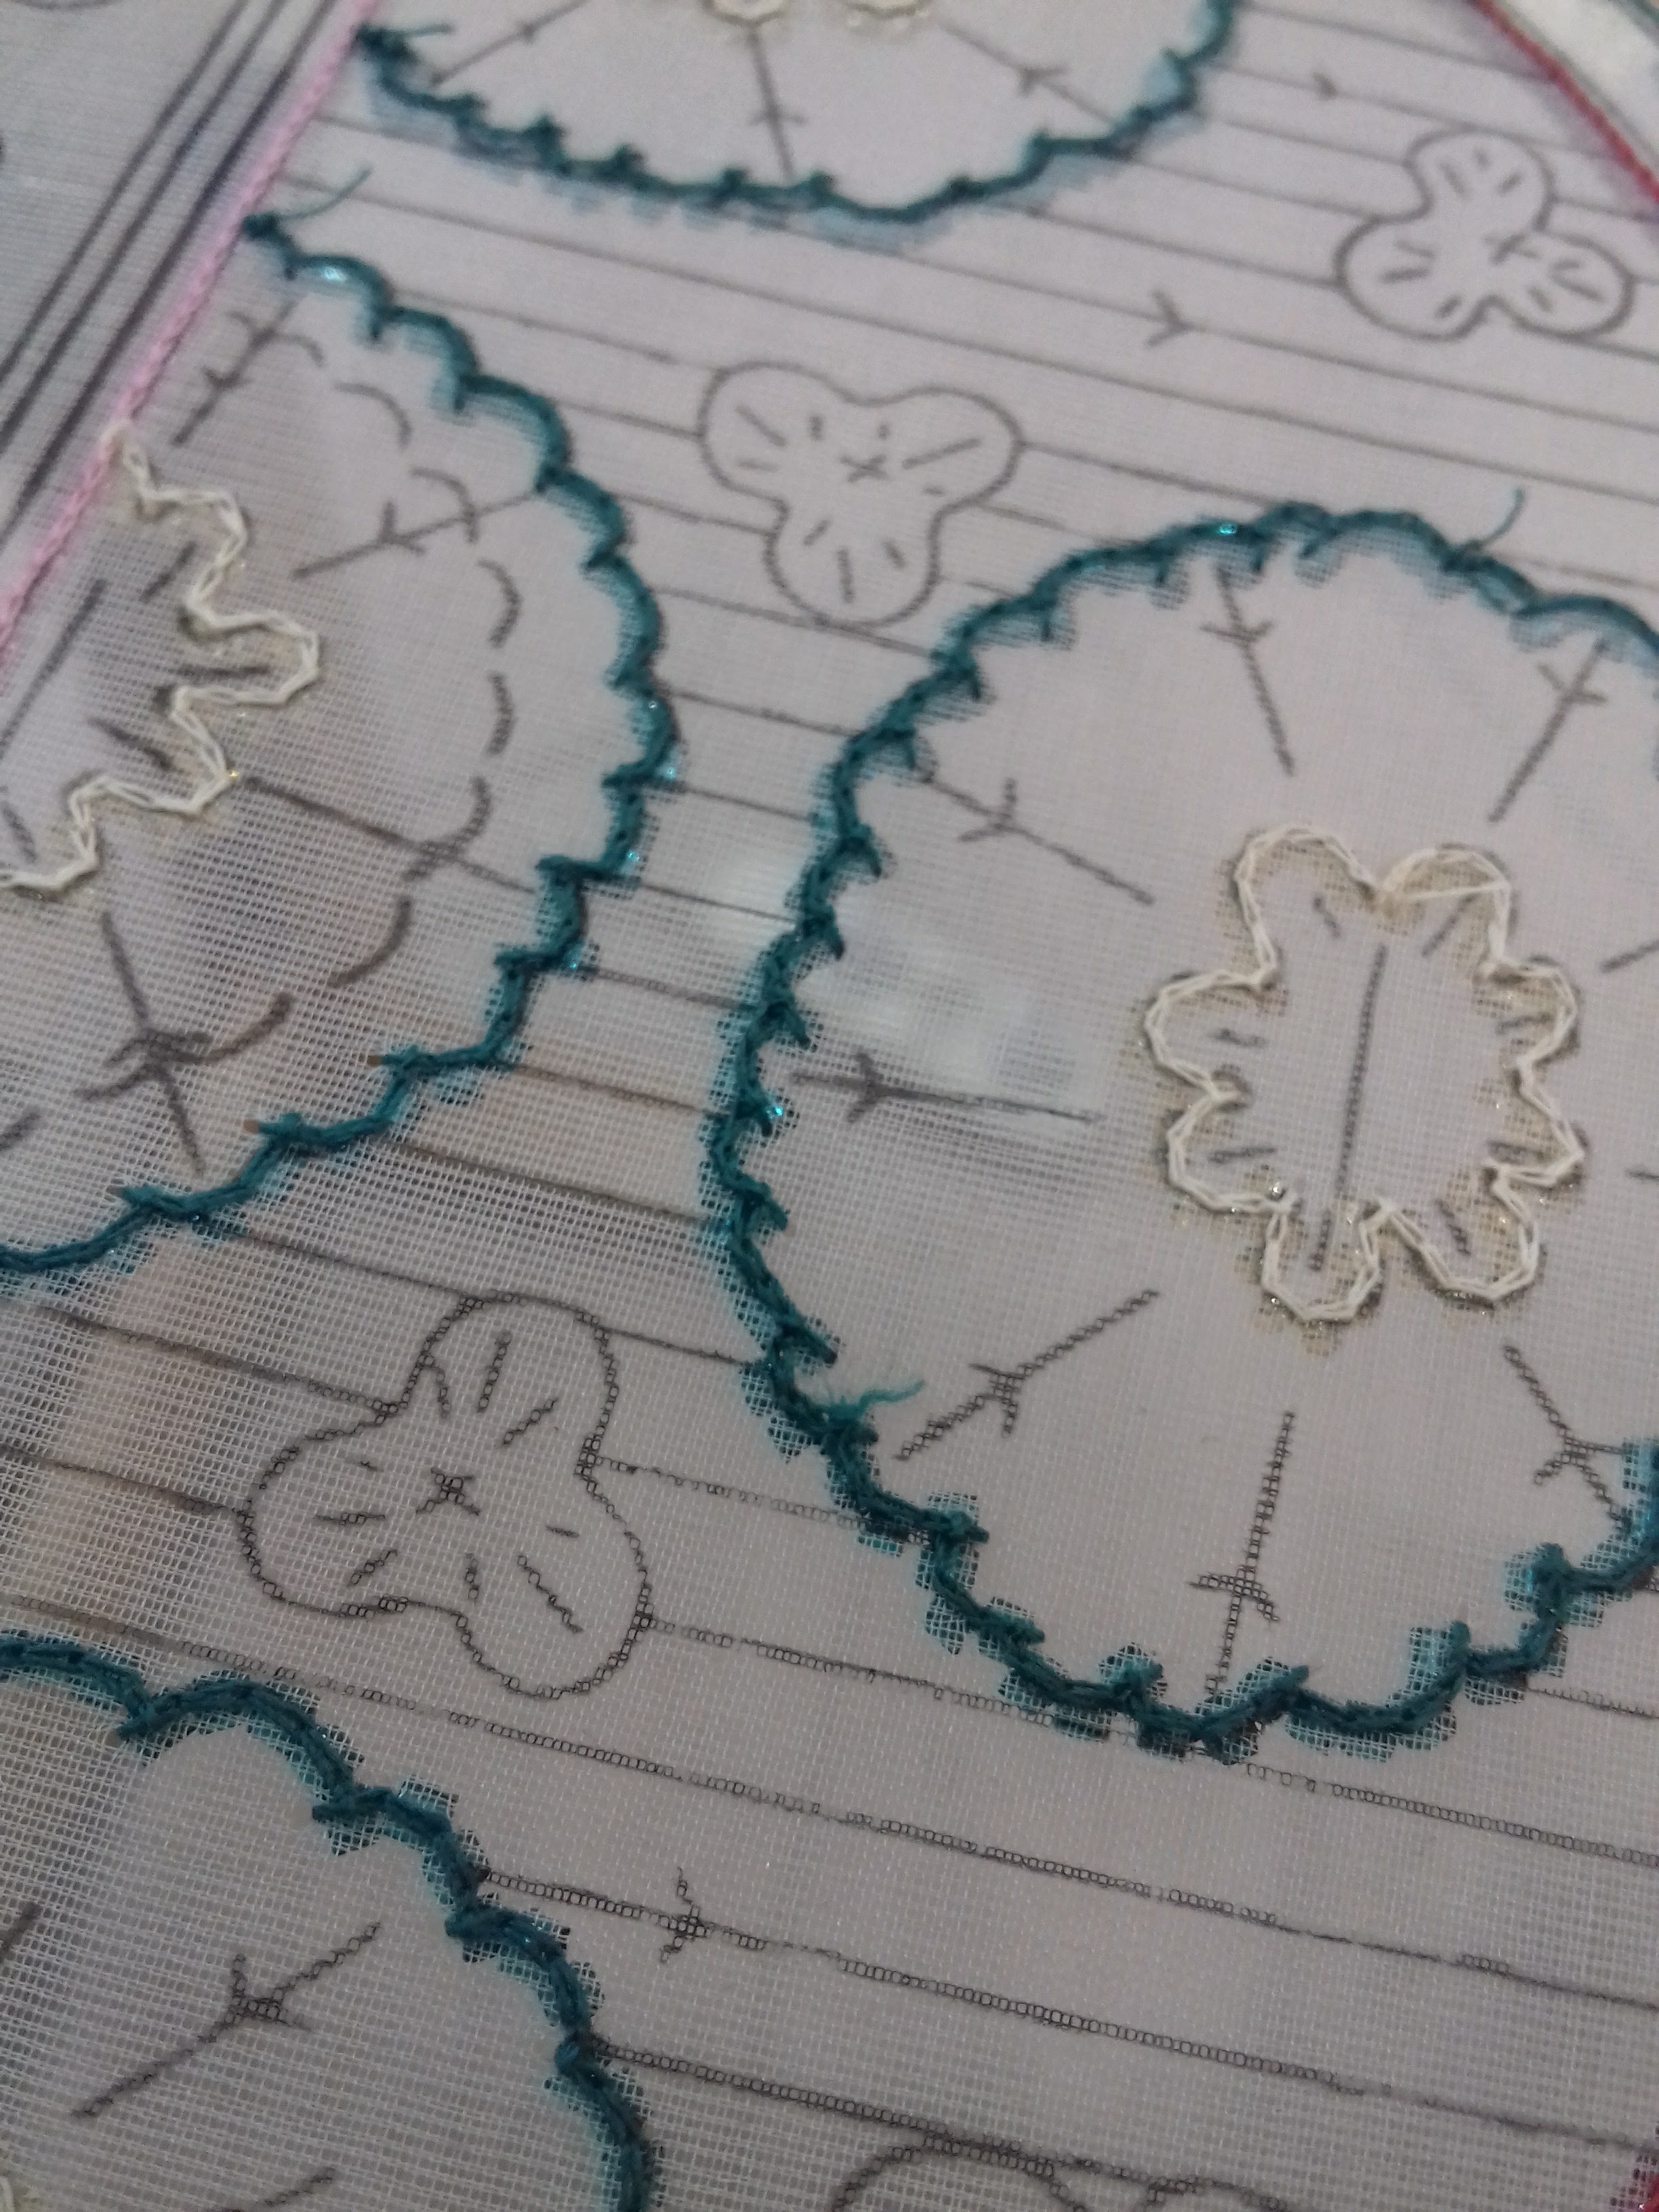
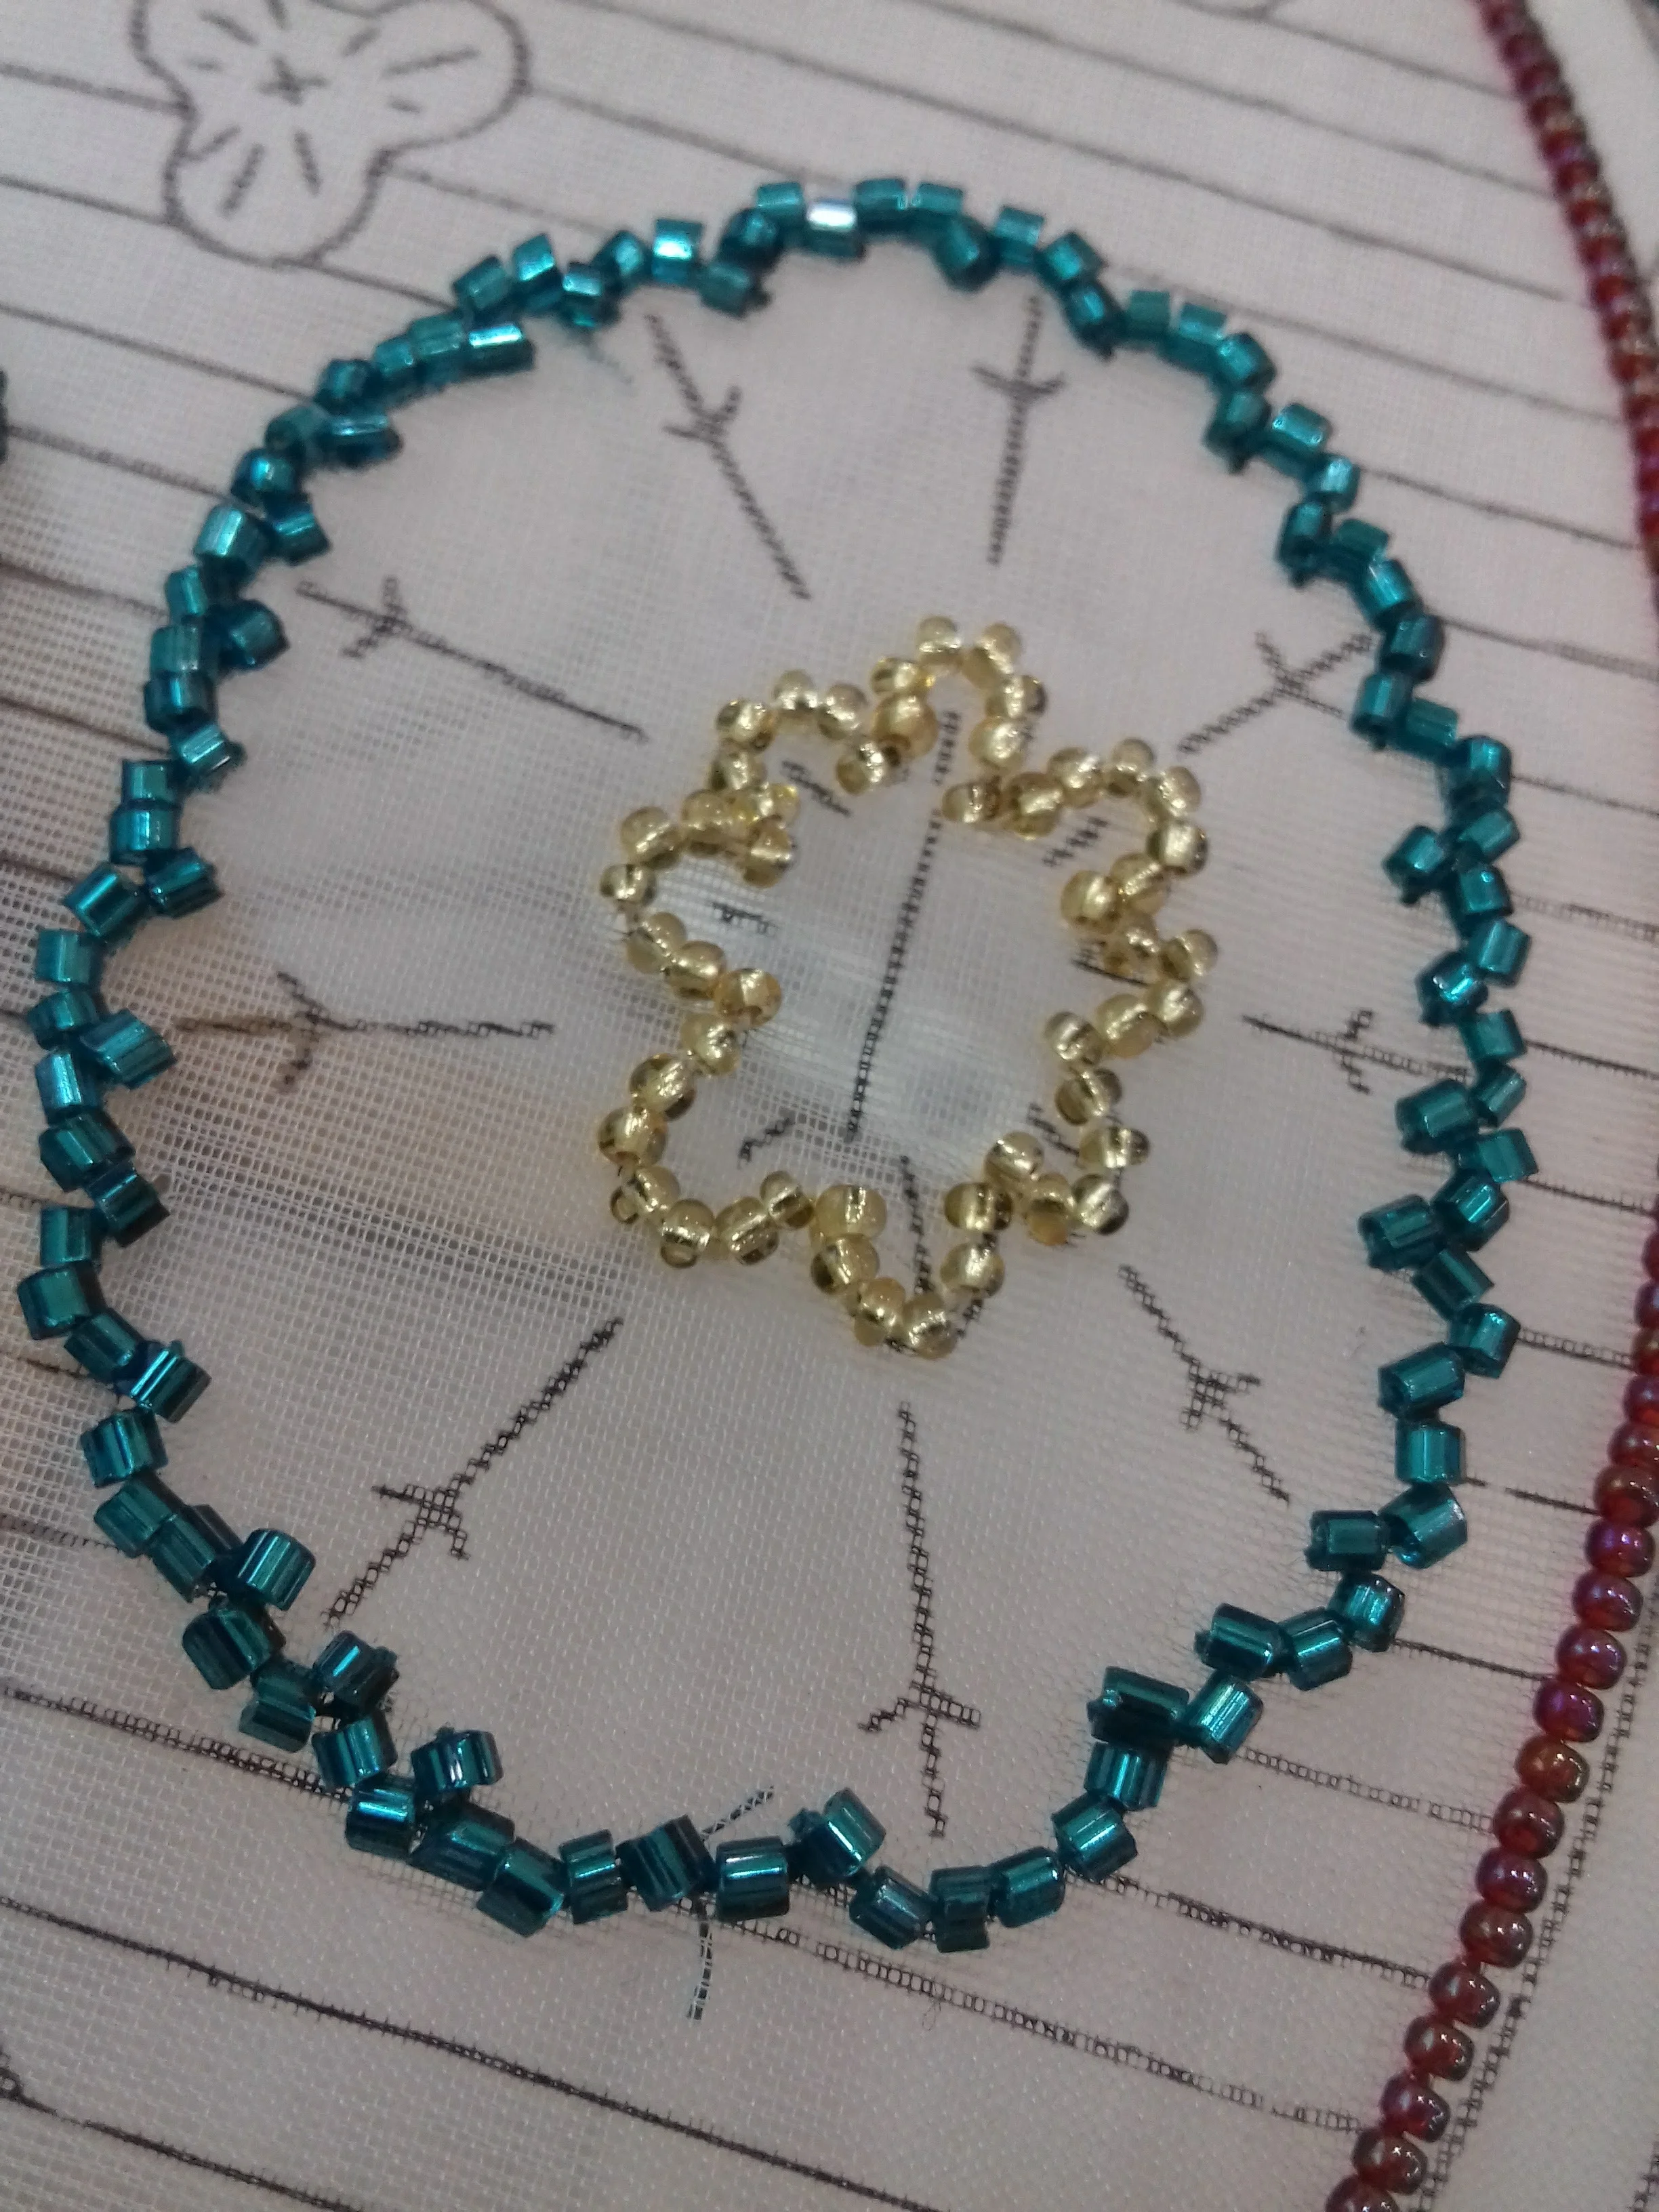
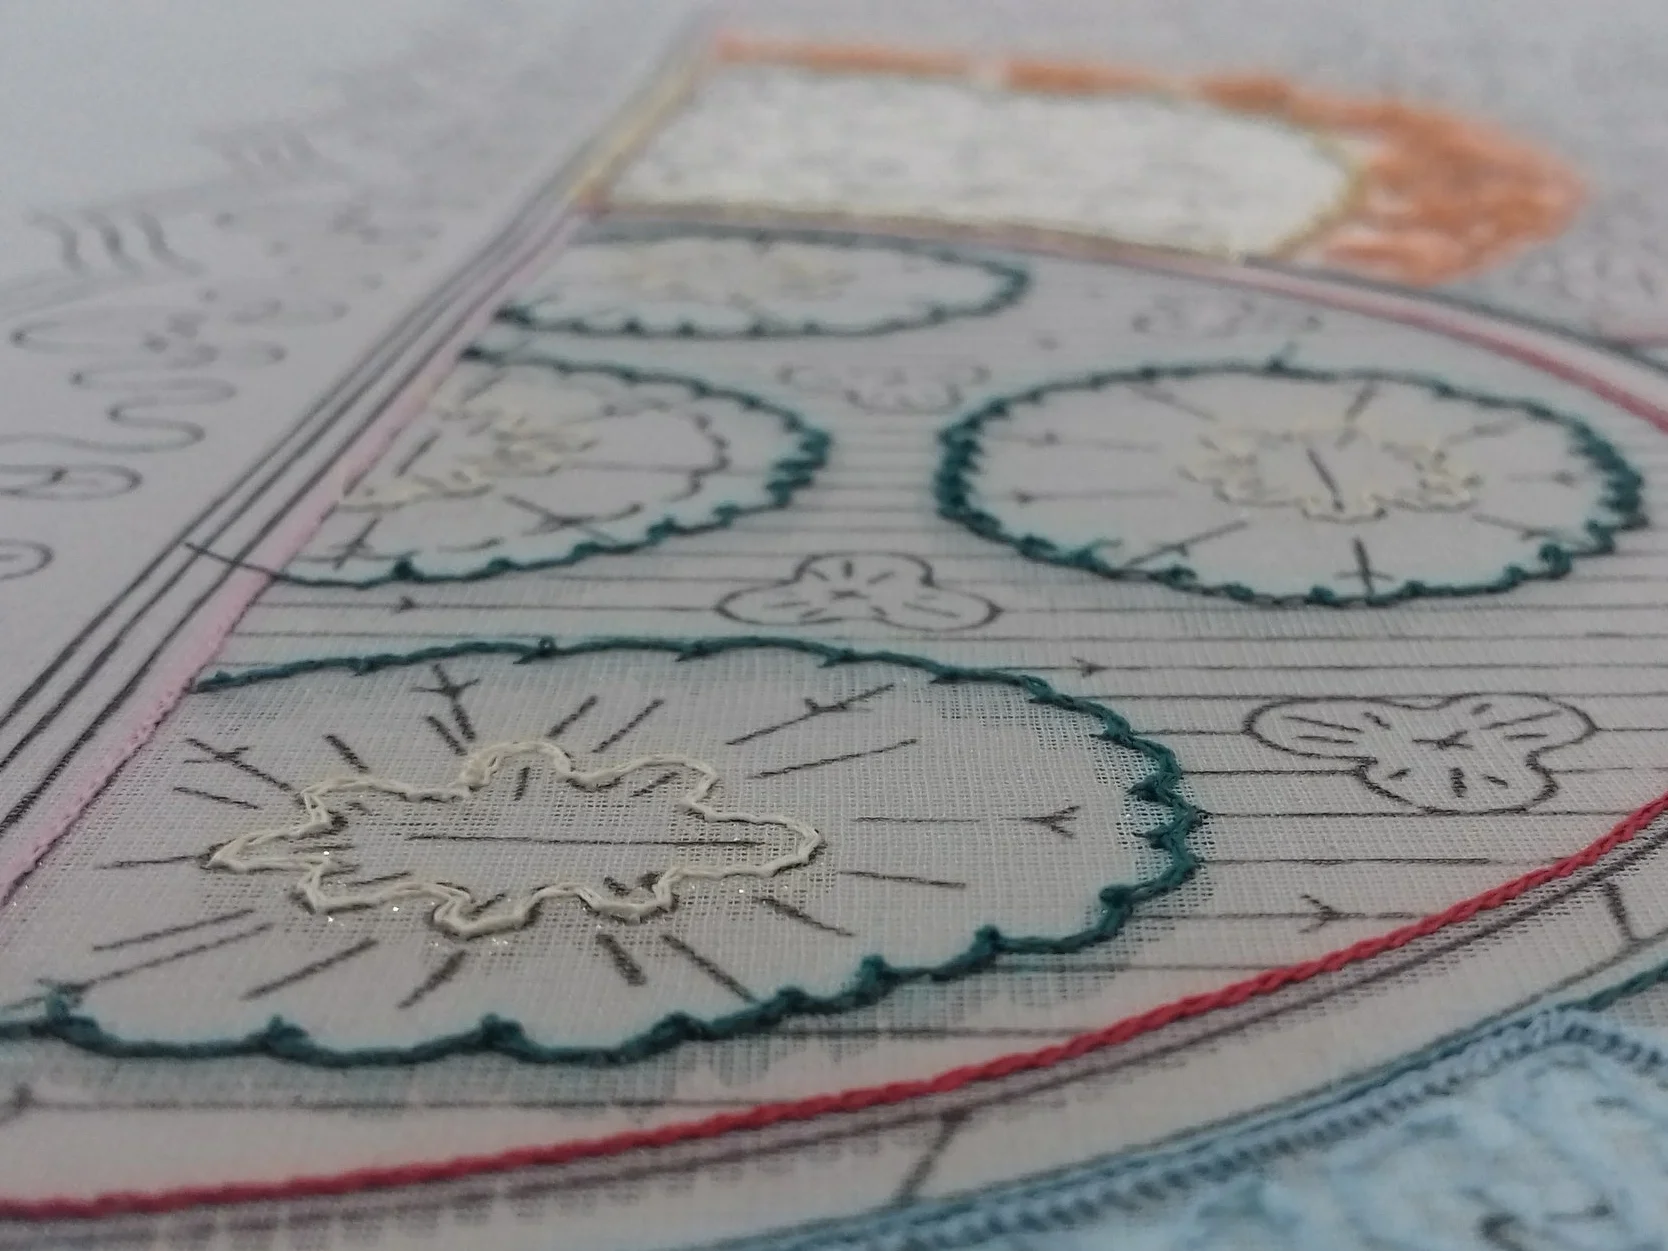
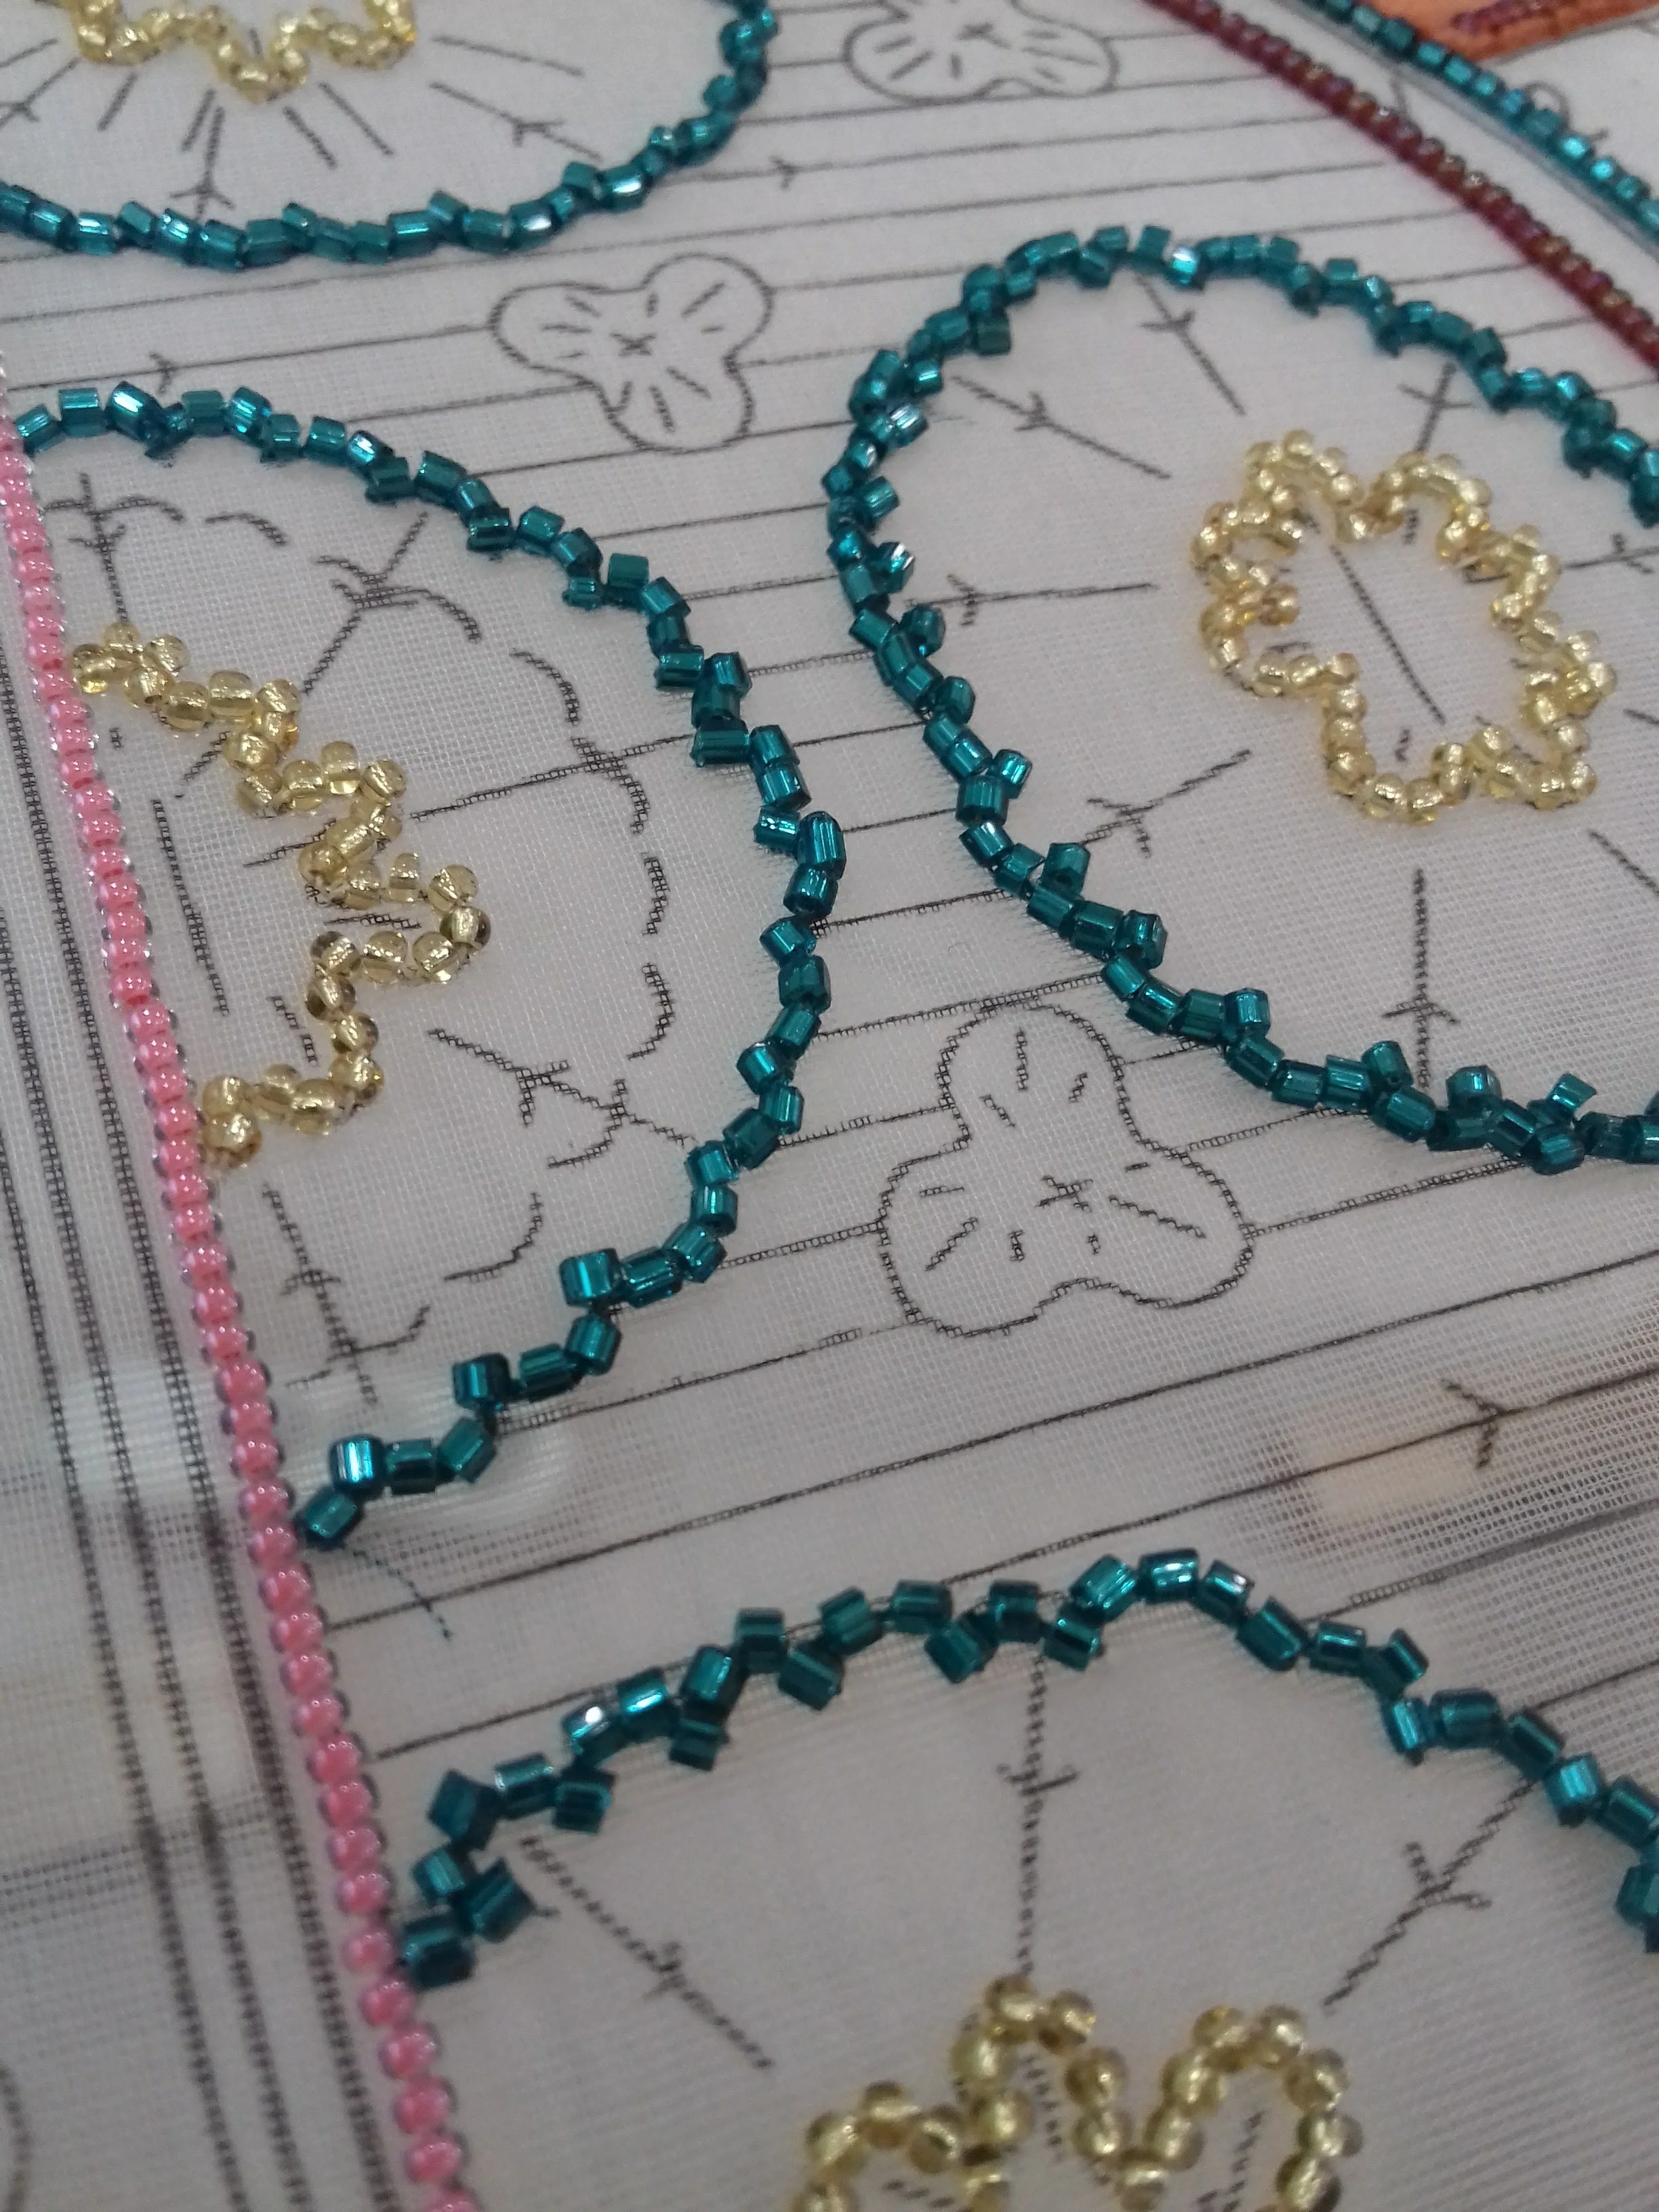
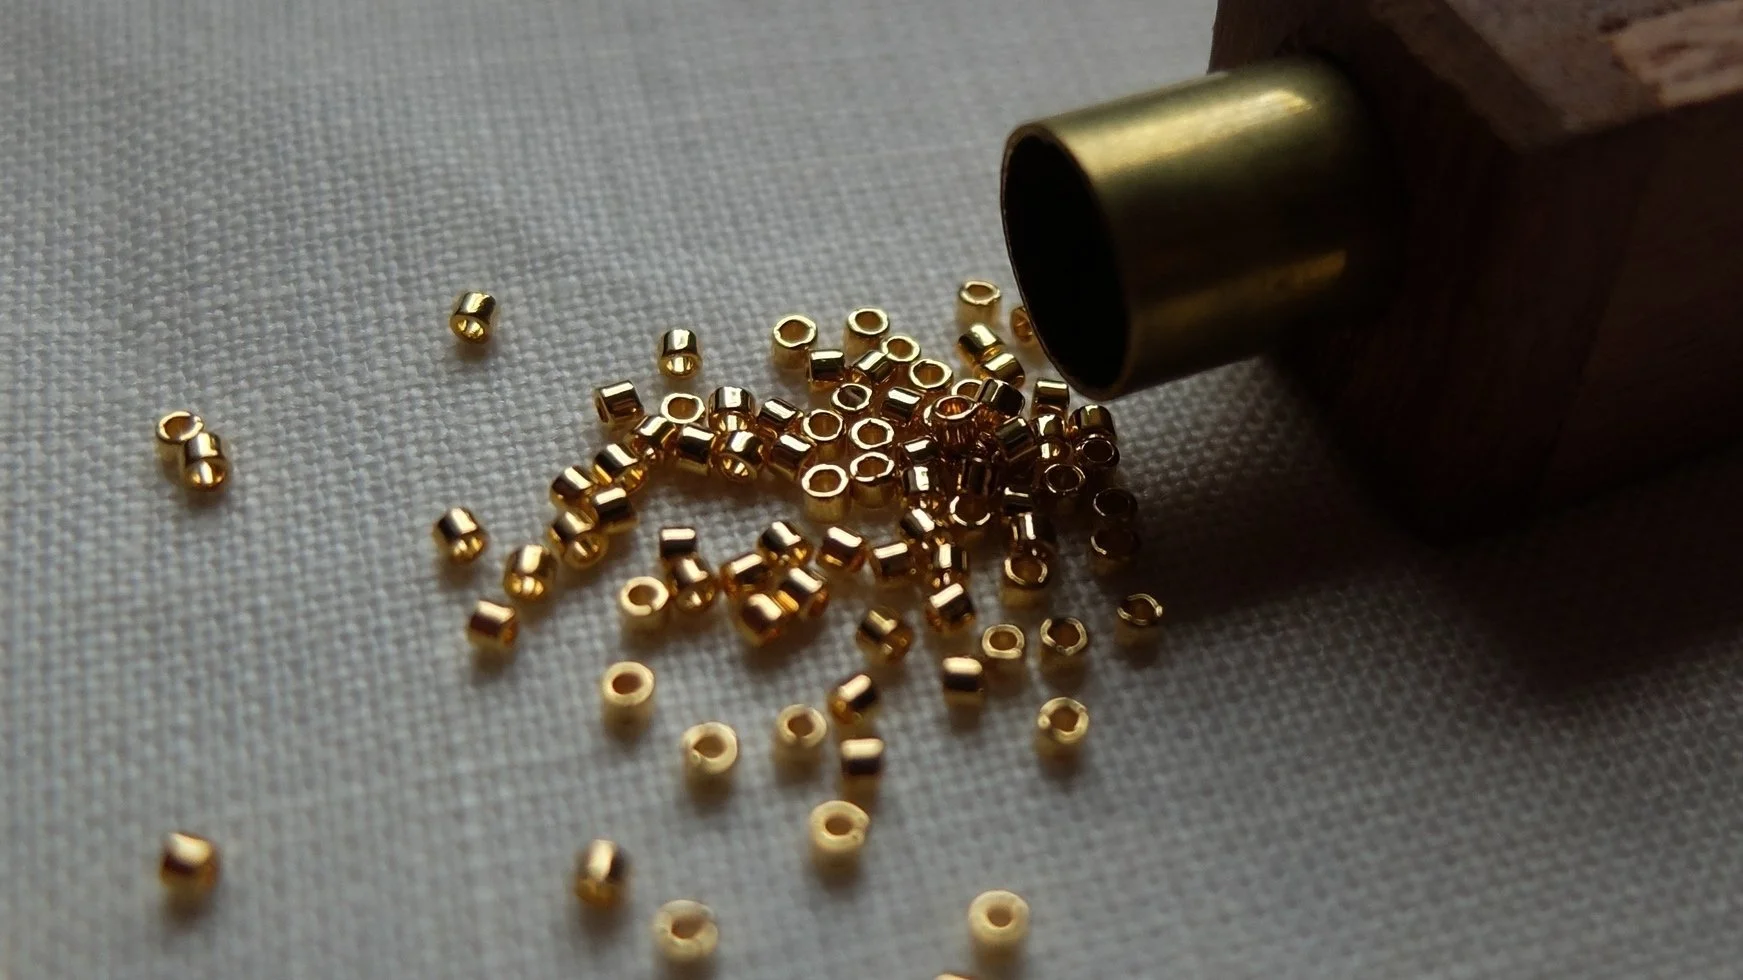
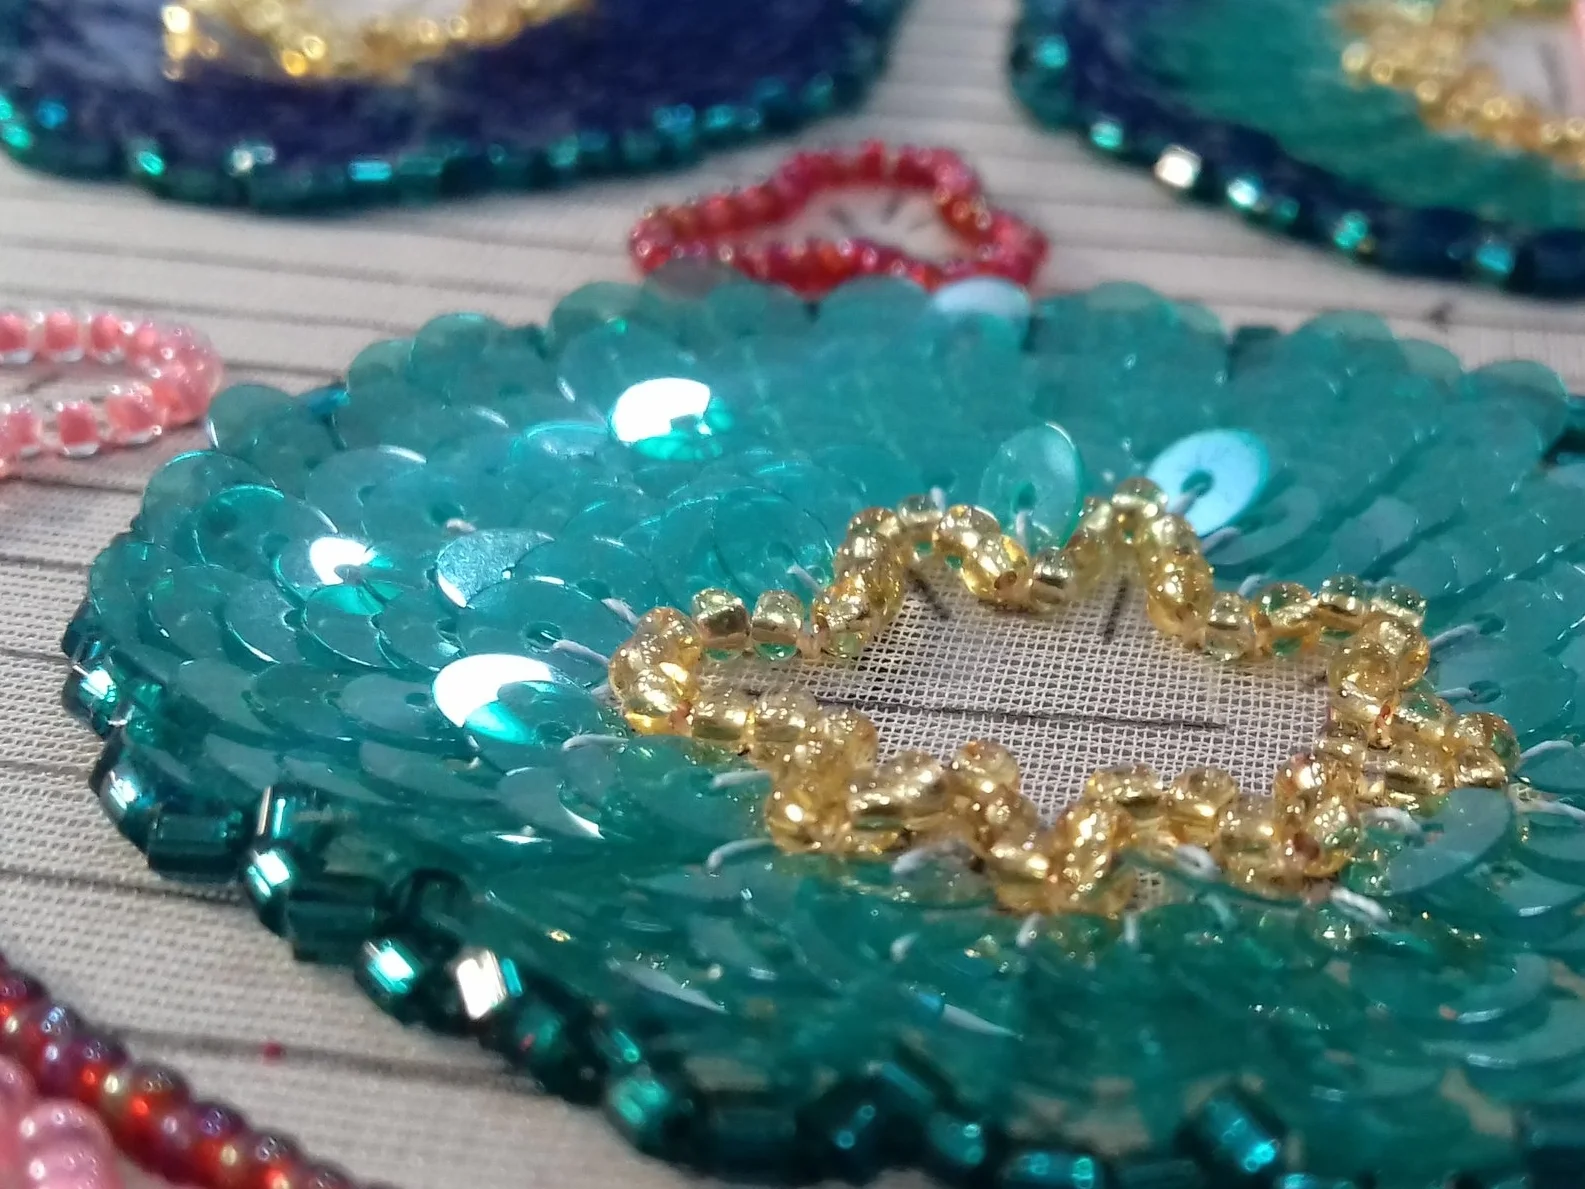
The first step was to outline the shapes with a scalloped contour of turquoise tube beads and to fill the central shapes with curved golden beads. The navy sequins were applied, starting from the outer edge and ensuring that the first sequin was placed to rest on top of the outline of tube beads. This slanted sequin would create the final effect of concave relief. The distance between each row had to be equal and the space between each sequin had to be just smaller than the radius so that the hole would be hidden. The turquoise sequins were applied next and the idea was to create a seamless transition in the rows from navy blue to turquoise. As the shape tapered towards the centre some of the rows had to be adjusted by reducing the number of sequins and creating a dovetail effect with the next row.
I may have held my breath throughout the whole precise and exacting exercise but when I eventually turned over the frame I marvelled at the beauty and drama of the effect!

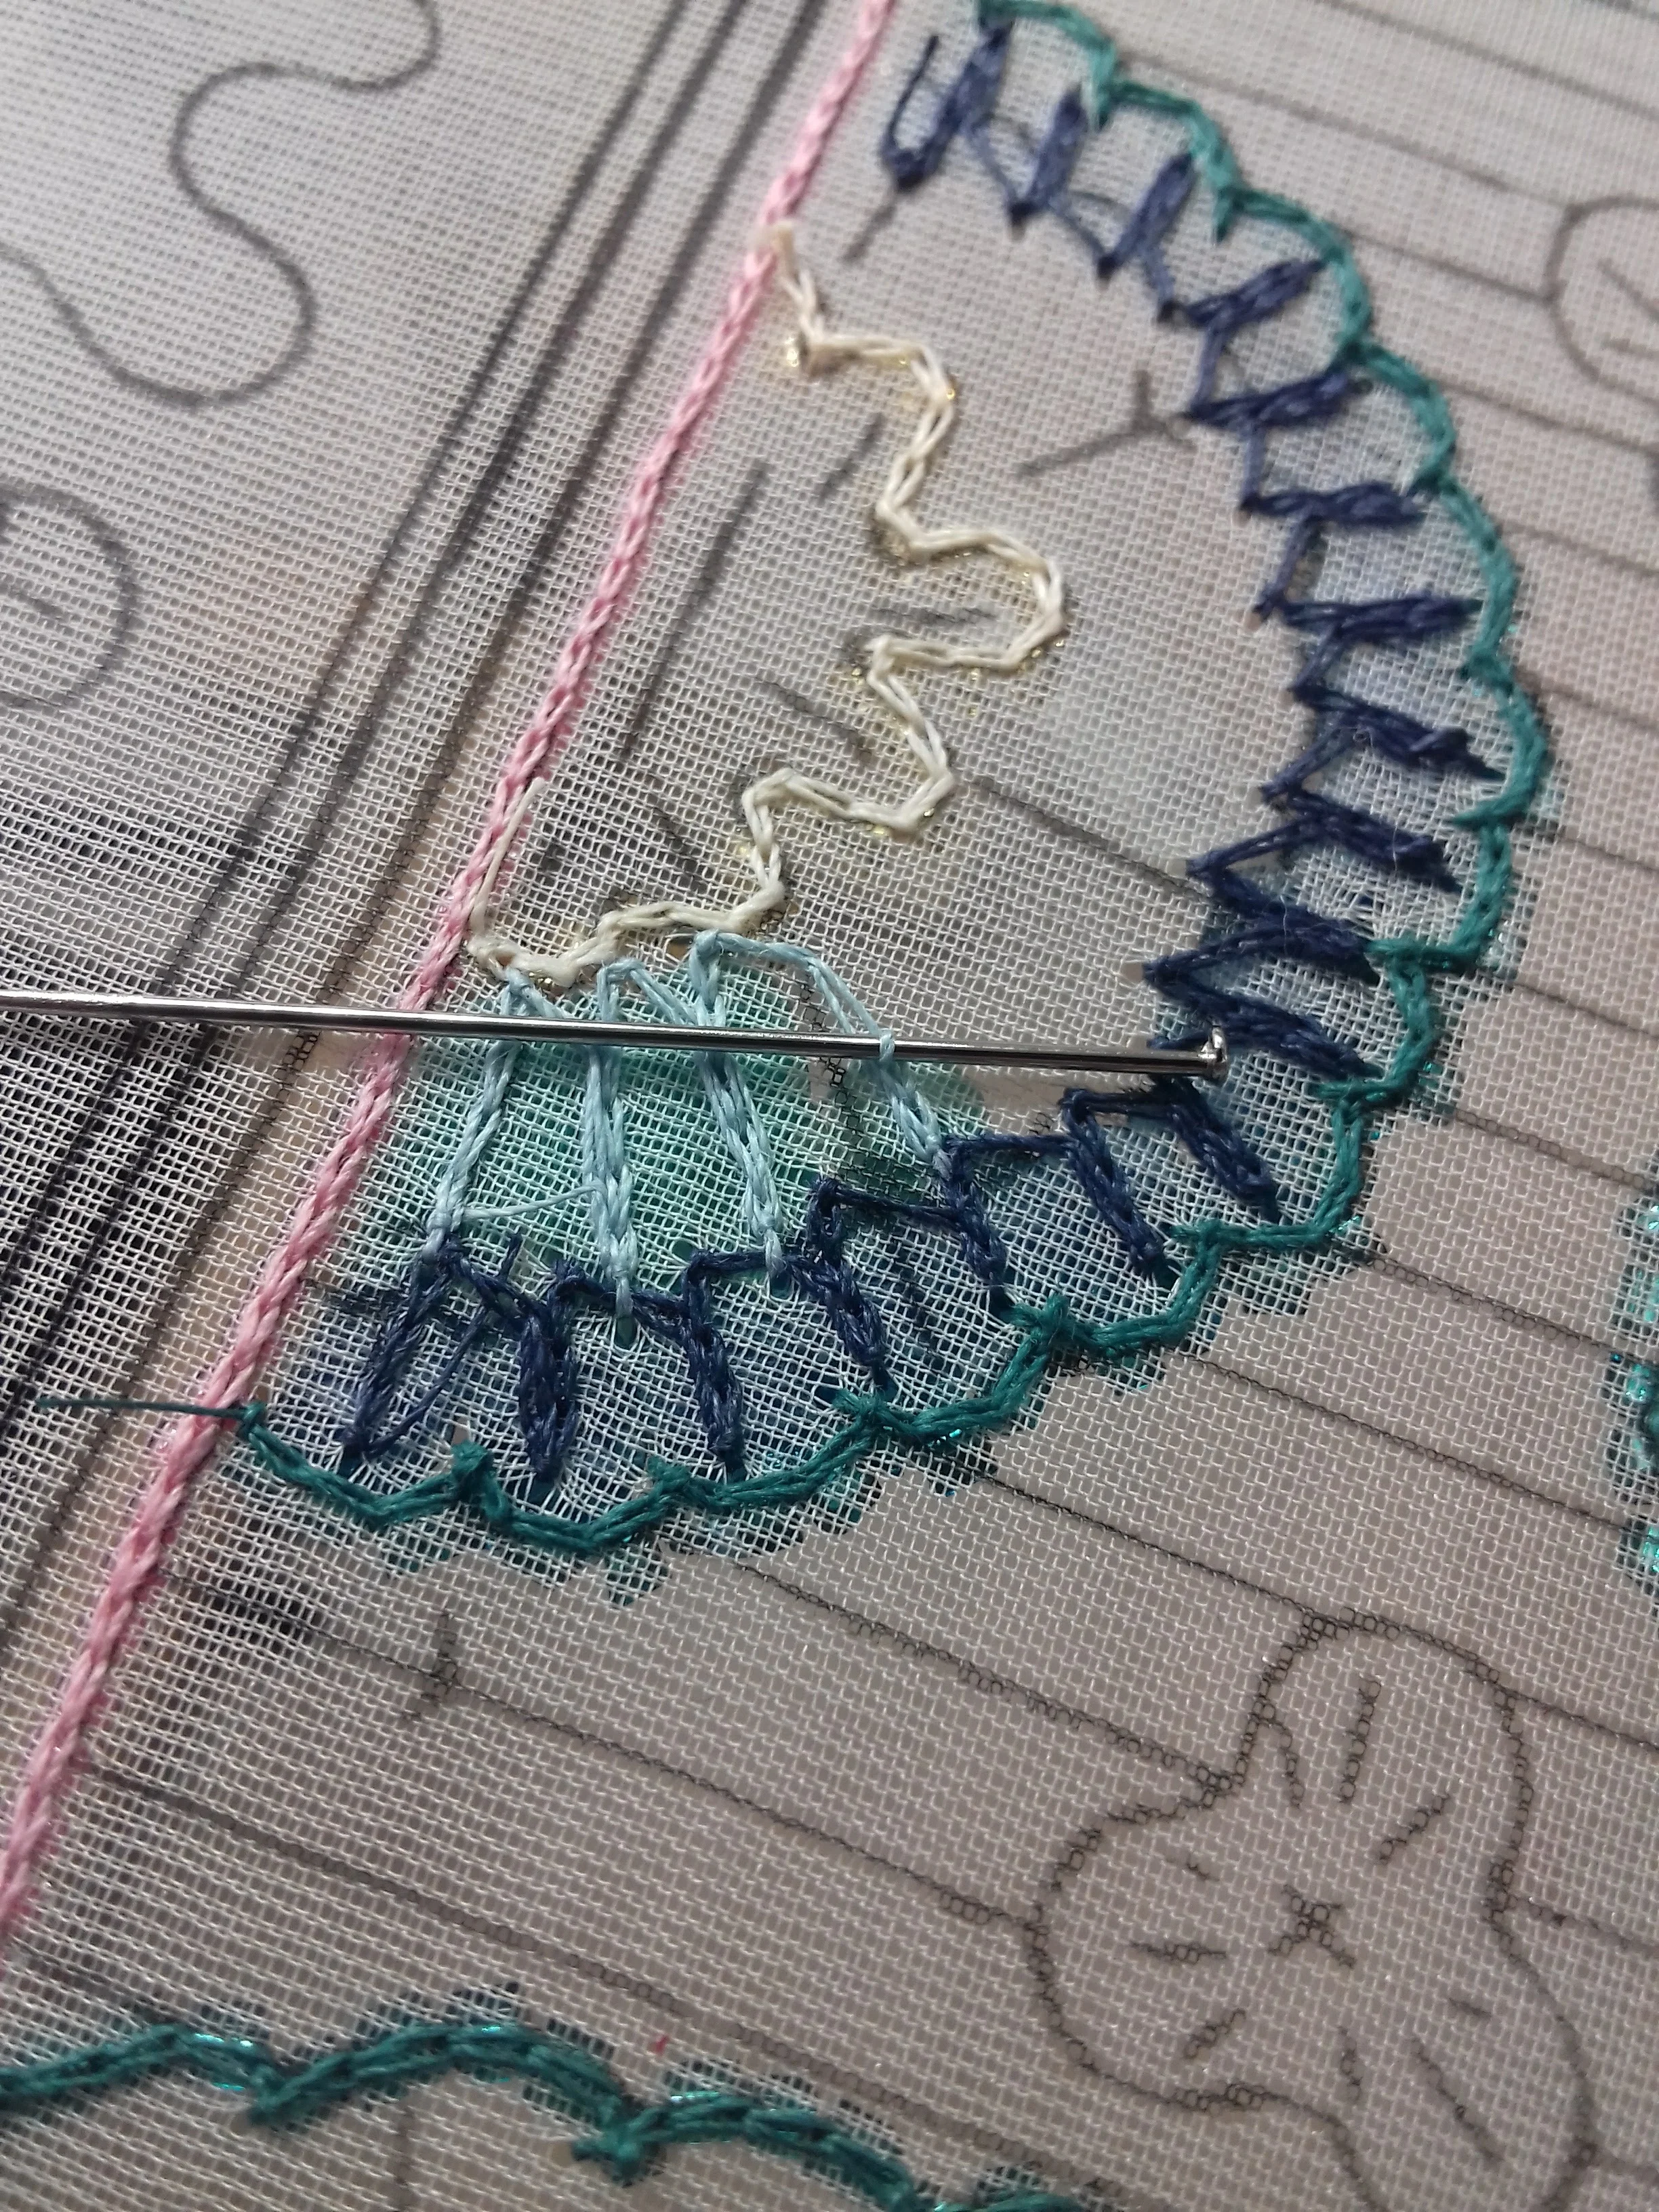
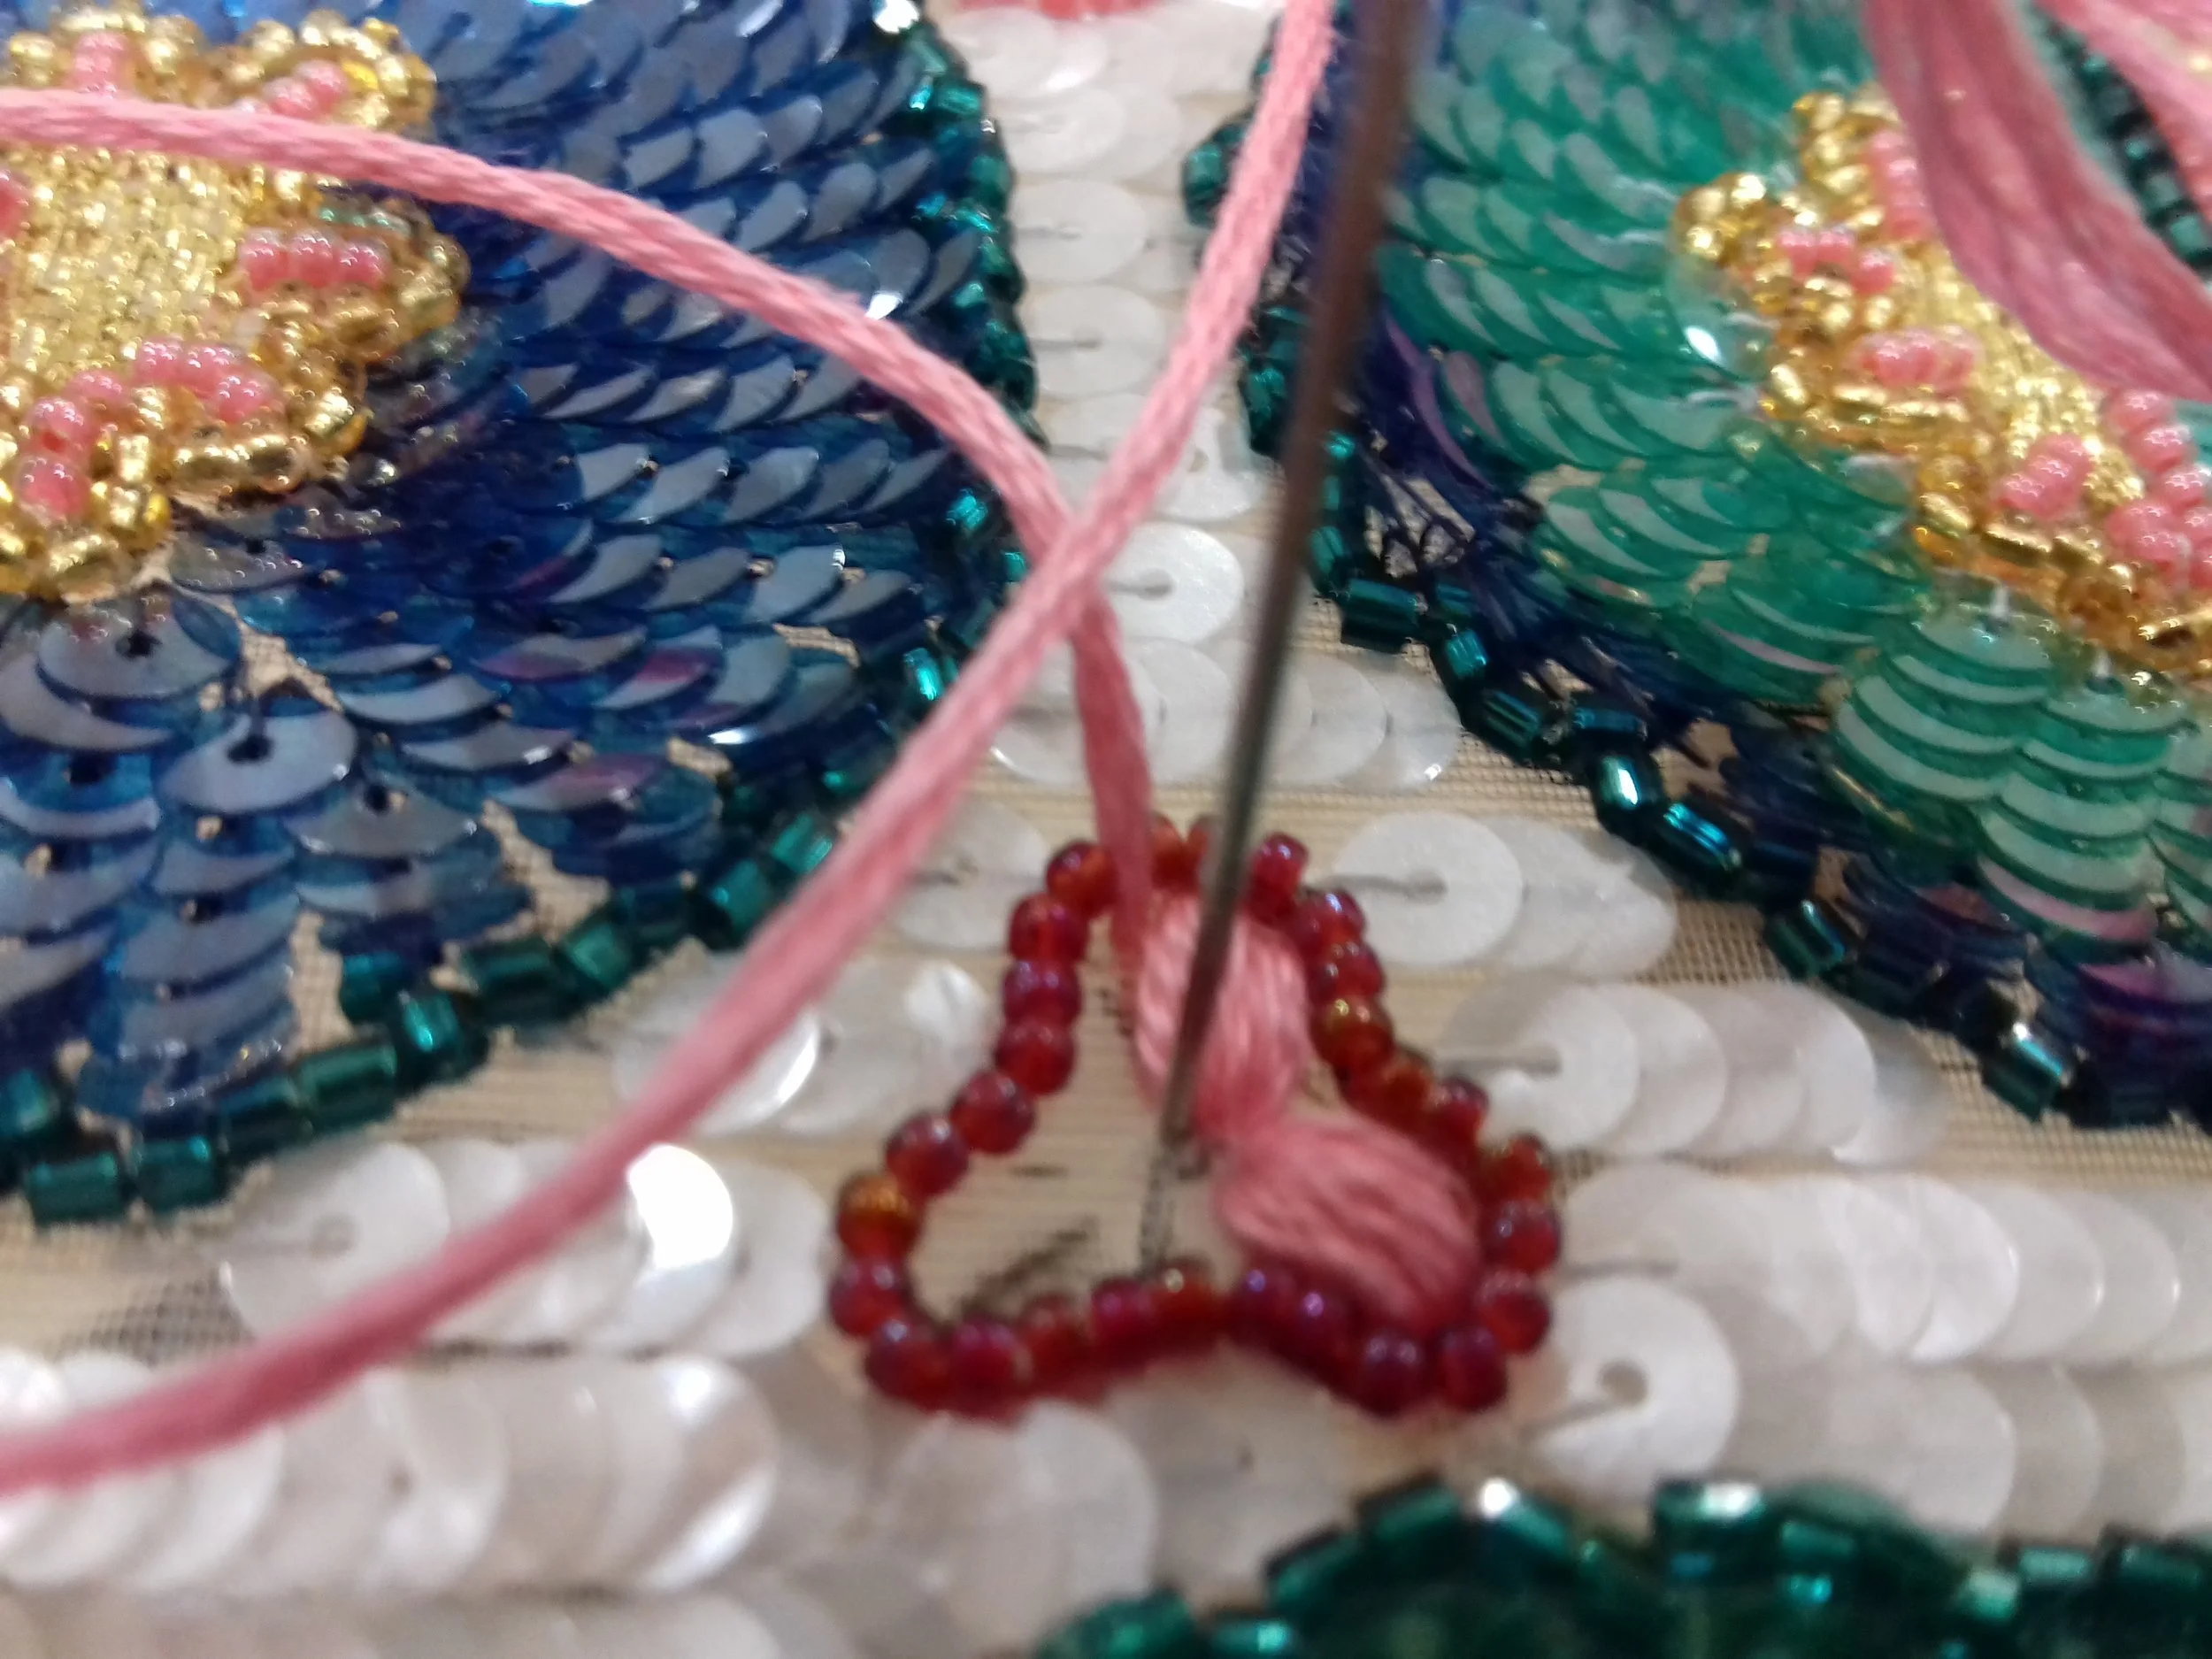
The tiny blossoms were outlined with pink and red beads and the background was filled with lines of iridescent sequins. Following on from the success of the sequin flowers I underestimated the difficulty of these lines and found myself under pressure to complete them. While I could manage adding lines of sequins in a river, I didn't realise that the lines had to be adjusted incrementally to accommodate the organic shapes of the flowers, blossoms and curved arch that outlined the section. As these adjustments were meant to be imperceptible, the background turned out to be quite the task of measuring, judging, doubting and finally placing sequins a millimetre or two outside the lines of the pattern!
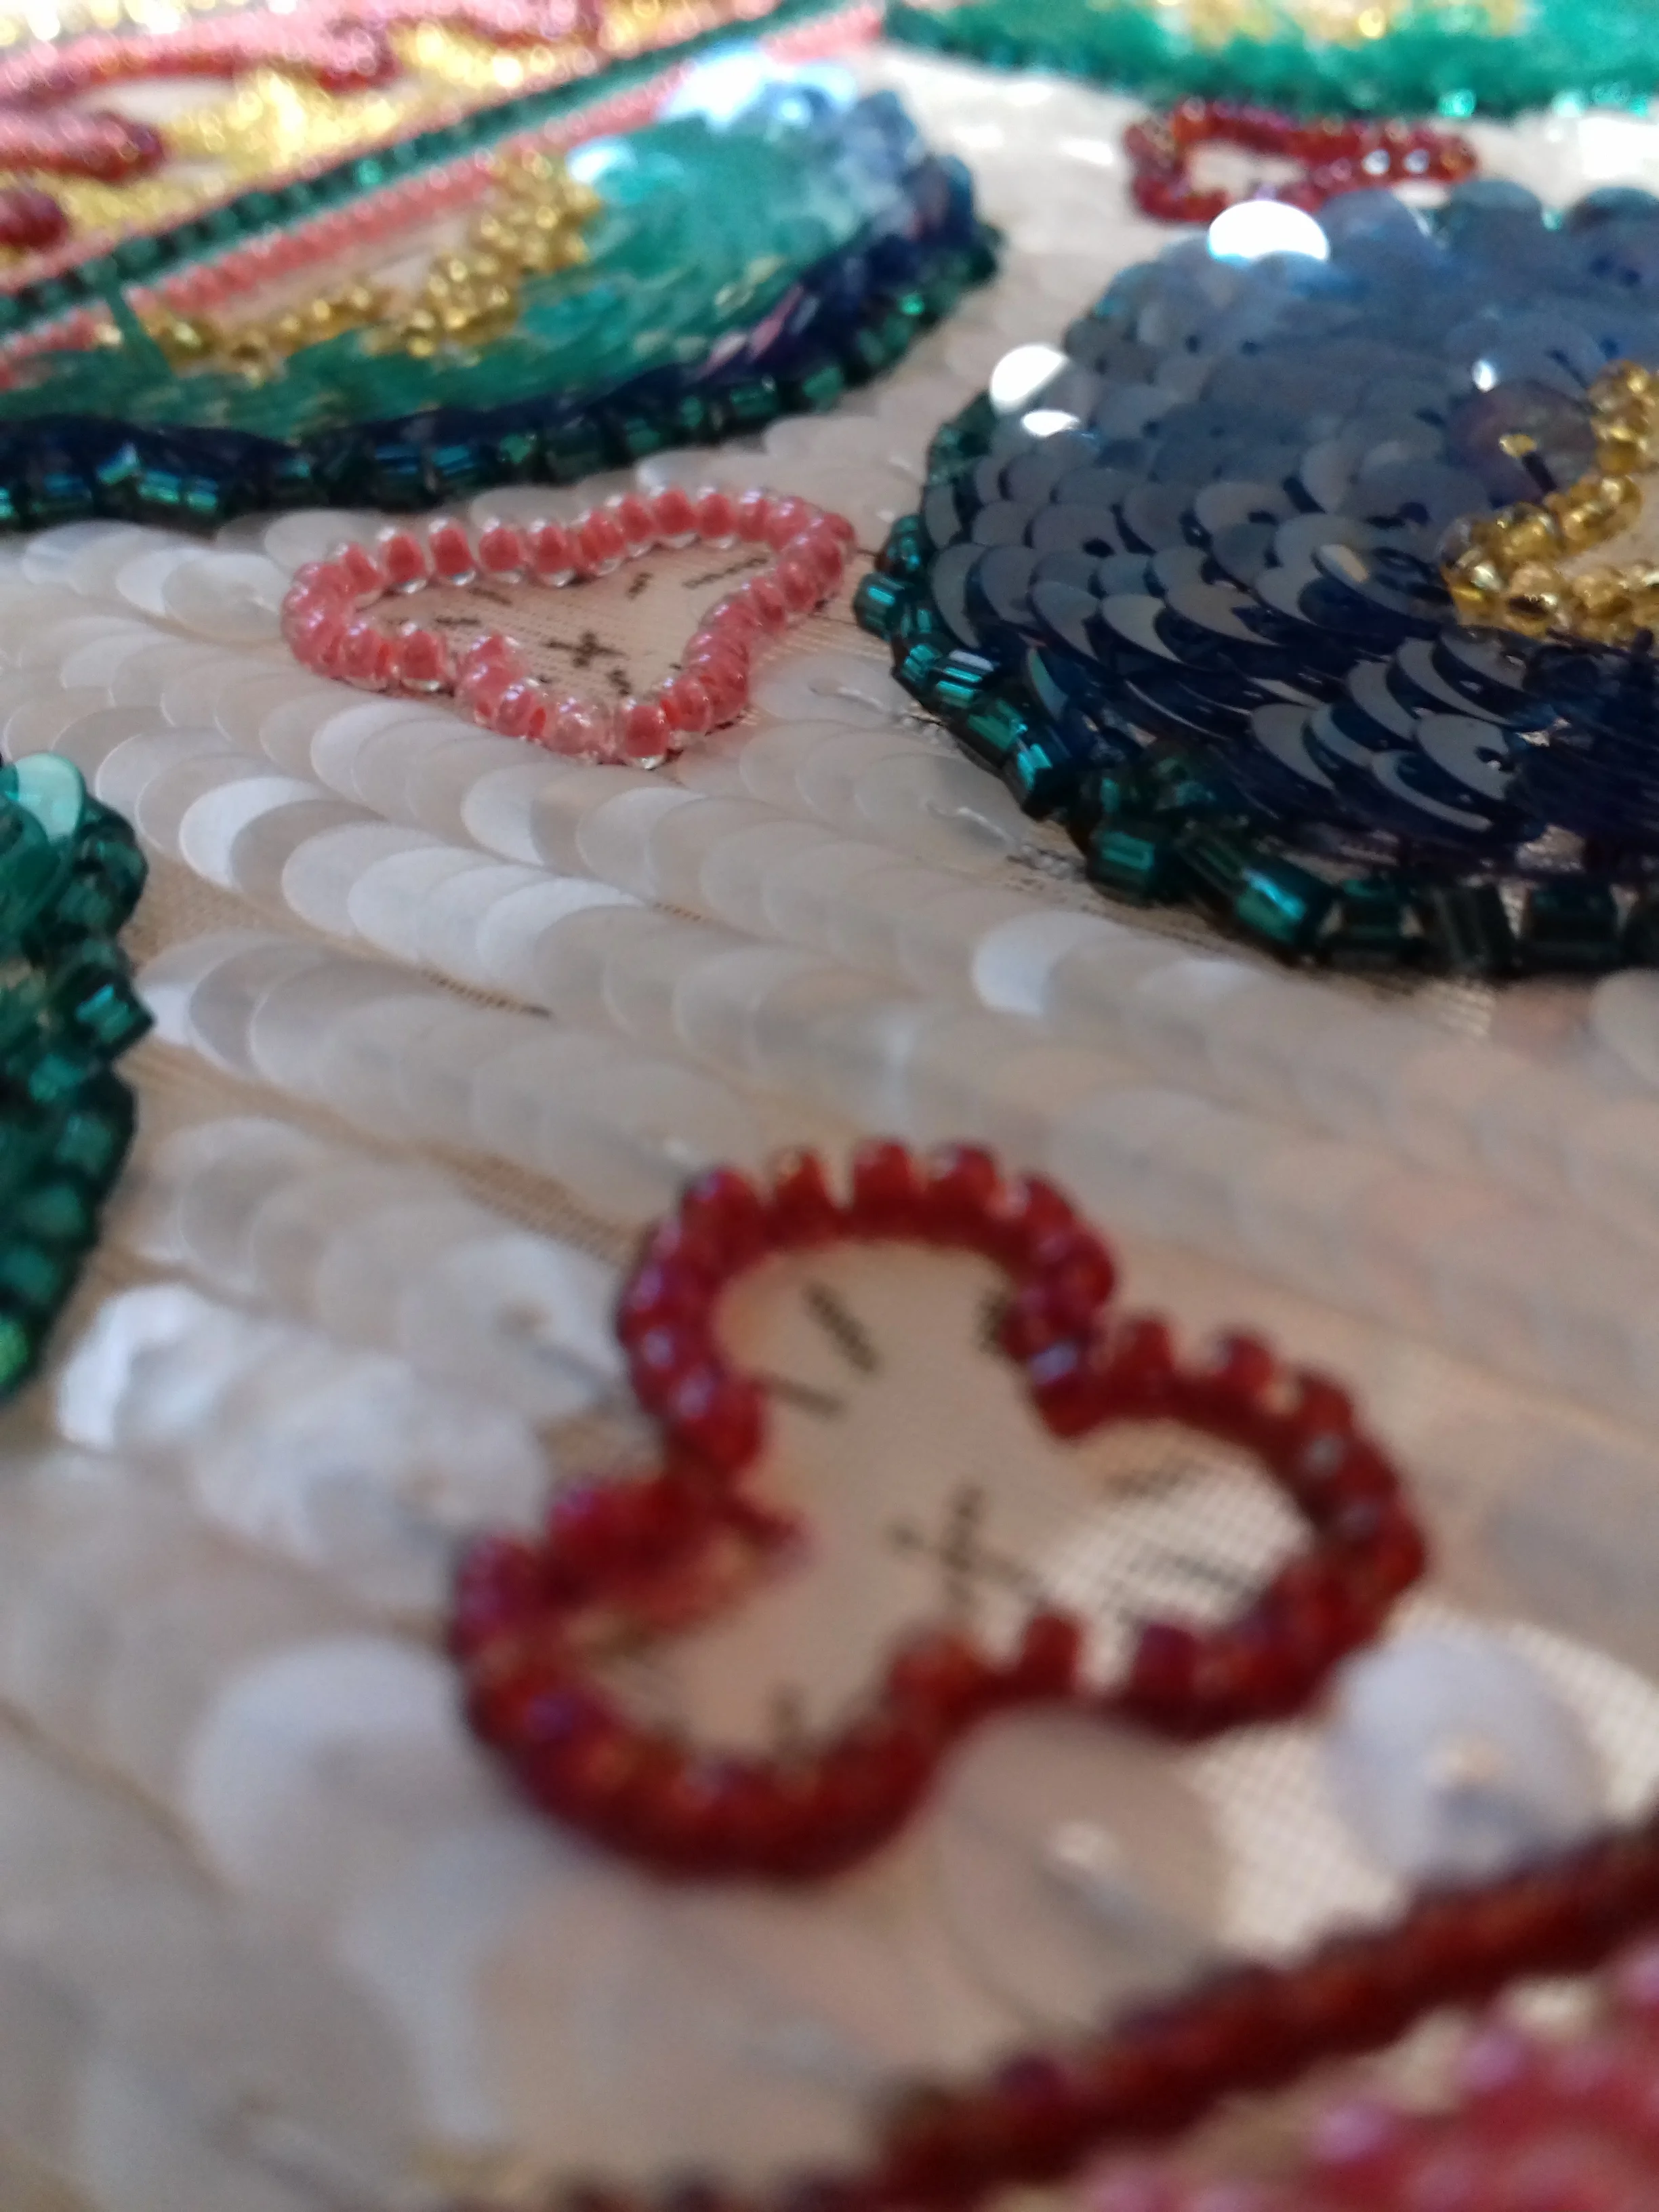
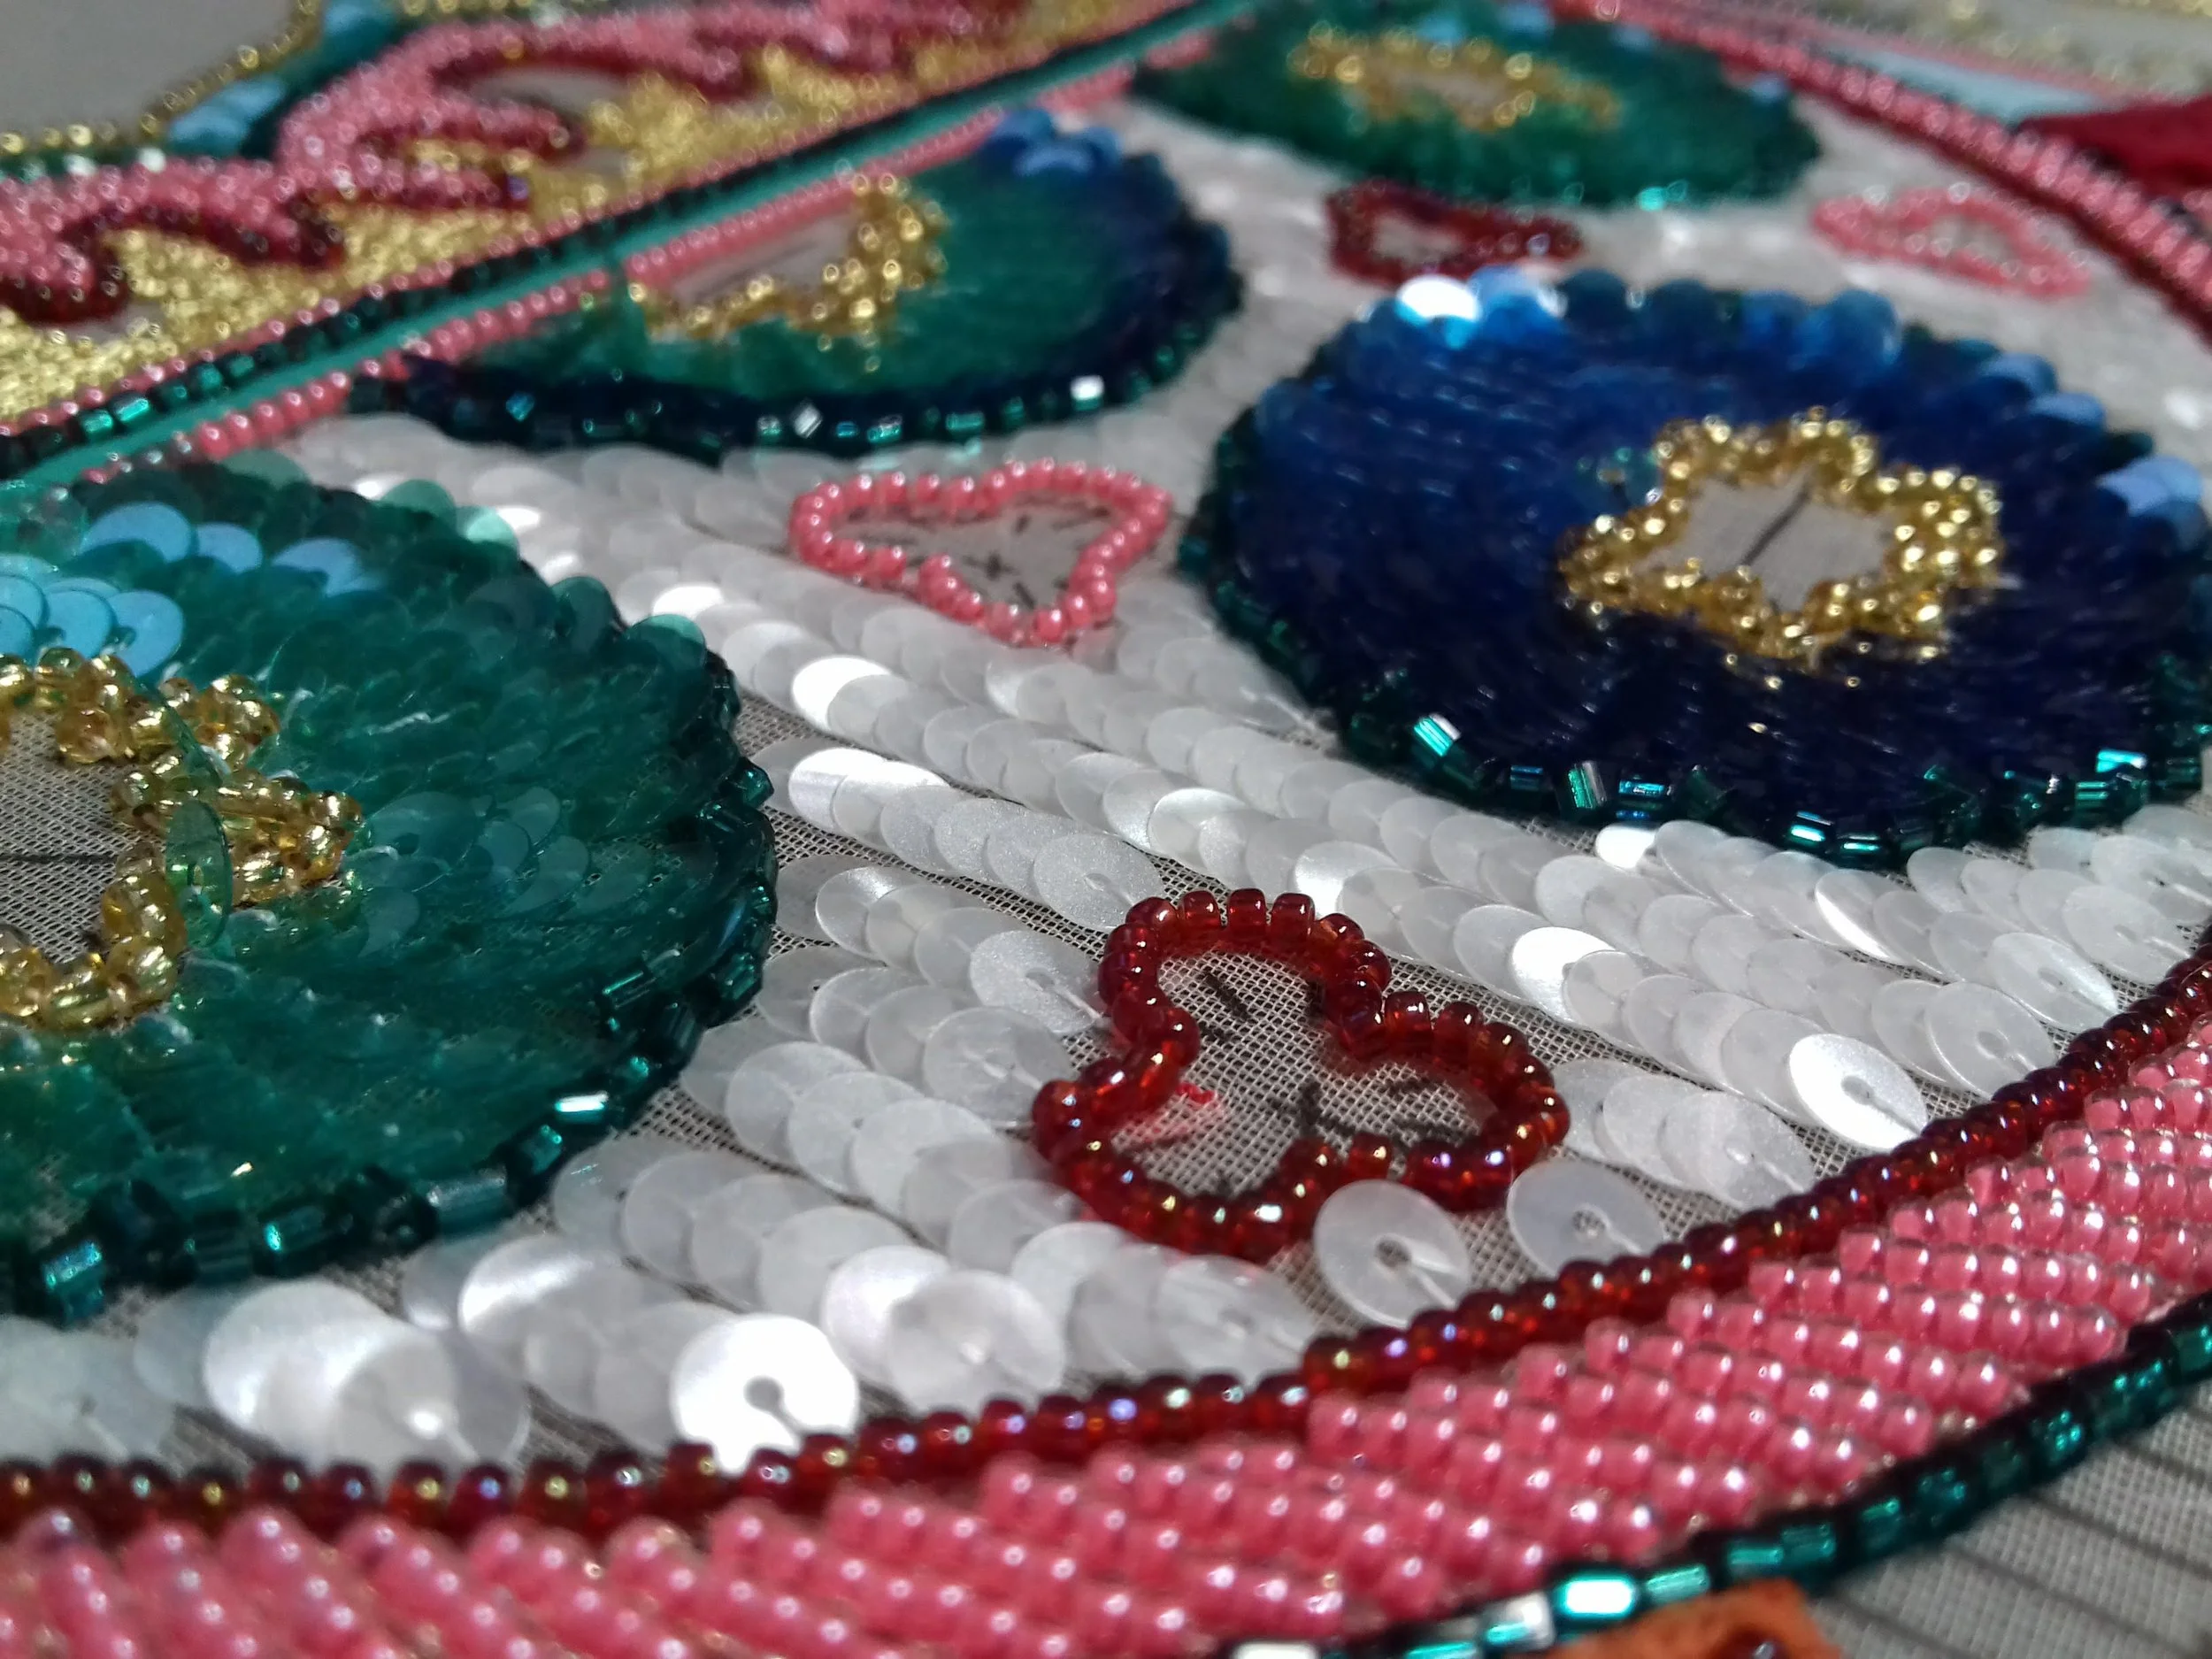
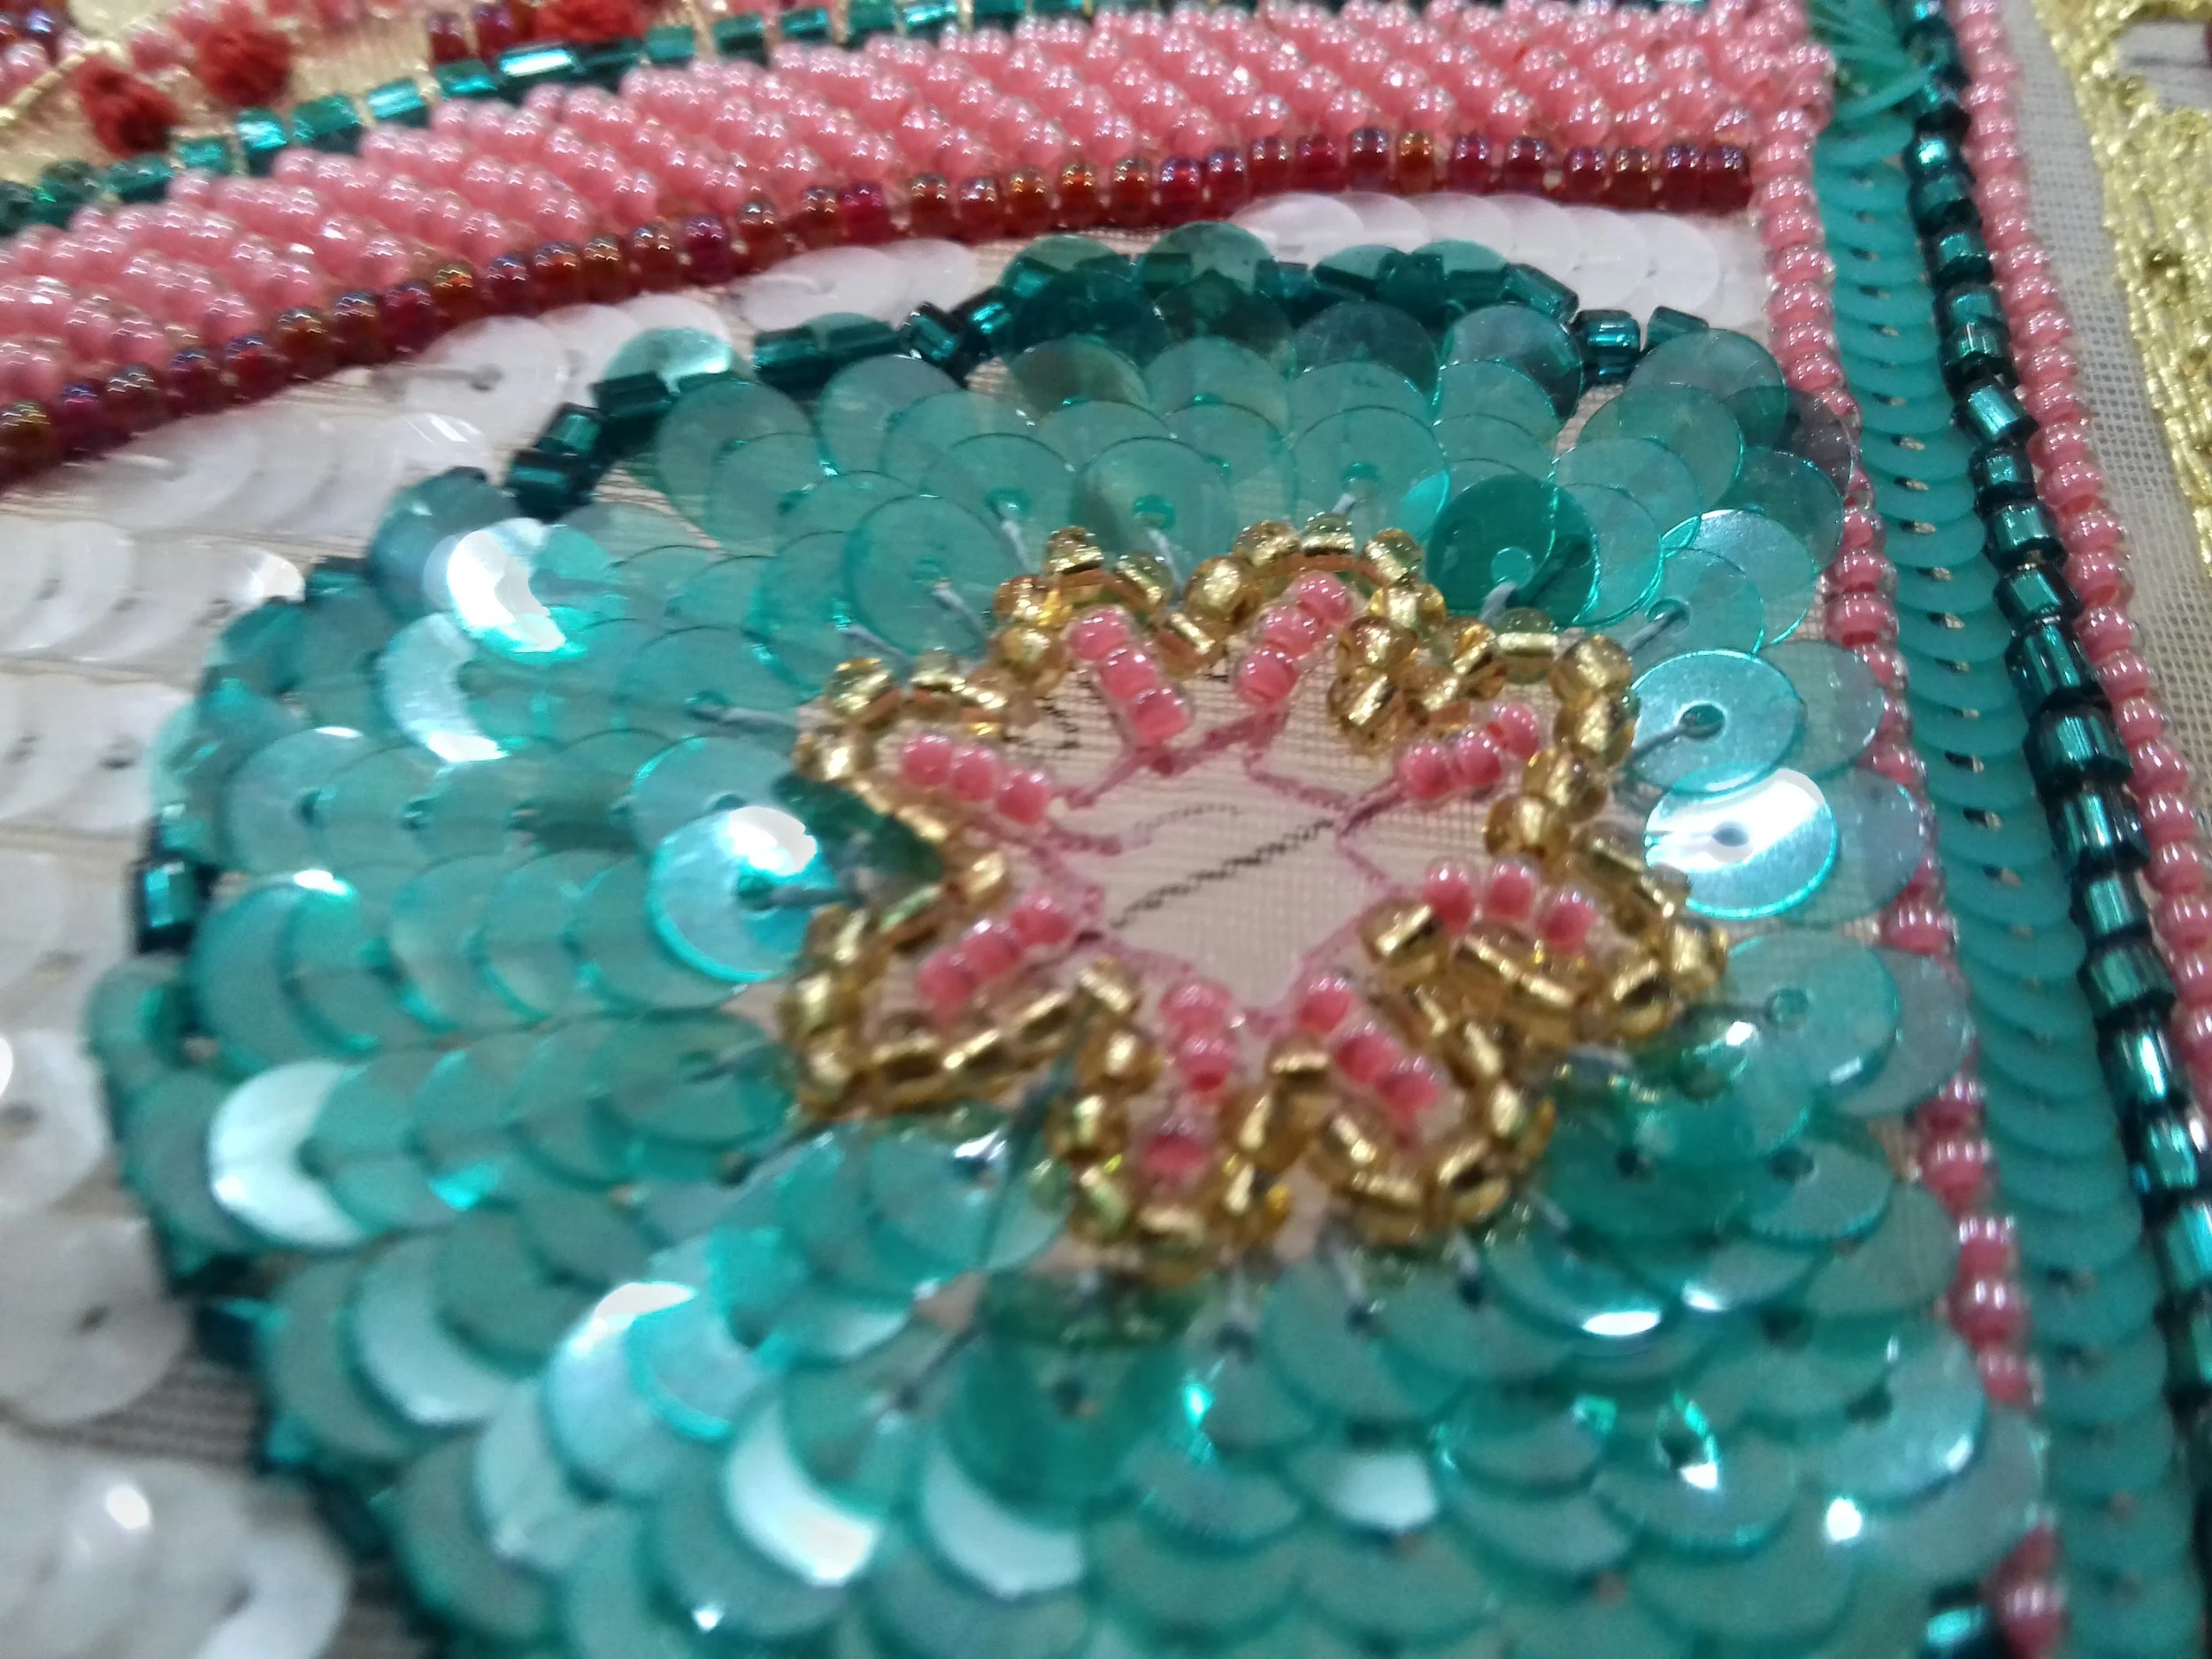
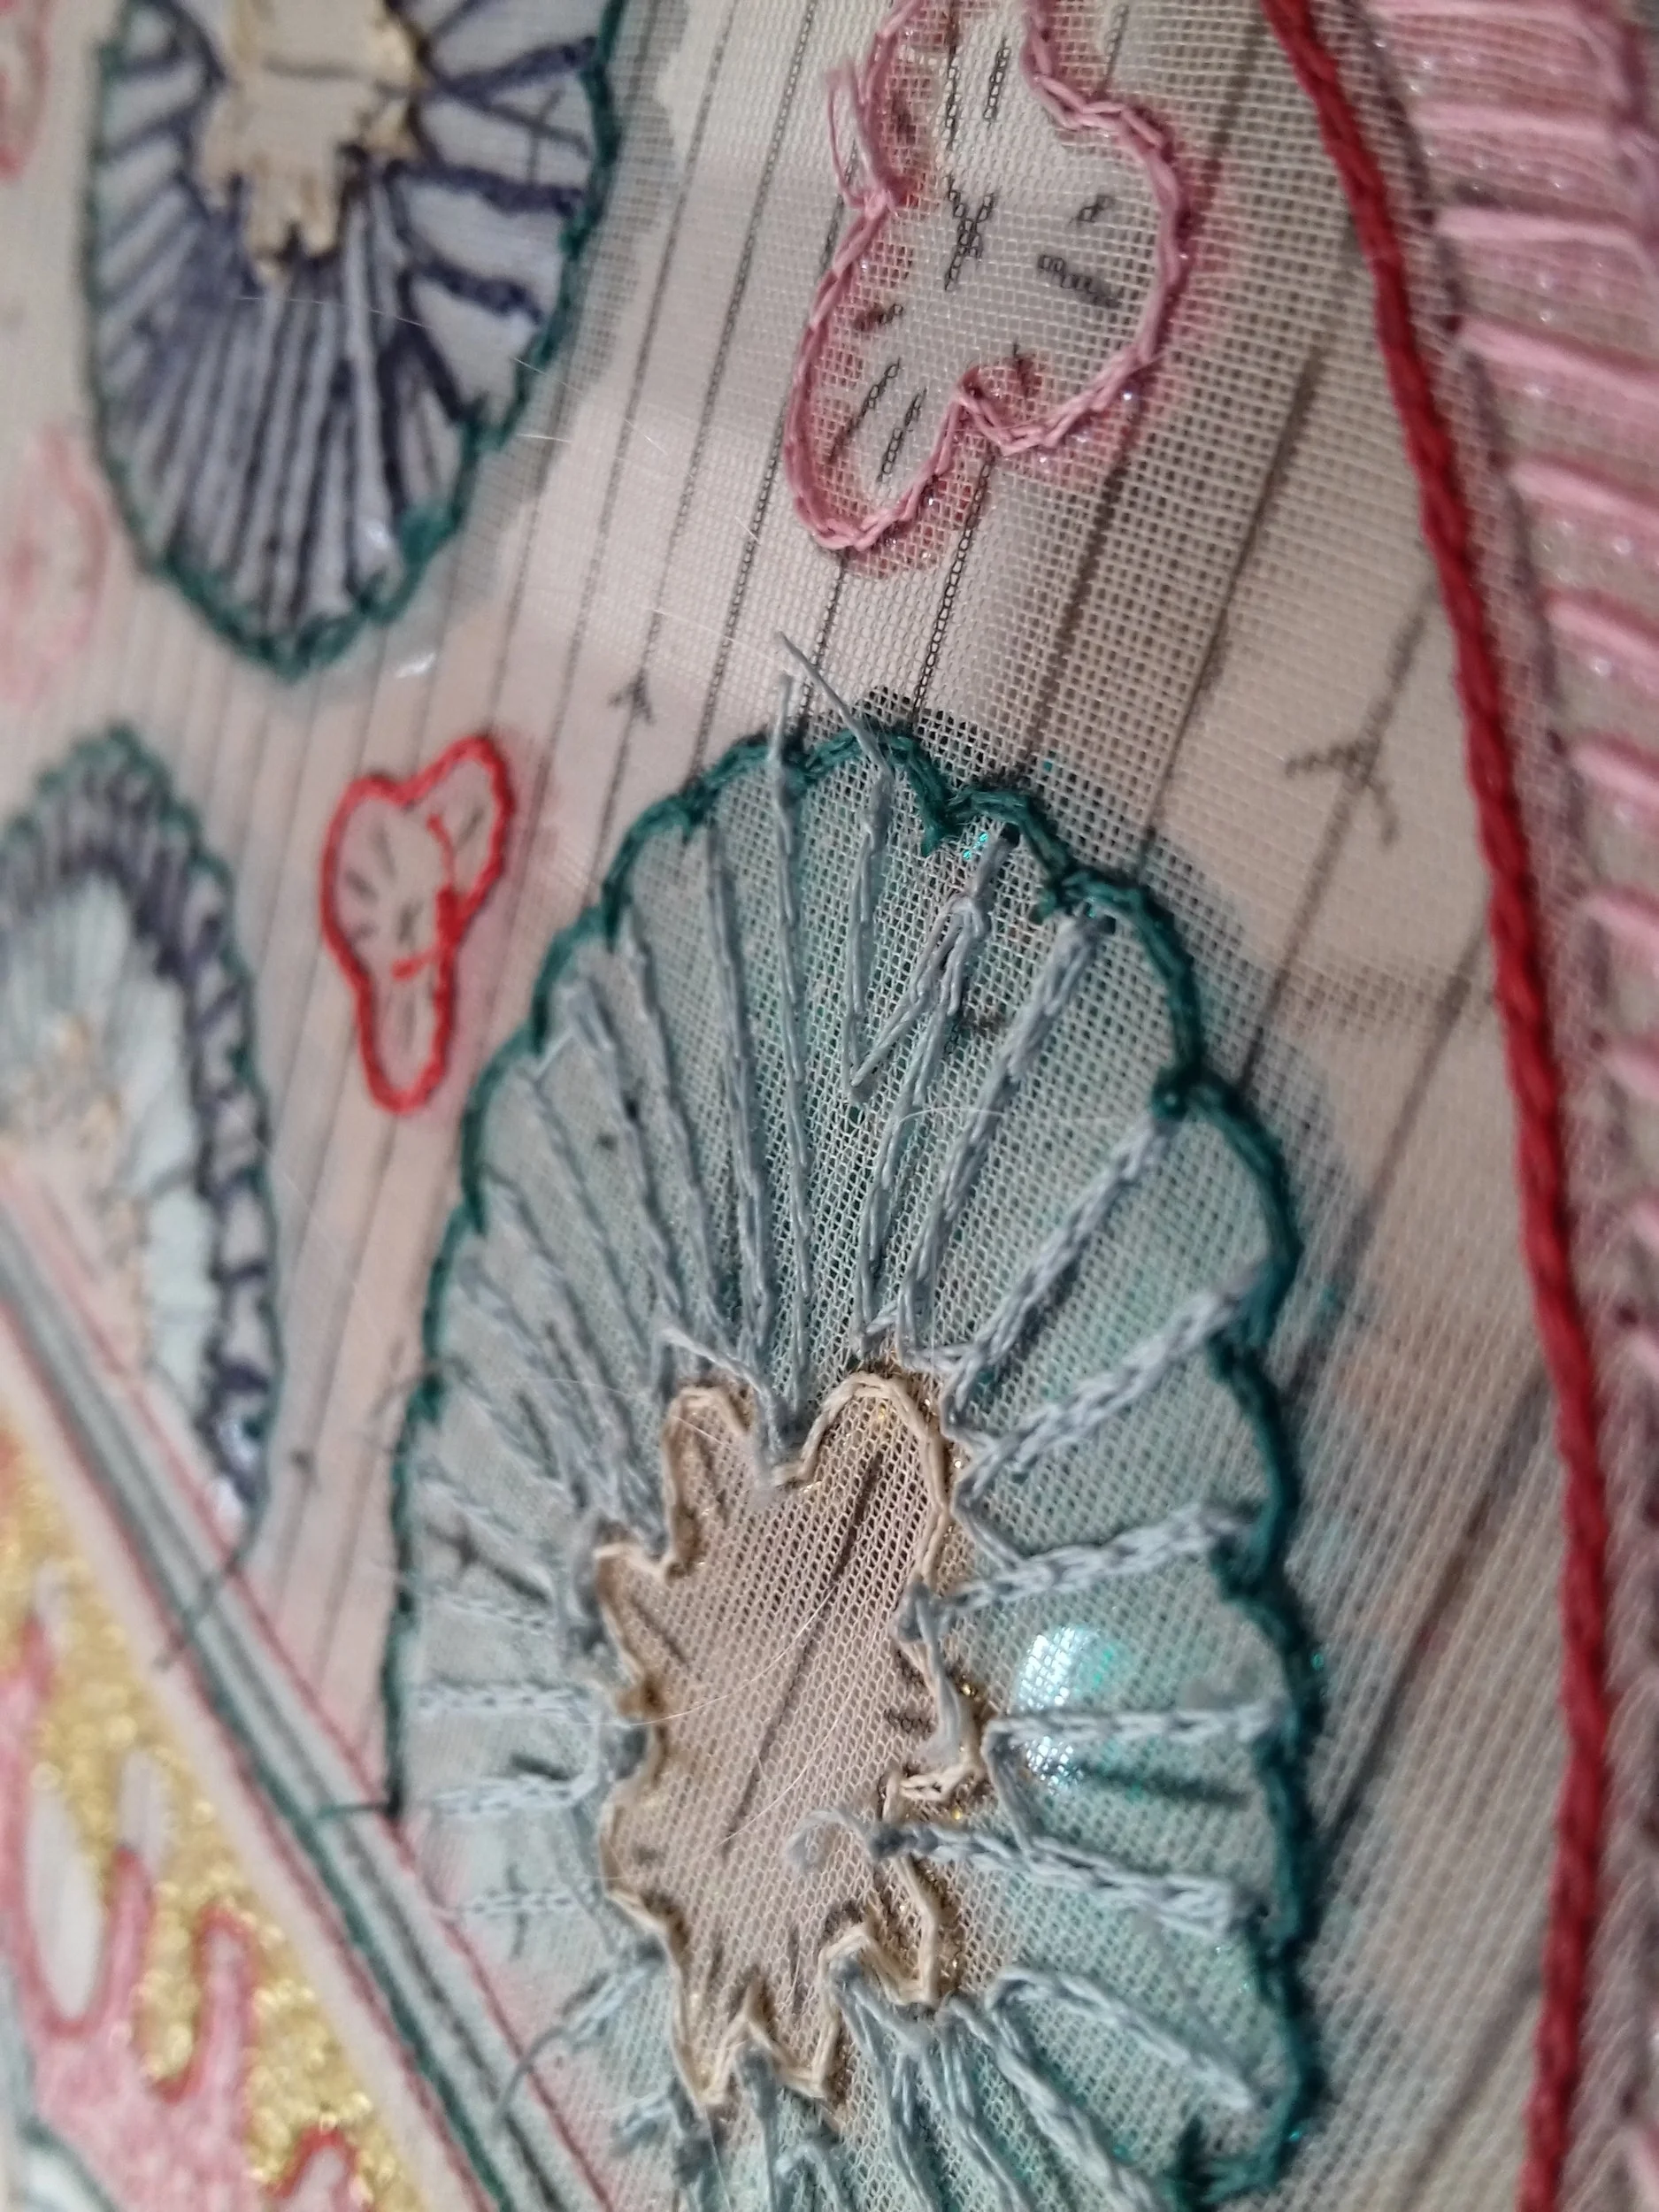
Short rows of pink beads were added inside each curve of the gold beads using the point-tiré and then the chain stitch was used to fill the centre in gold metallic thread. Each petal of the tiny blossoms was created using satin stitch in pink or red embroidery floss and long stitches were added in alternating colours that were to finish between the sequins in the background. Pink sparkling jewels were placed in the centre of the tiny blossoms.
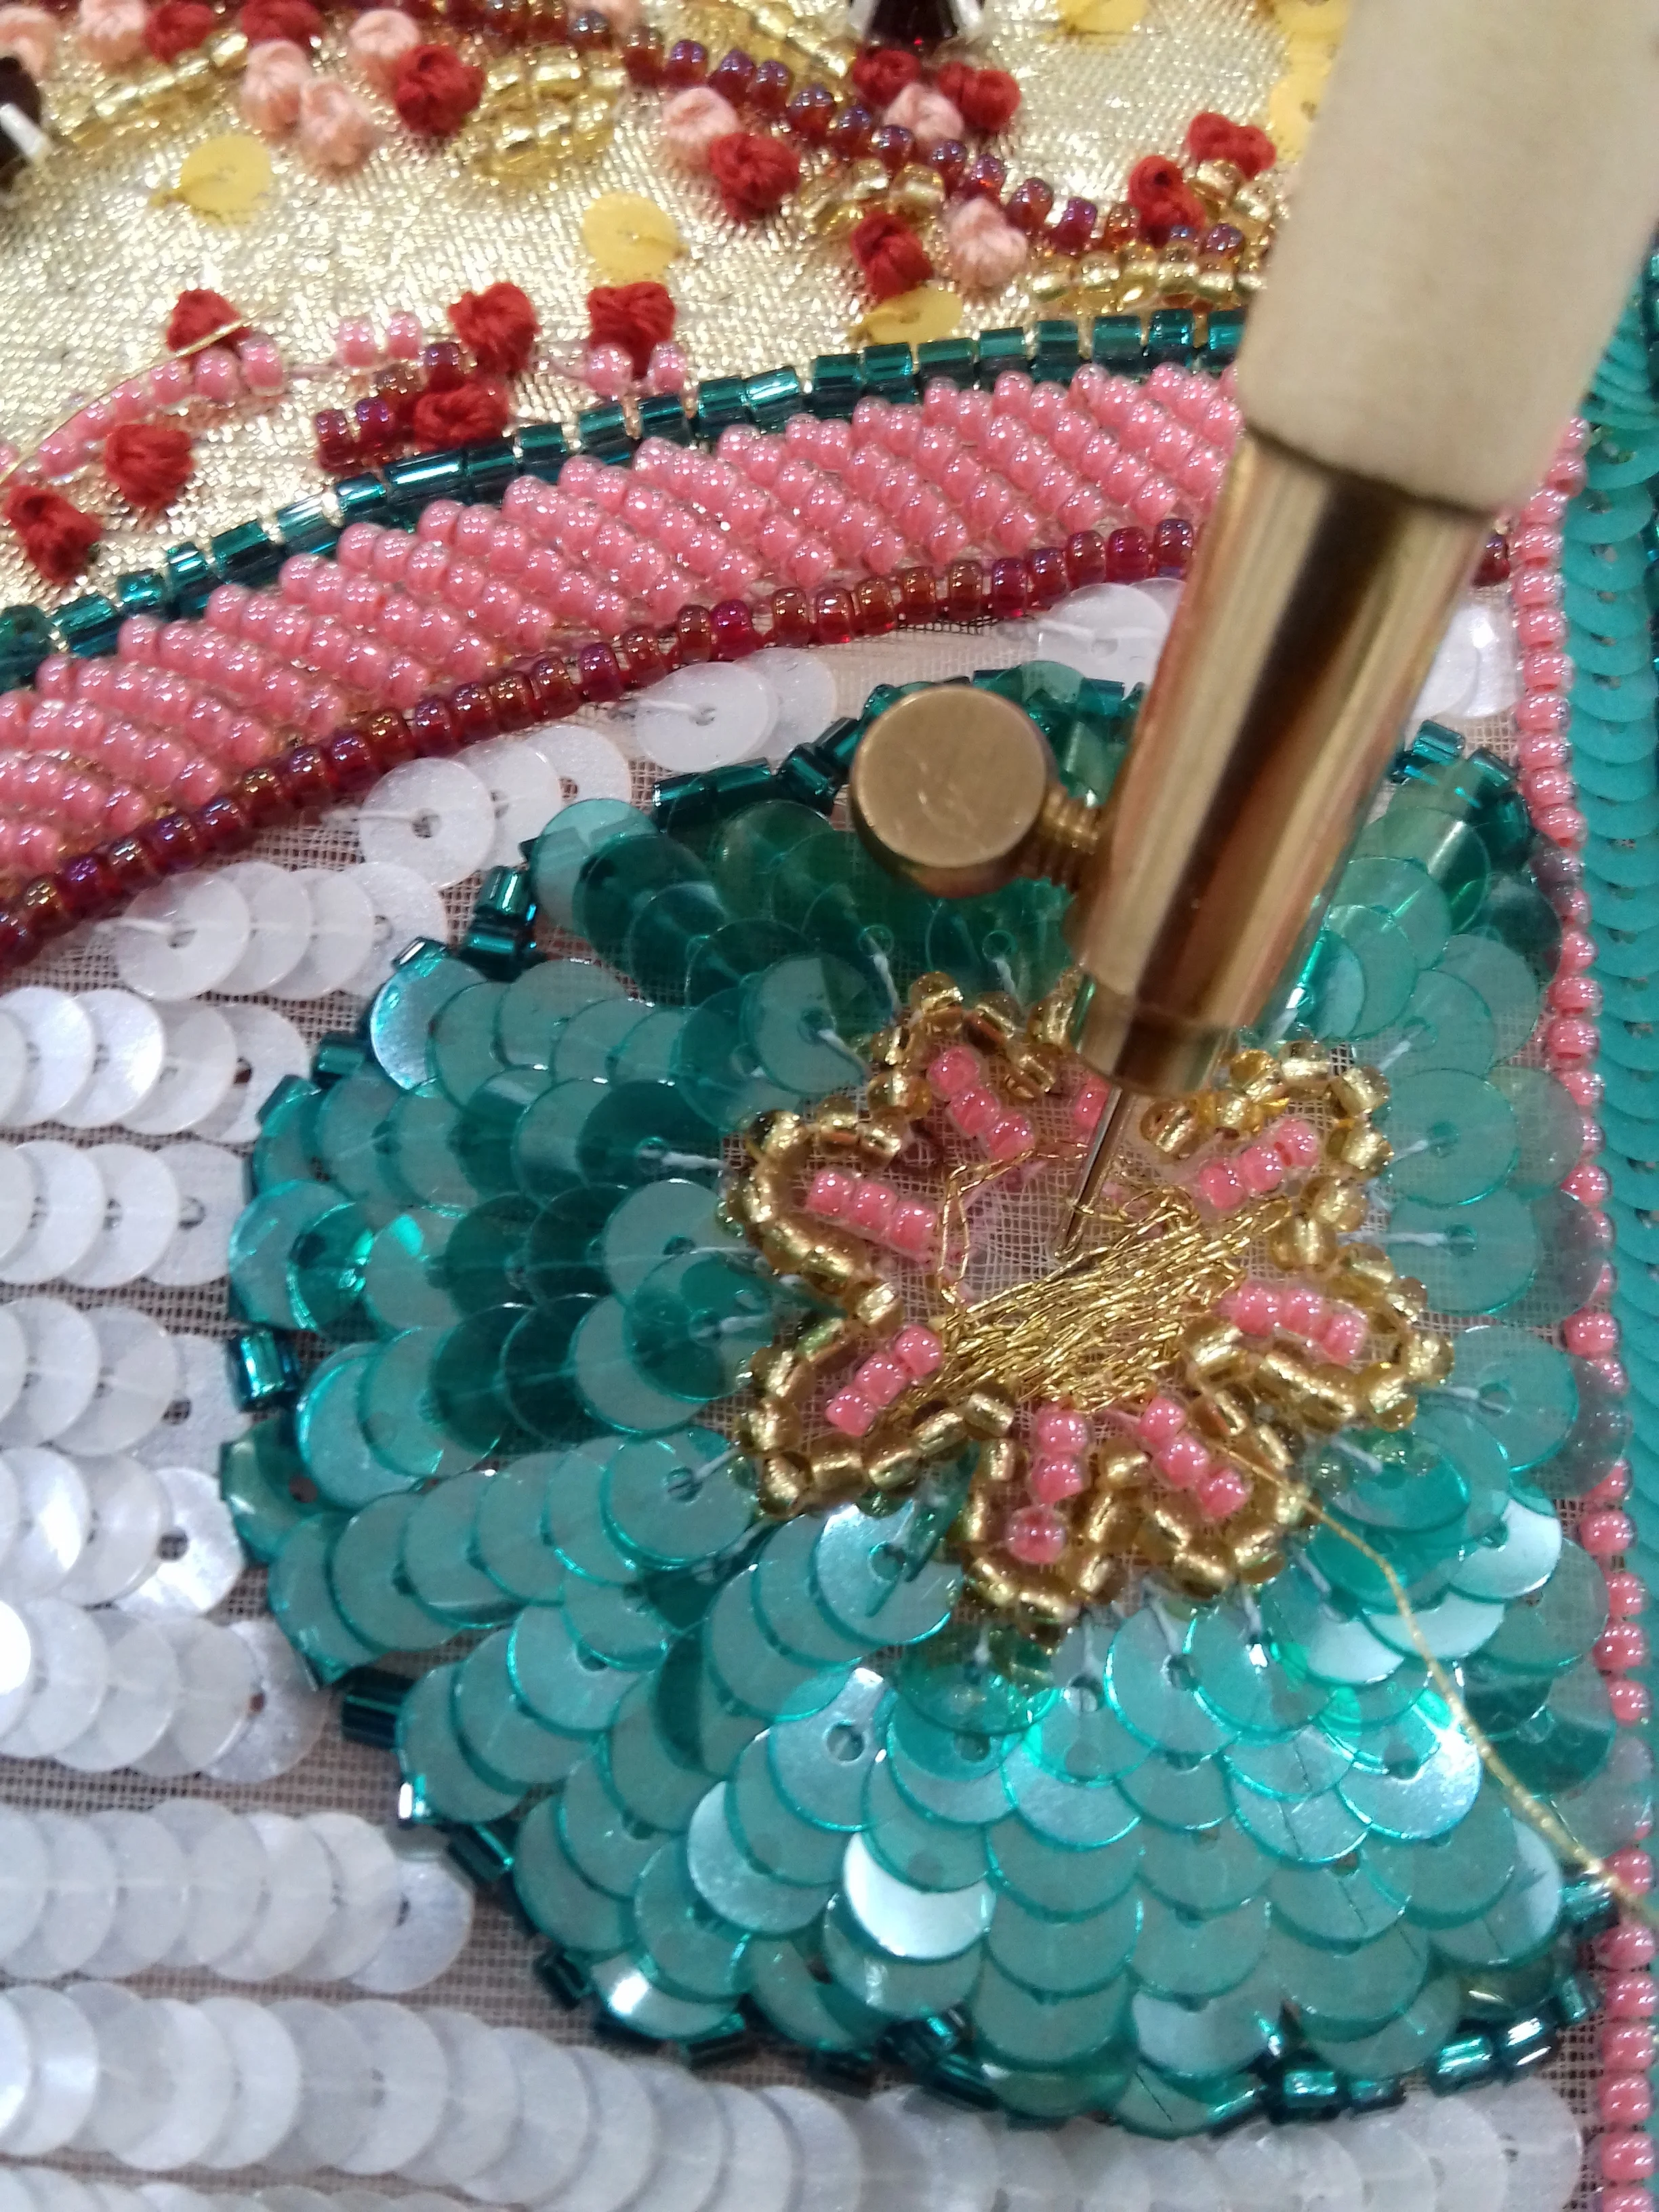
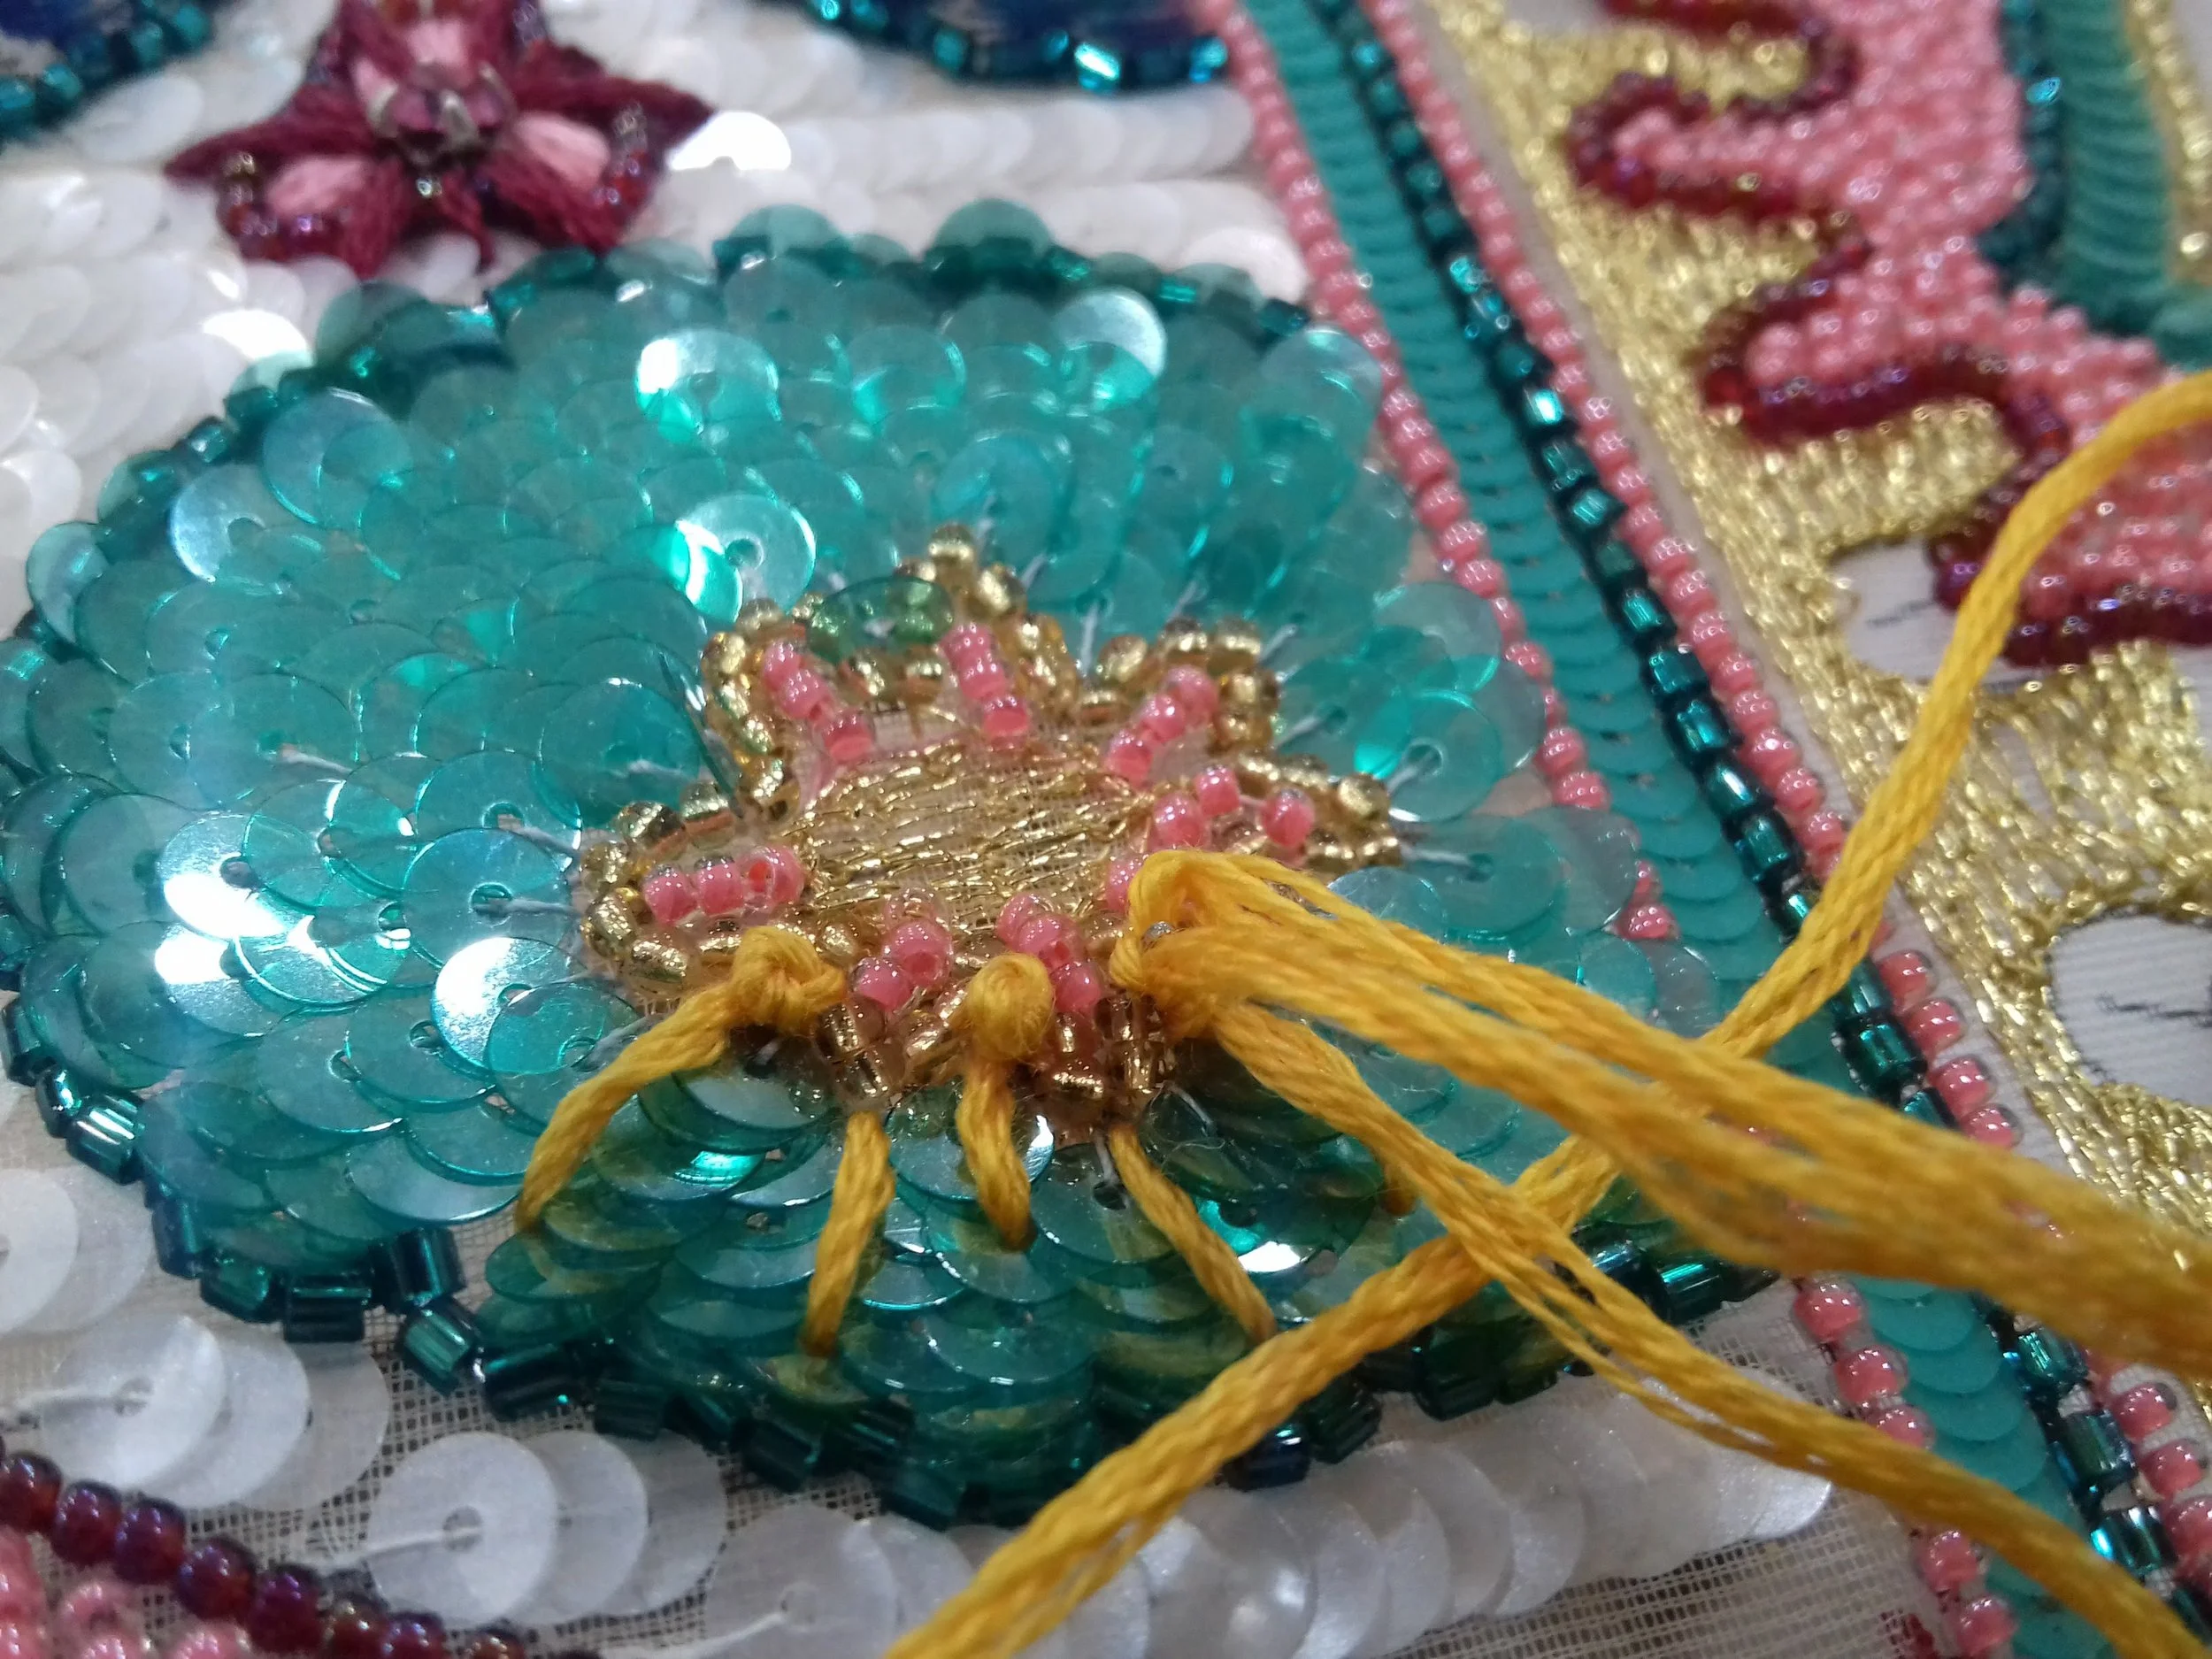
A final flourish was added to one of the sequin flowers with lancé stitches and french knots in sunshine yellow embroidery floss. And voilà! I would have to say that I was delighted when I made this section, it was relatively easy and I think the technique has such a dramatic effect. I was really curious to discover if it is used in contemporary embroidery and decided that it was high time to do a bit of window-shopping at the famous Grands Magasins of Paris...
Textile Tours of Paris
Join Rebecca on a tour of Paris’ charming haberdasheries nestled deep in the winding streets of Le Sentier, the city’s historic textile and fashion district. Enjoy a Sunday morning with Rebecca on a Flea Market Tour as she guides you through the labyrinth alleys of Paris’ oldest marché-aux-puces to uncover hidden treasure troves filled with vintage lace, linen, passementerie, golden threads and gossamer lingerie. To find out more visit Textile Tours of Paris.