
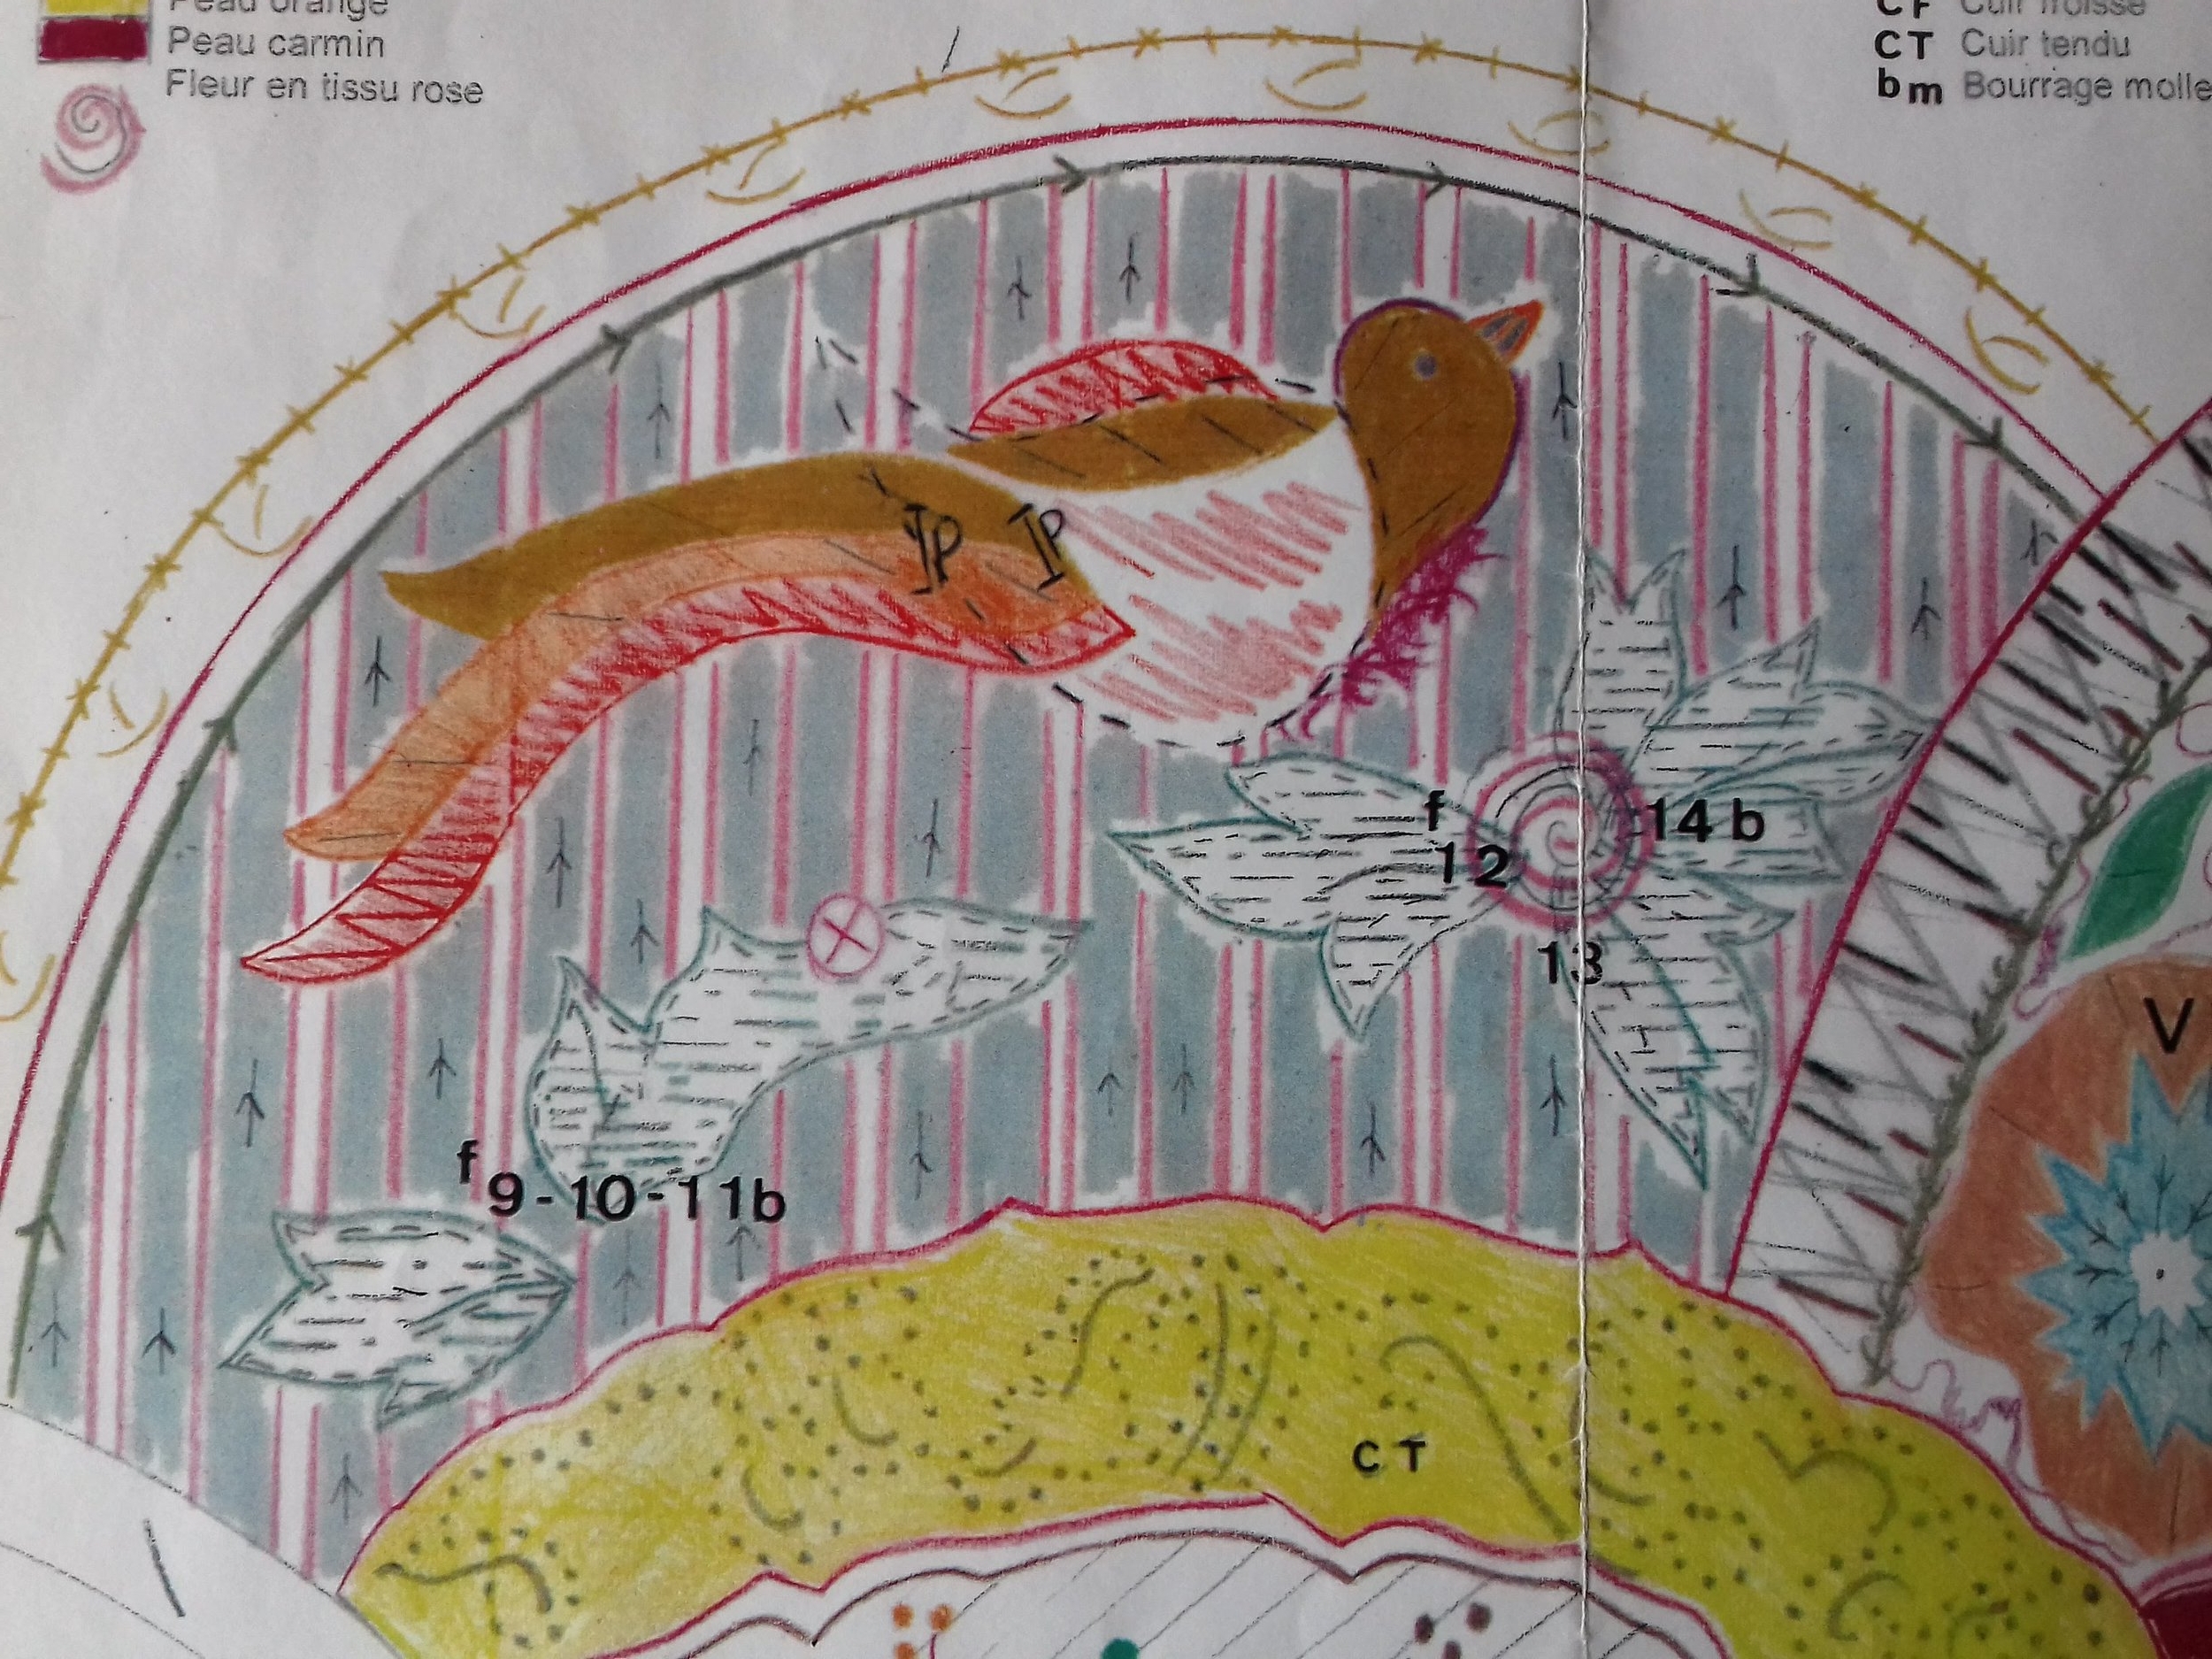
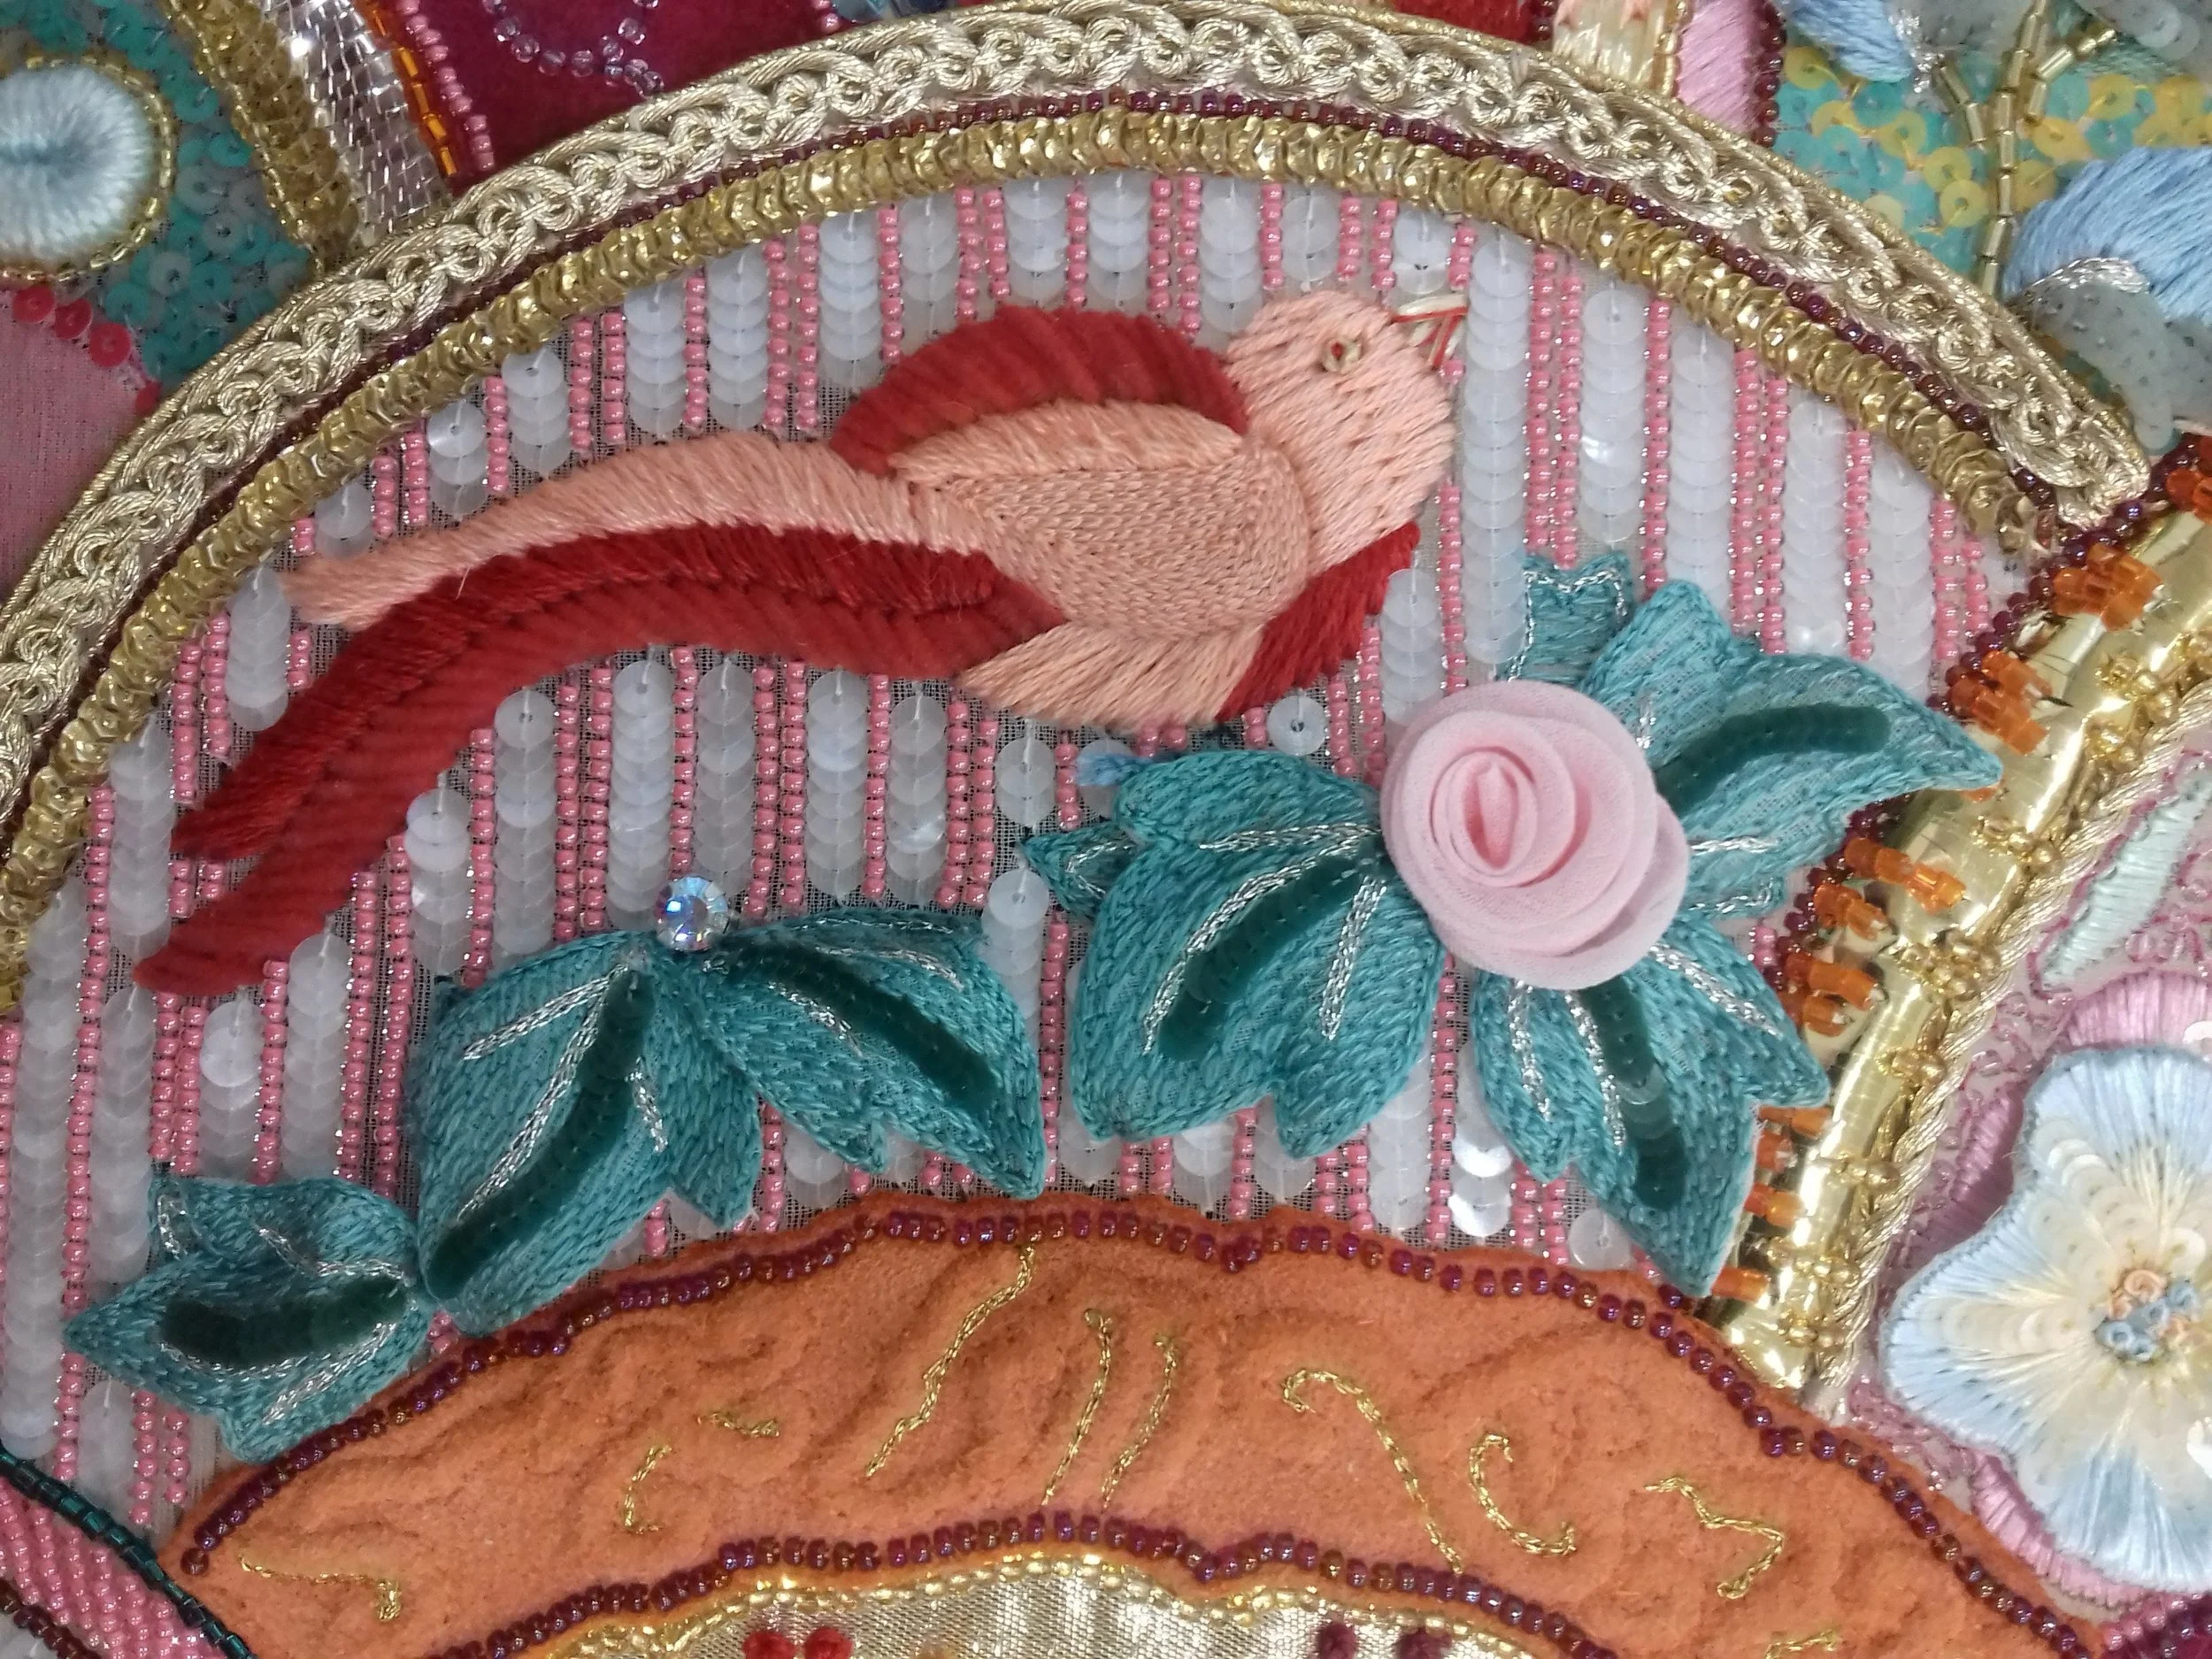
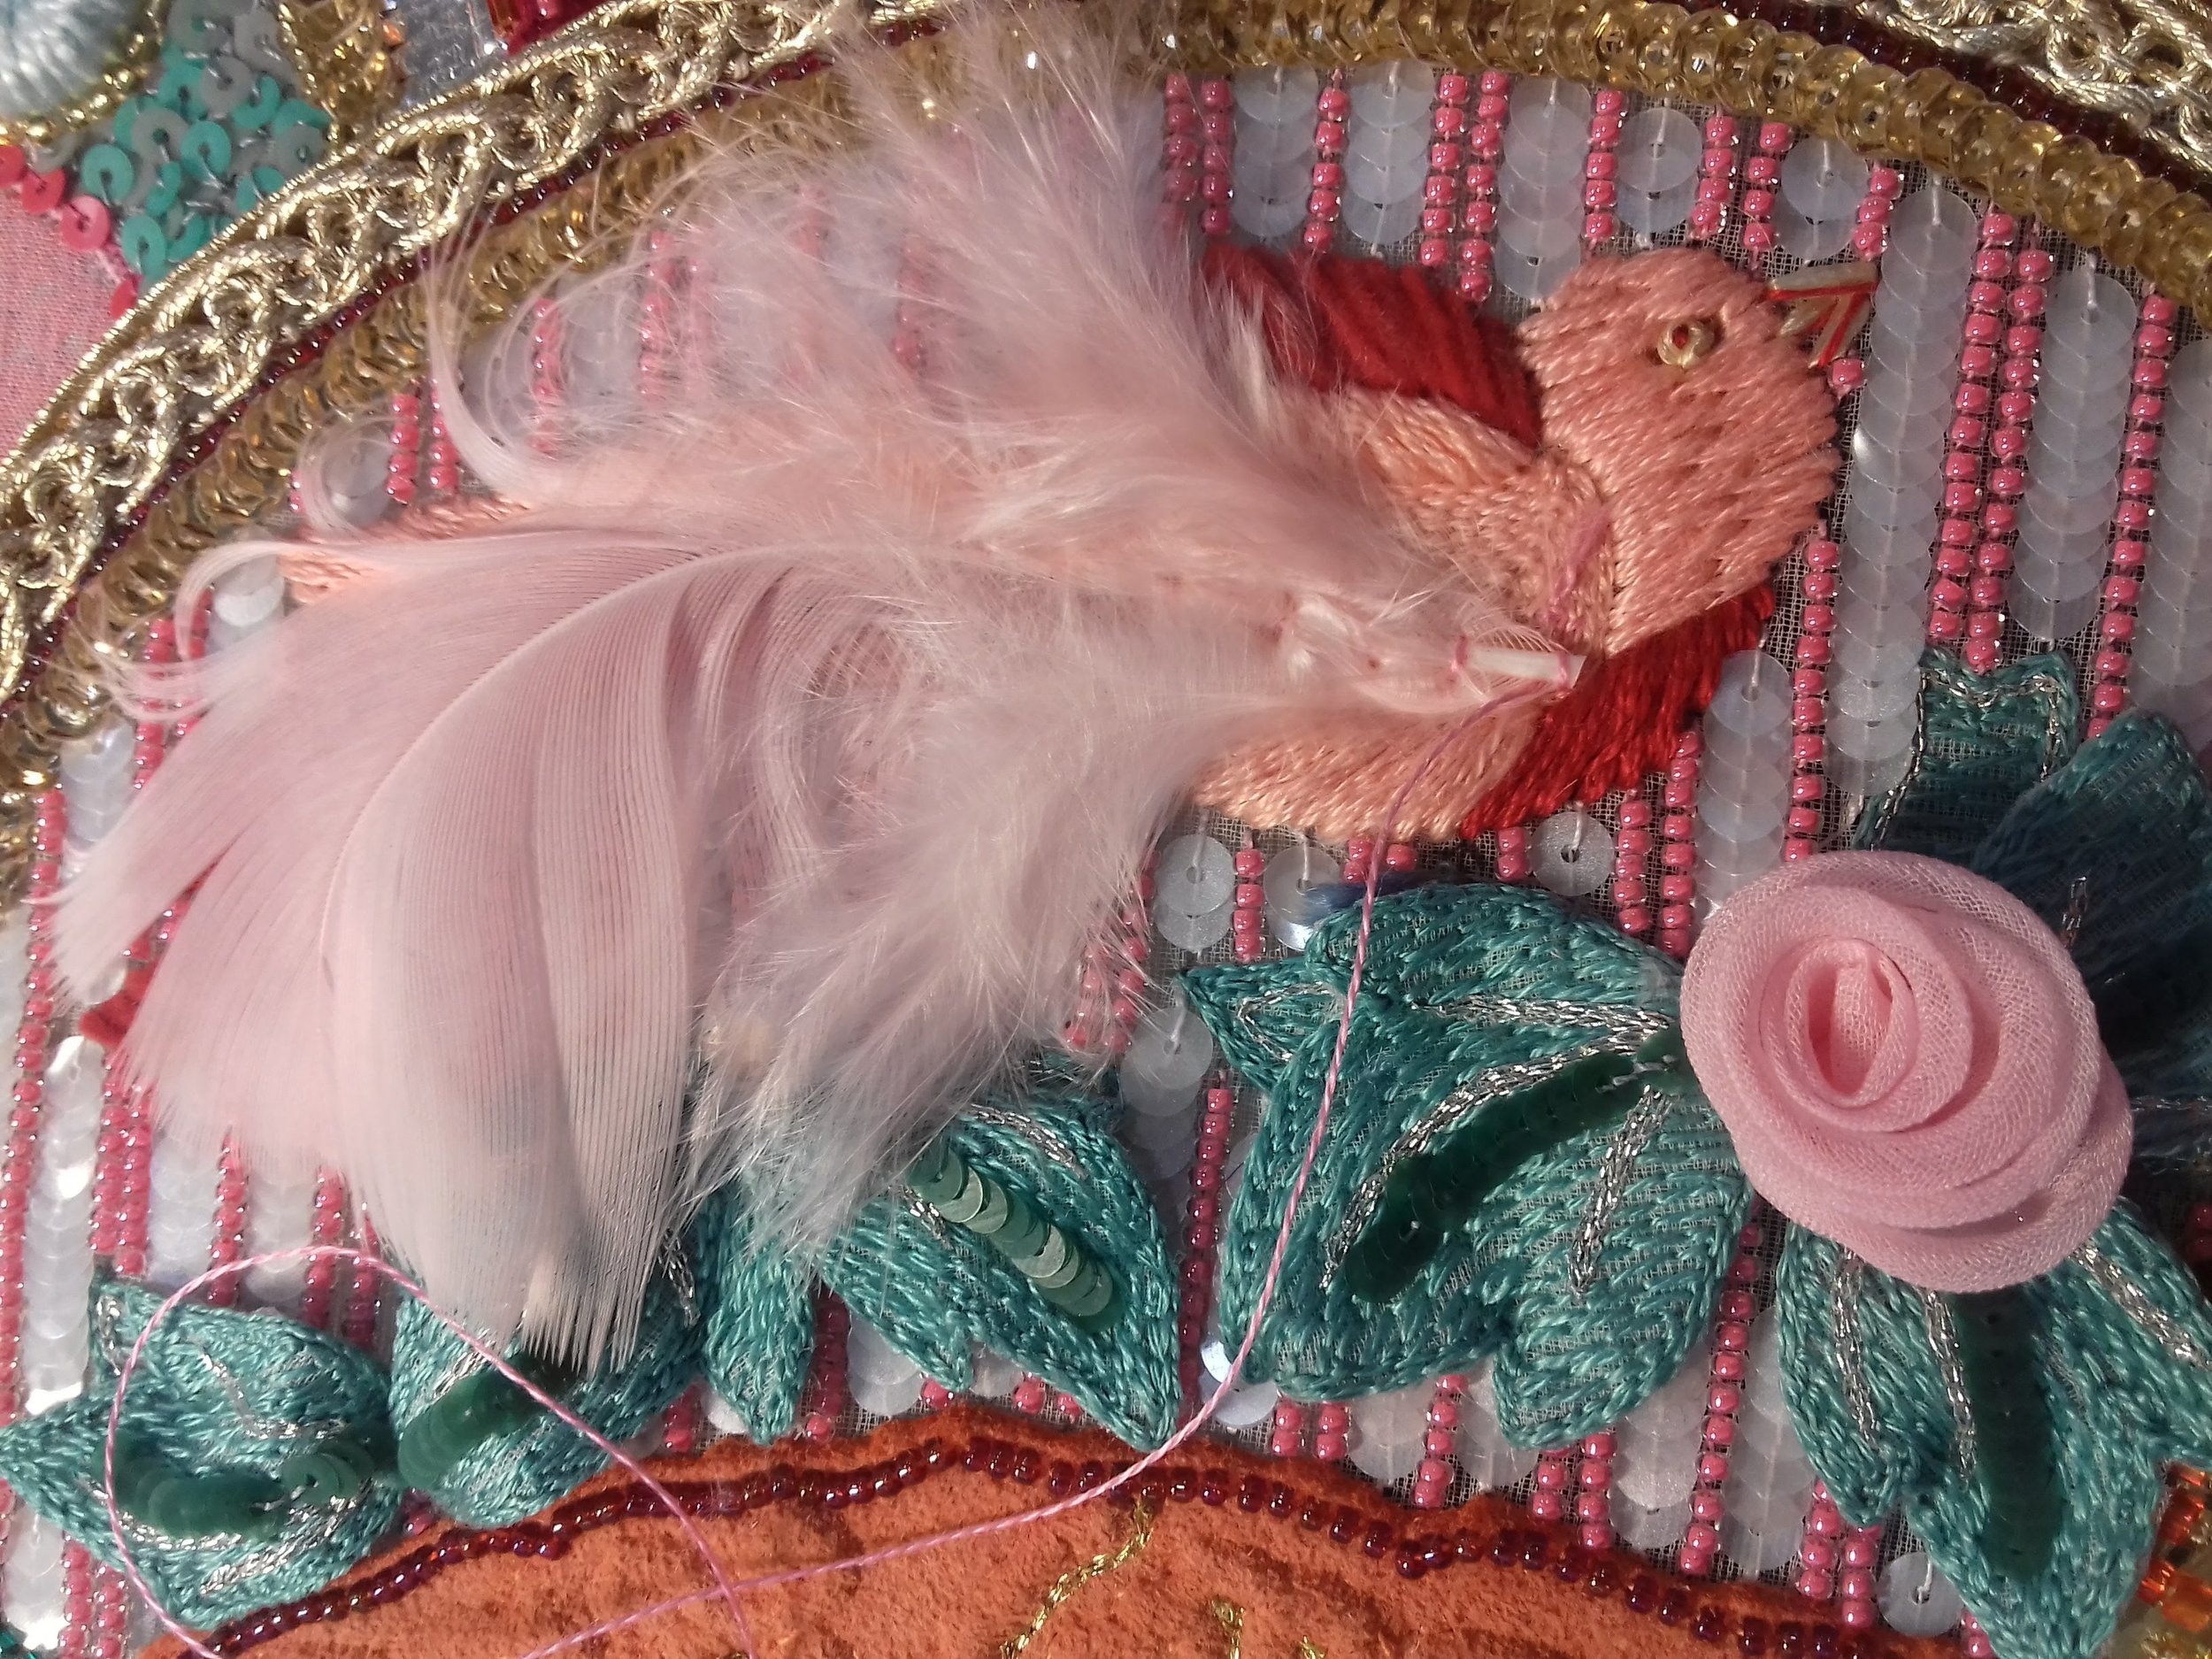
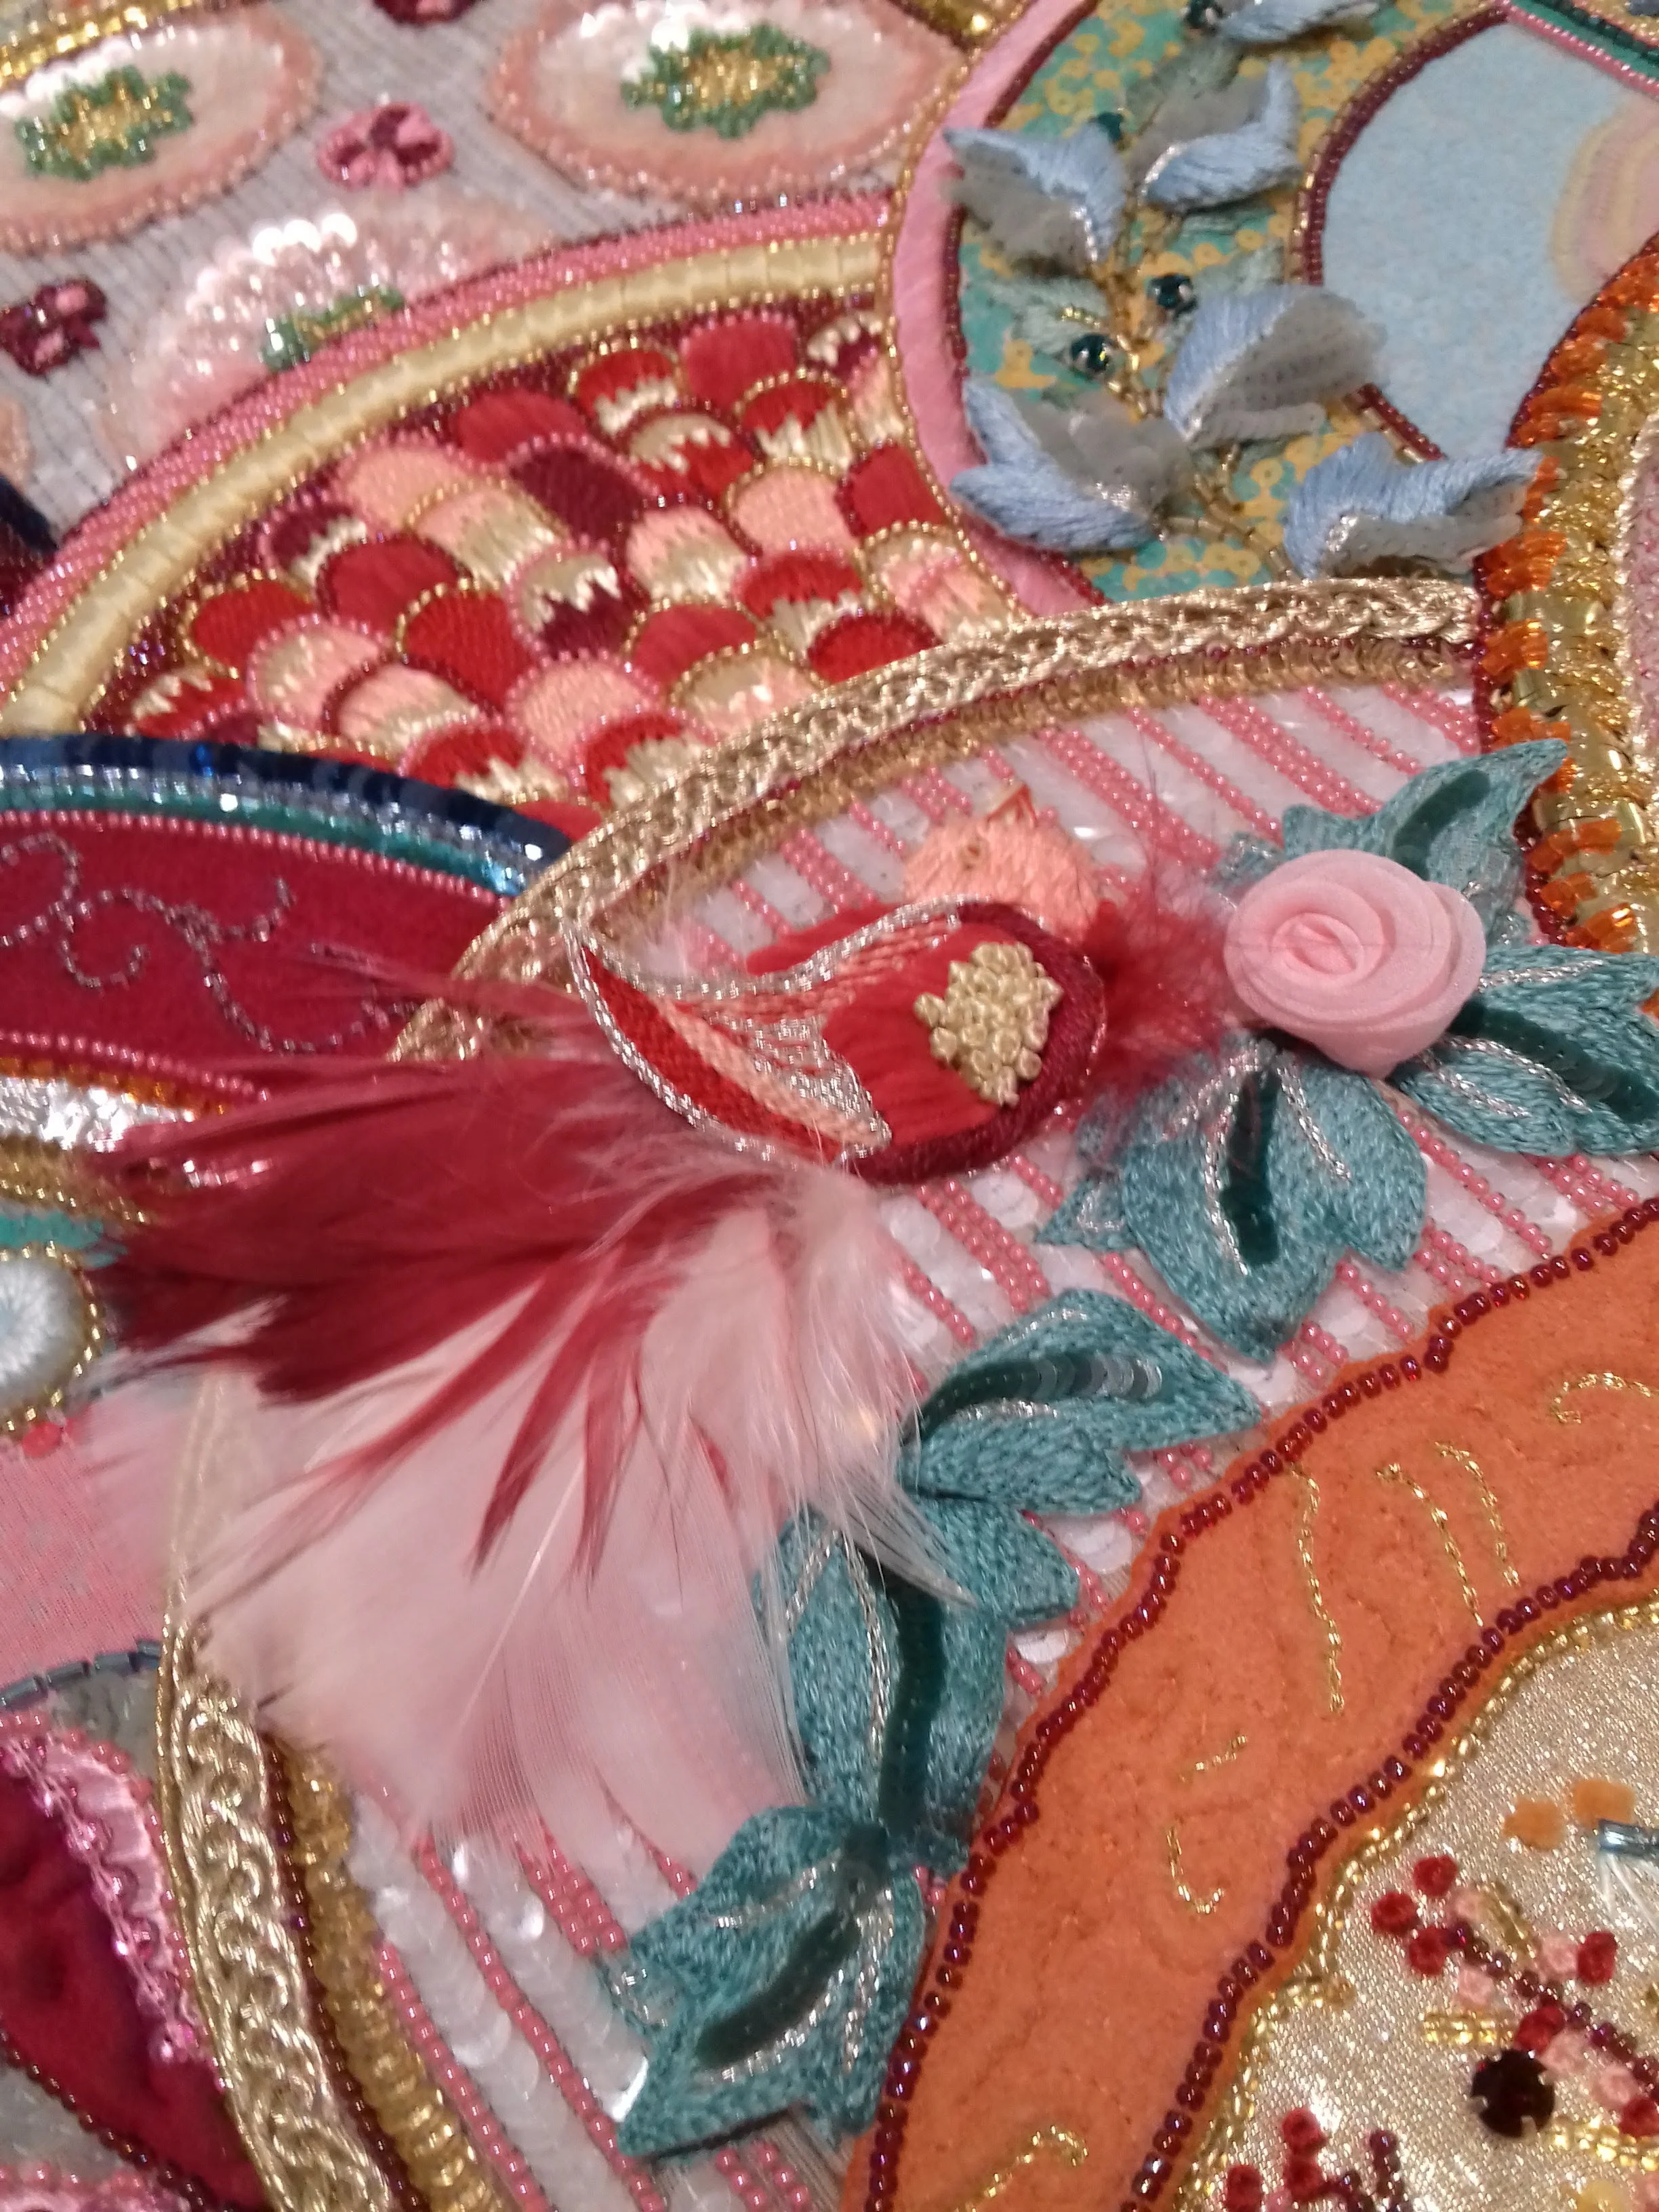
This flight of fancy was completed in several stages leading to a cheerful detail in the centre of the finished piece. The pattern shows the background of sequins and beads, with an arched border of curved golden sequins, red seed beads and golden braiding. There are foliage motifs that are applied directly to the surface and then covered with undulating 3D leaves to add volume. The section included interesting techniques like creating a pretty mousseline rose, embroidering the dove in embroidery floss and chenille thread, feather preparation and application and finally placing the wing according to the pattern markings. A few swarovski jewels were added for sparkle!
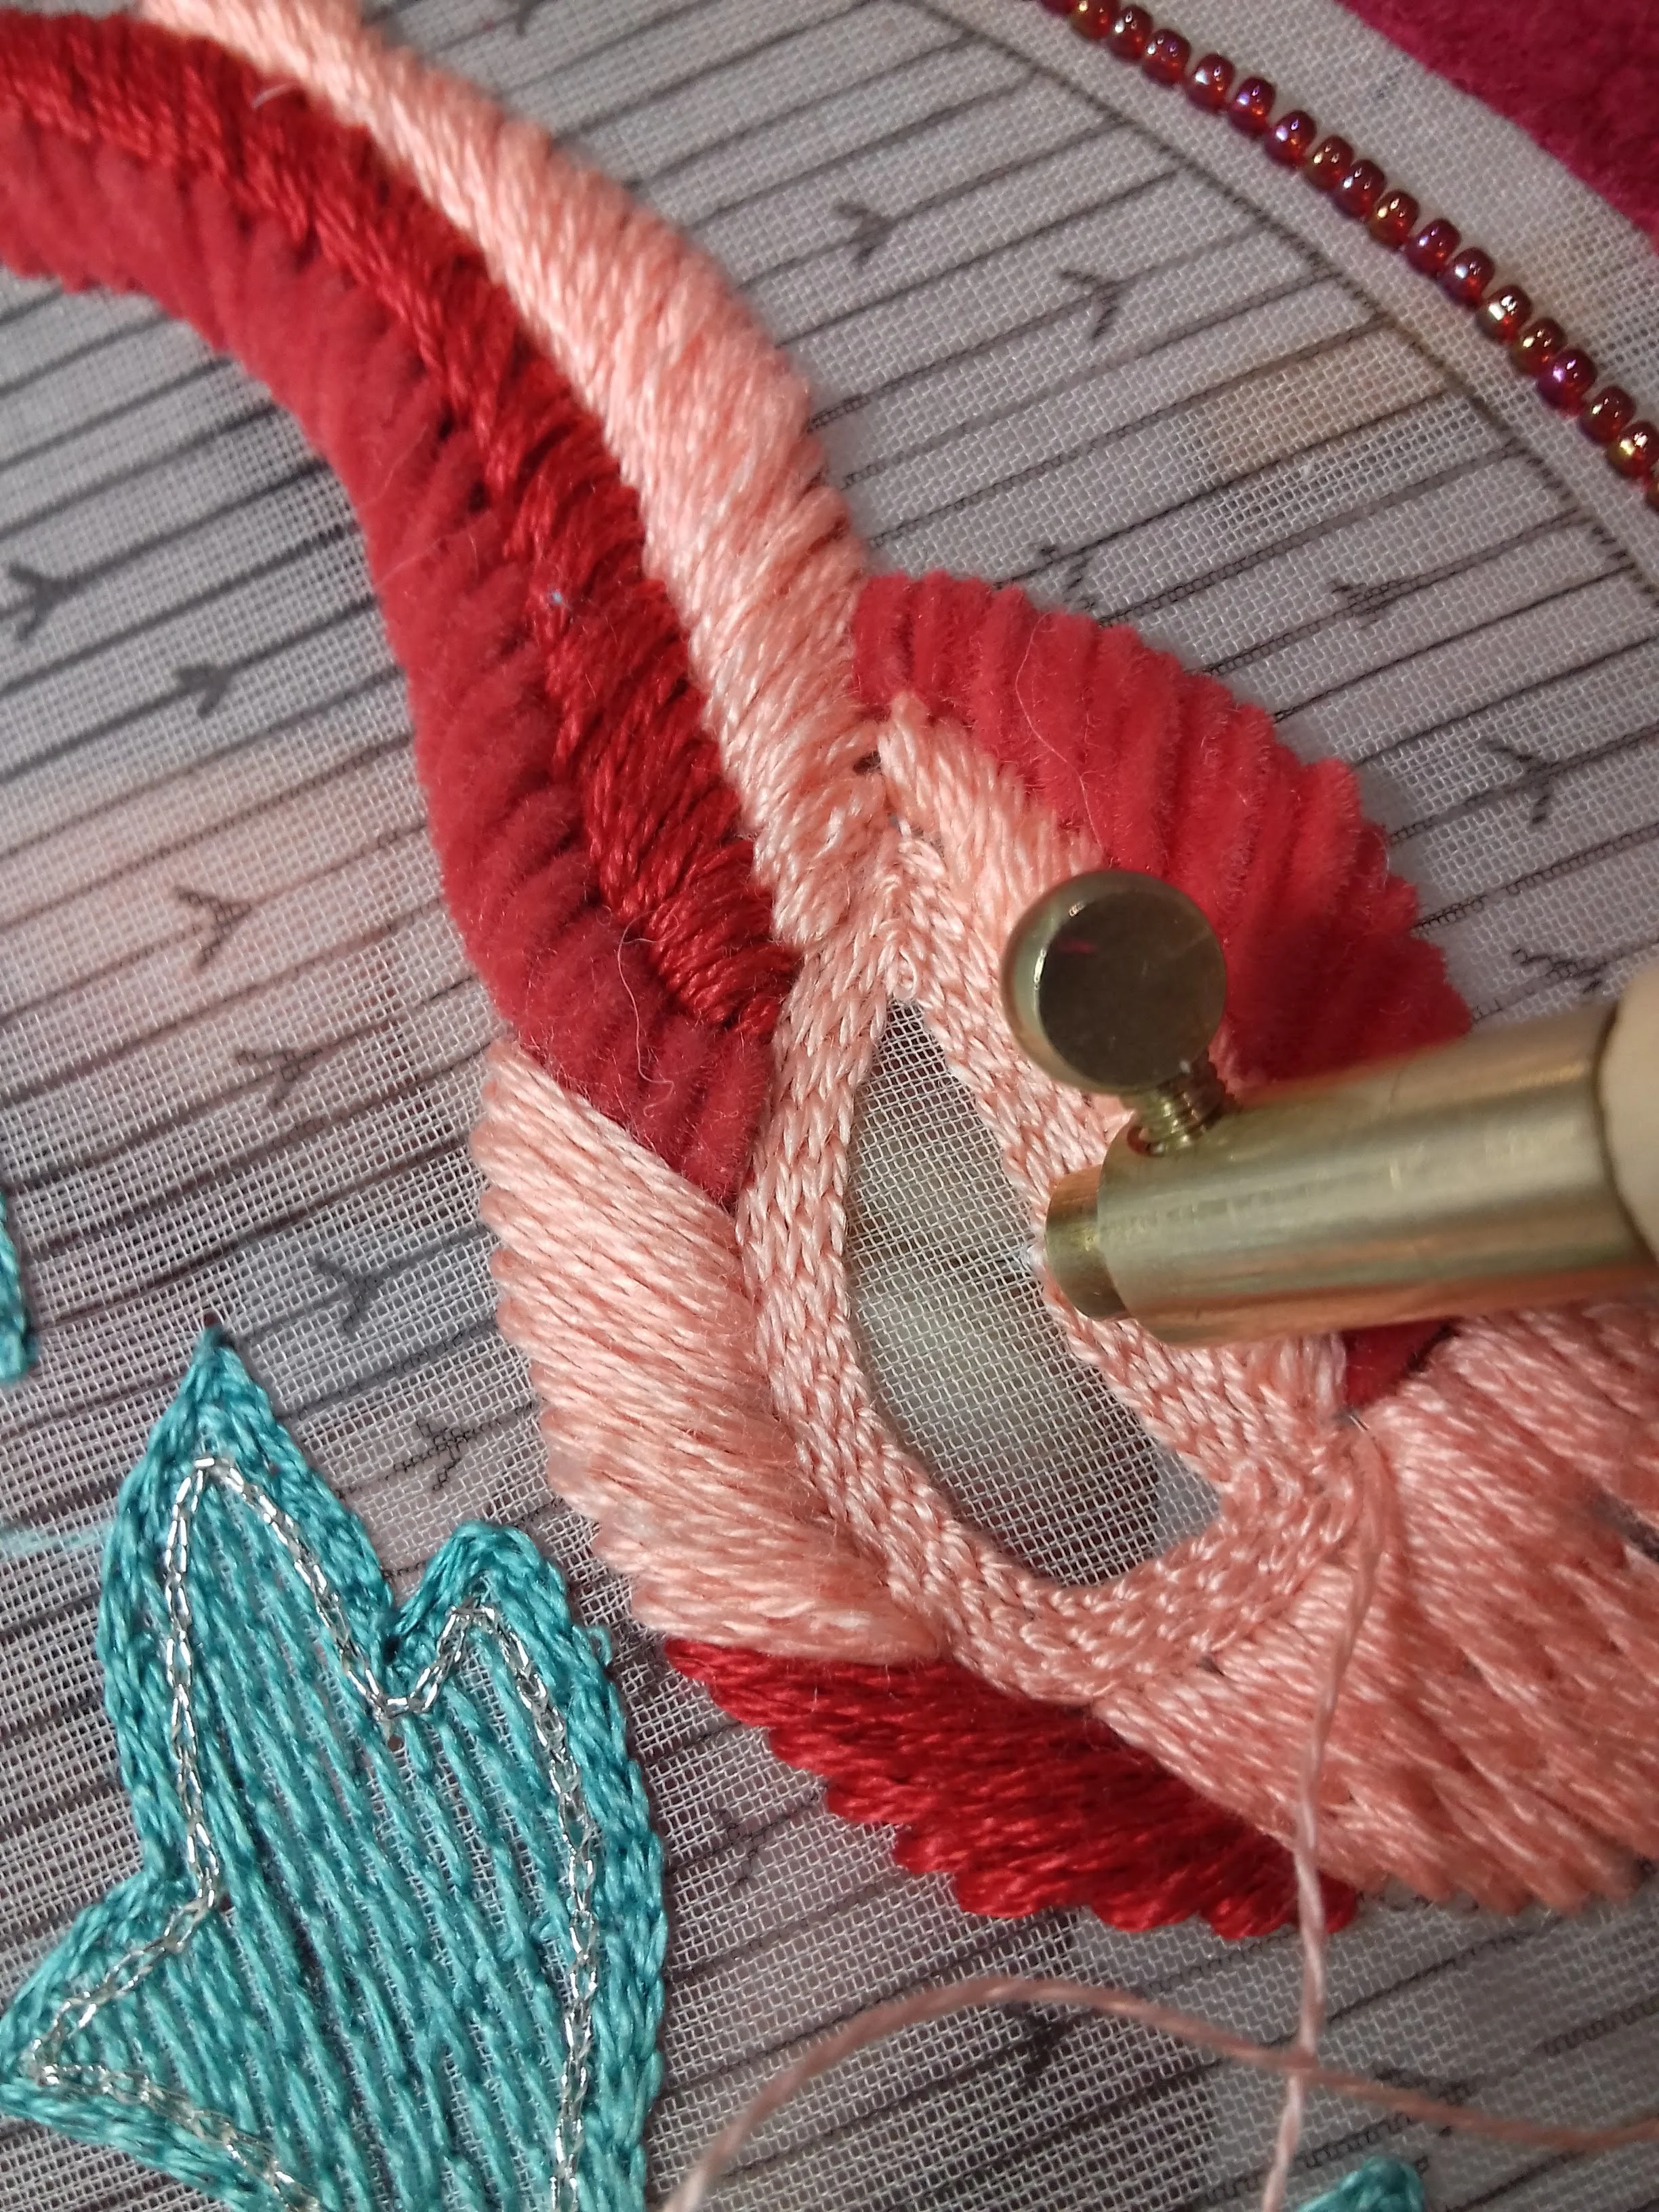
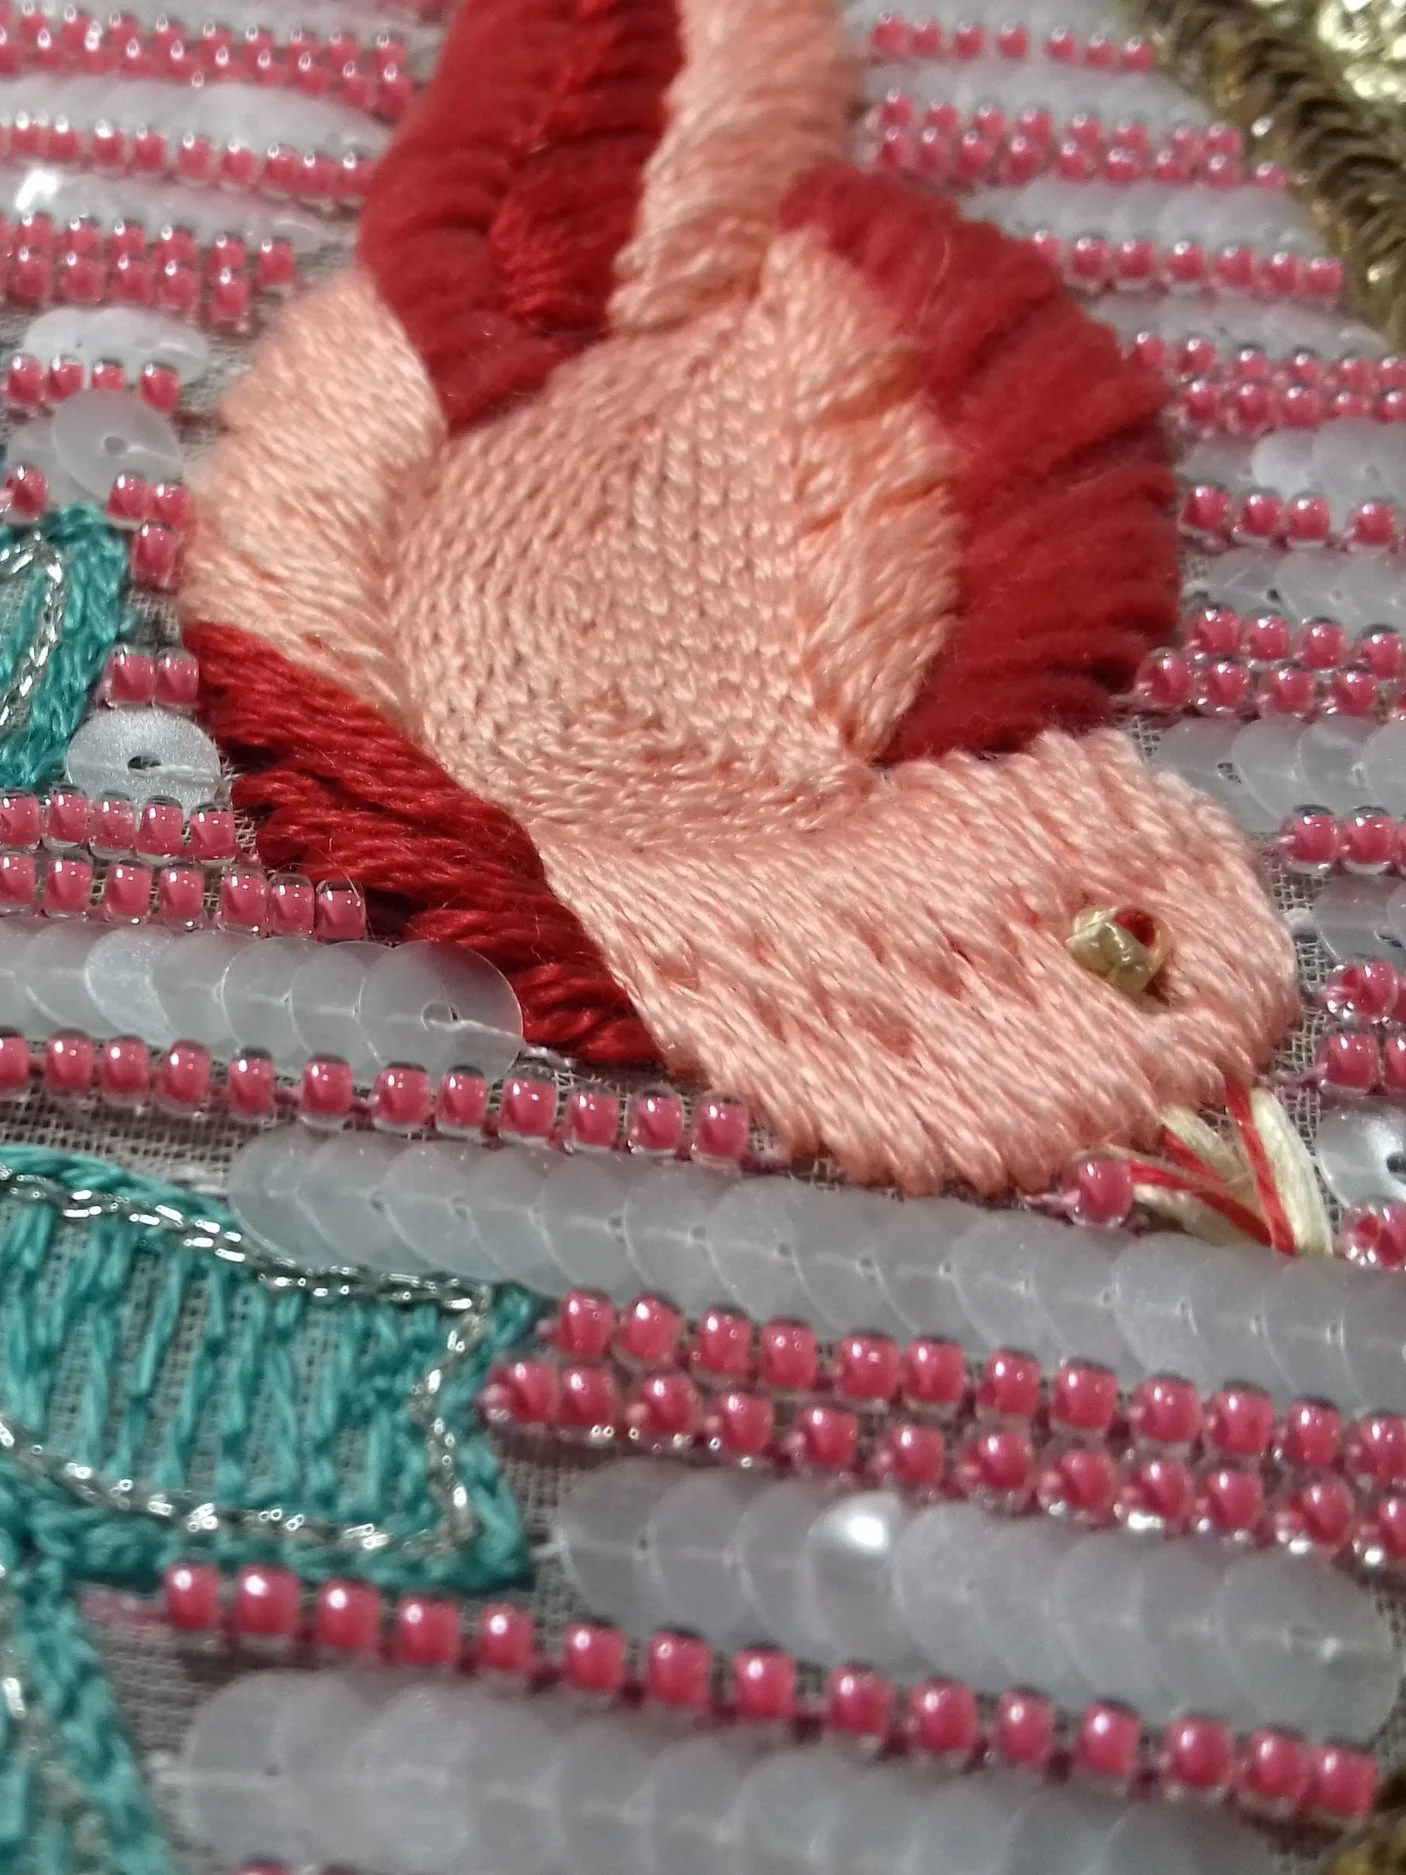
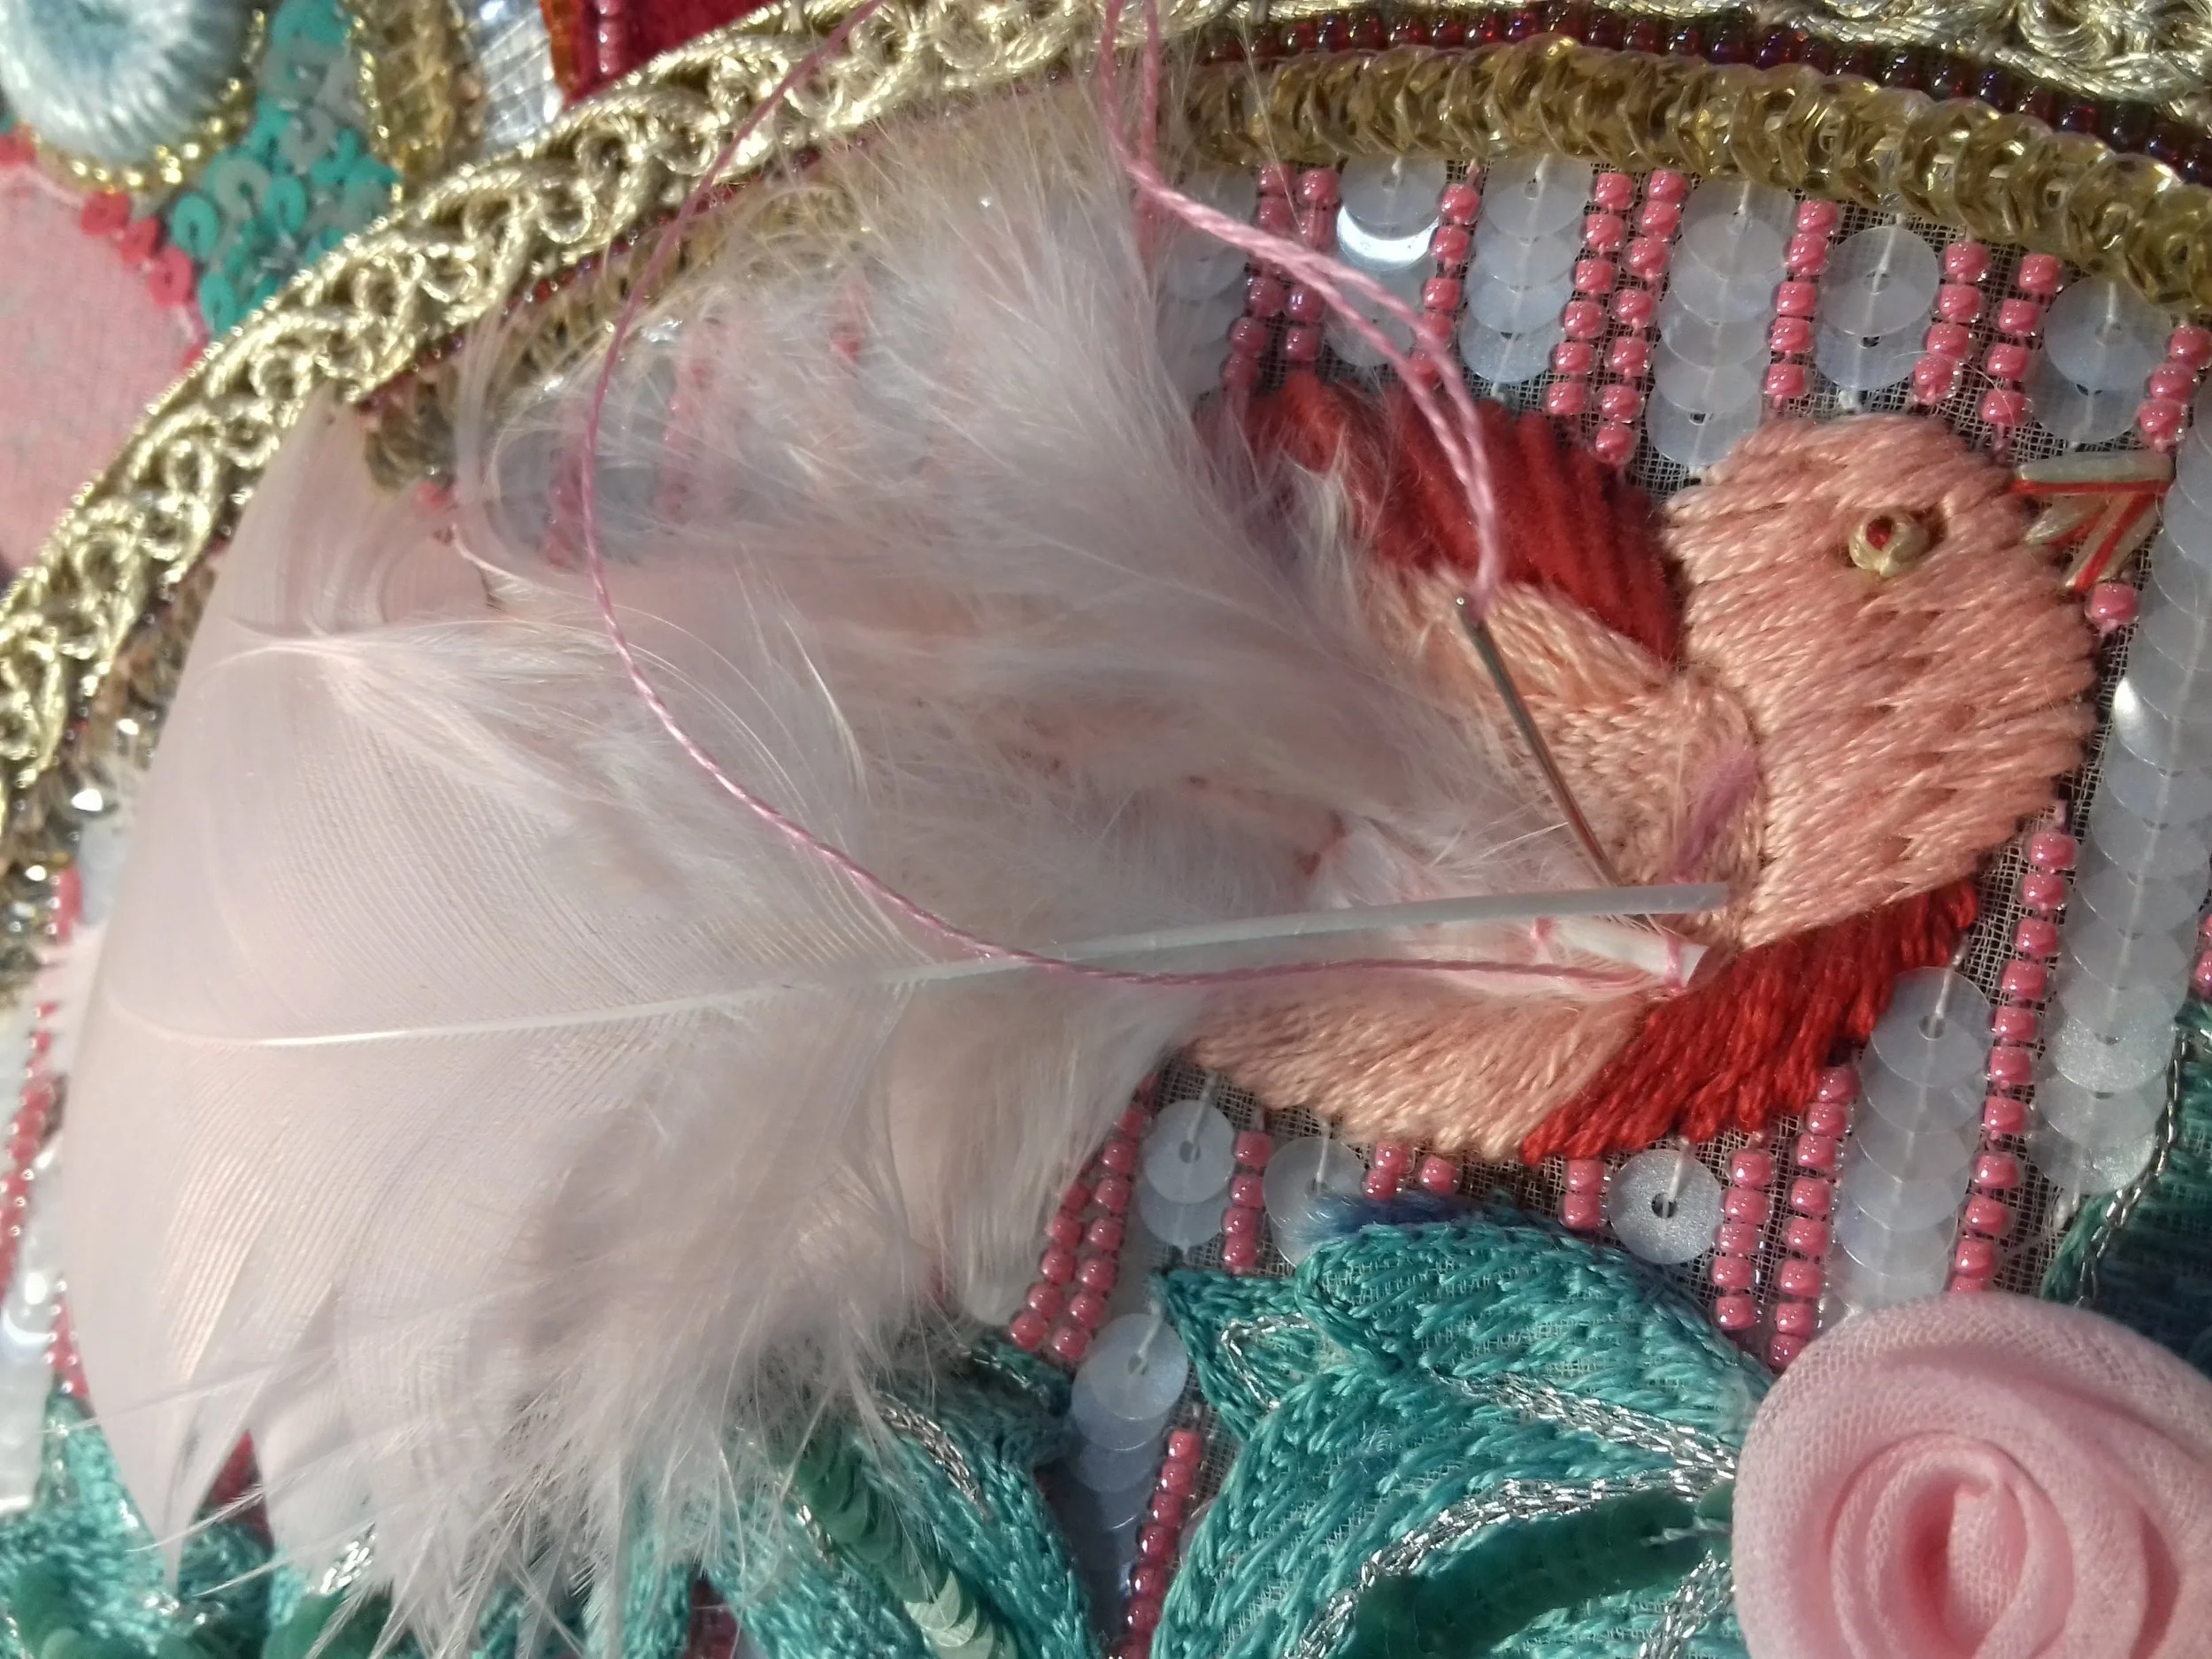
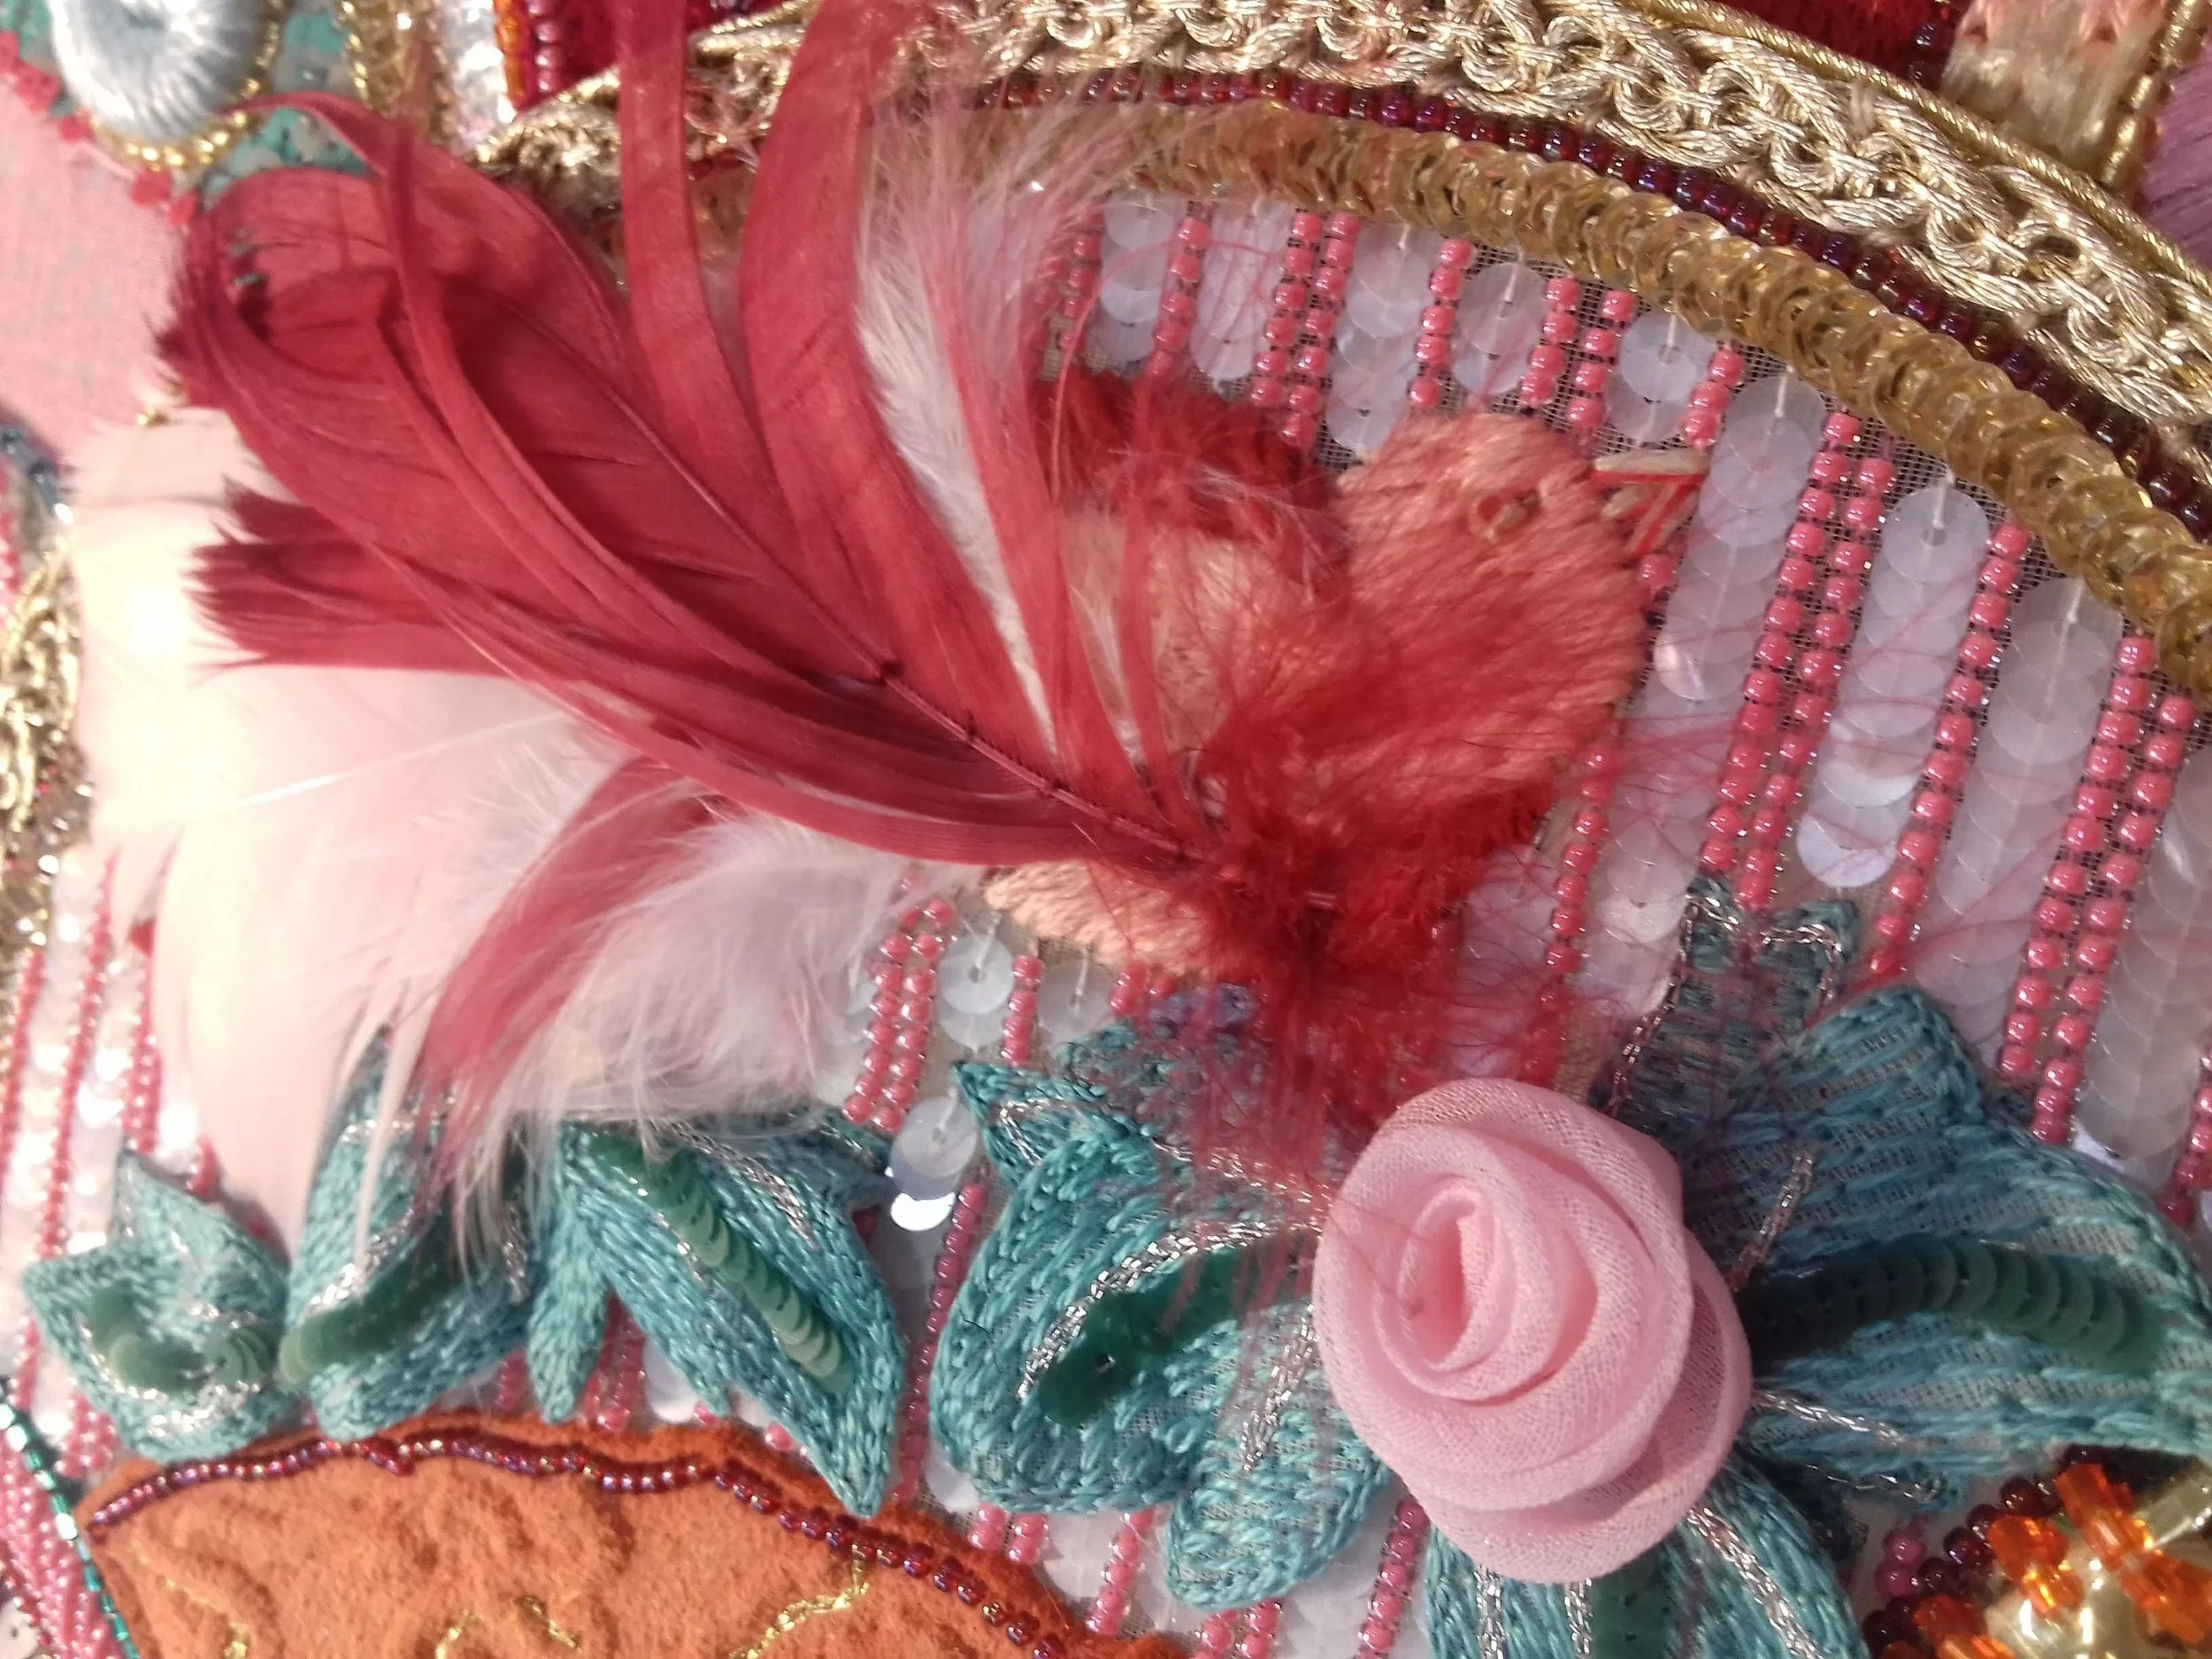
The cotton embroidery floss was in tones of salmon and coral and this was applied first using a diagonal satin stitch. I thought given my previous struggles with straight satin stitch the diagonal would prove to be my forté but I was mistaken. The teacher was mystified at how I struggled with such a basic stitch. On closer inspection she said that I was not creating enough tension with my stitches and this was making the threads unravel and so harder for me to follow the direction of the lines. Once the cotton sections were filled the chenille was added, it is a lovely material to work with and gave a sumptuous texture. A filling chain stitch was used for the body, working on the surface in concentric lines. The little head was long and short stitches in salmon embroidery floss and then the beak and eye were added in light yellow raffia. A rather strange red pupil was added to the eye!
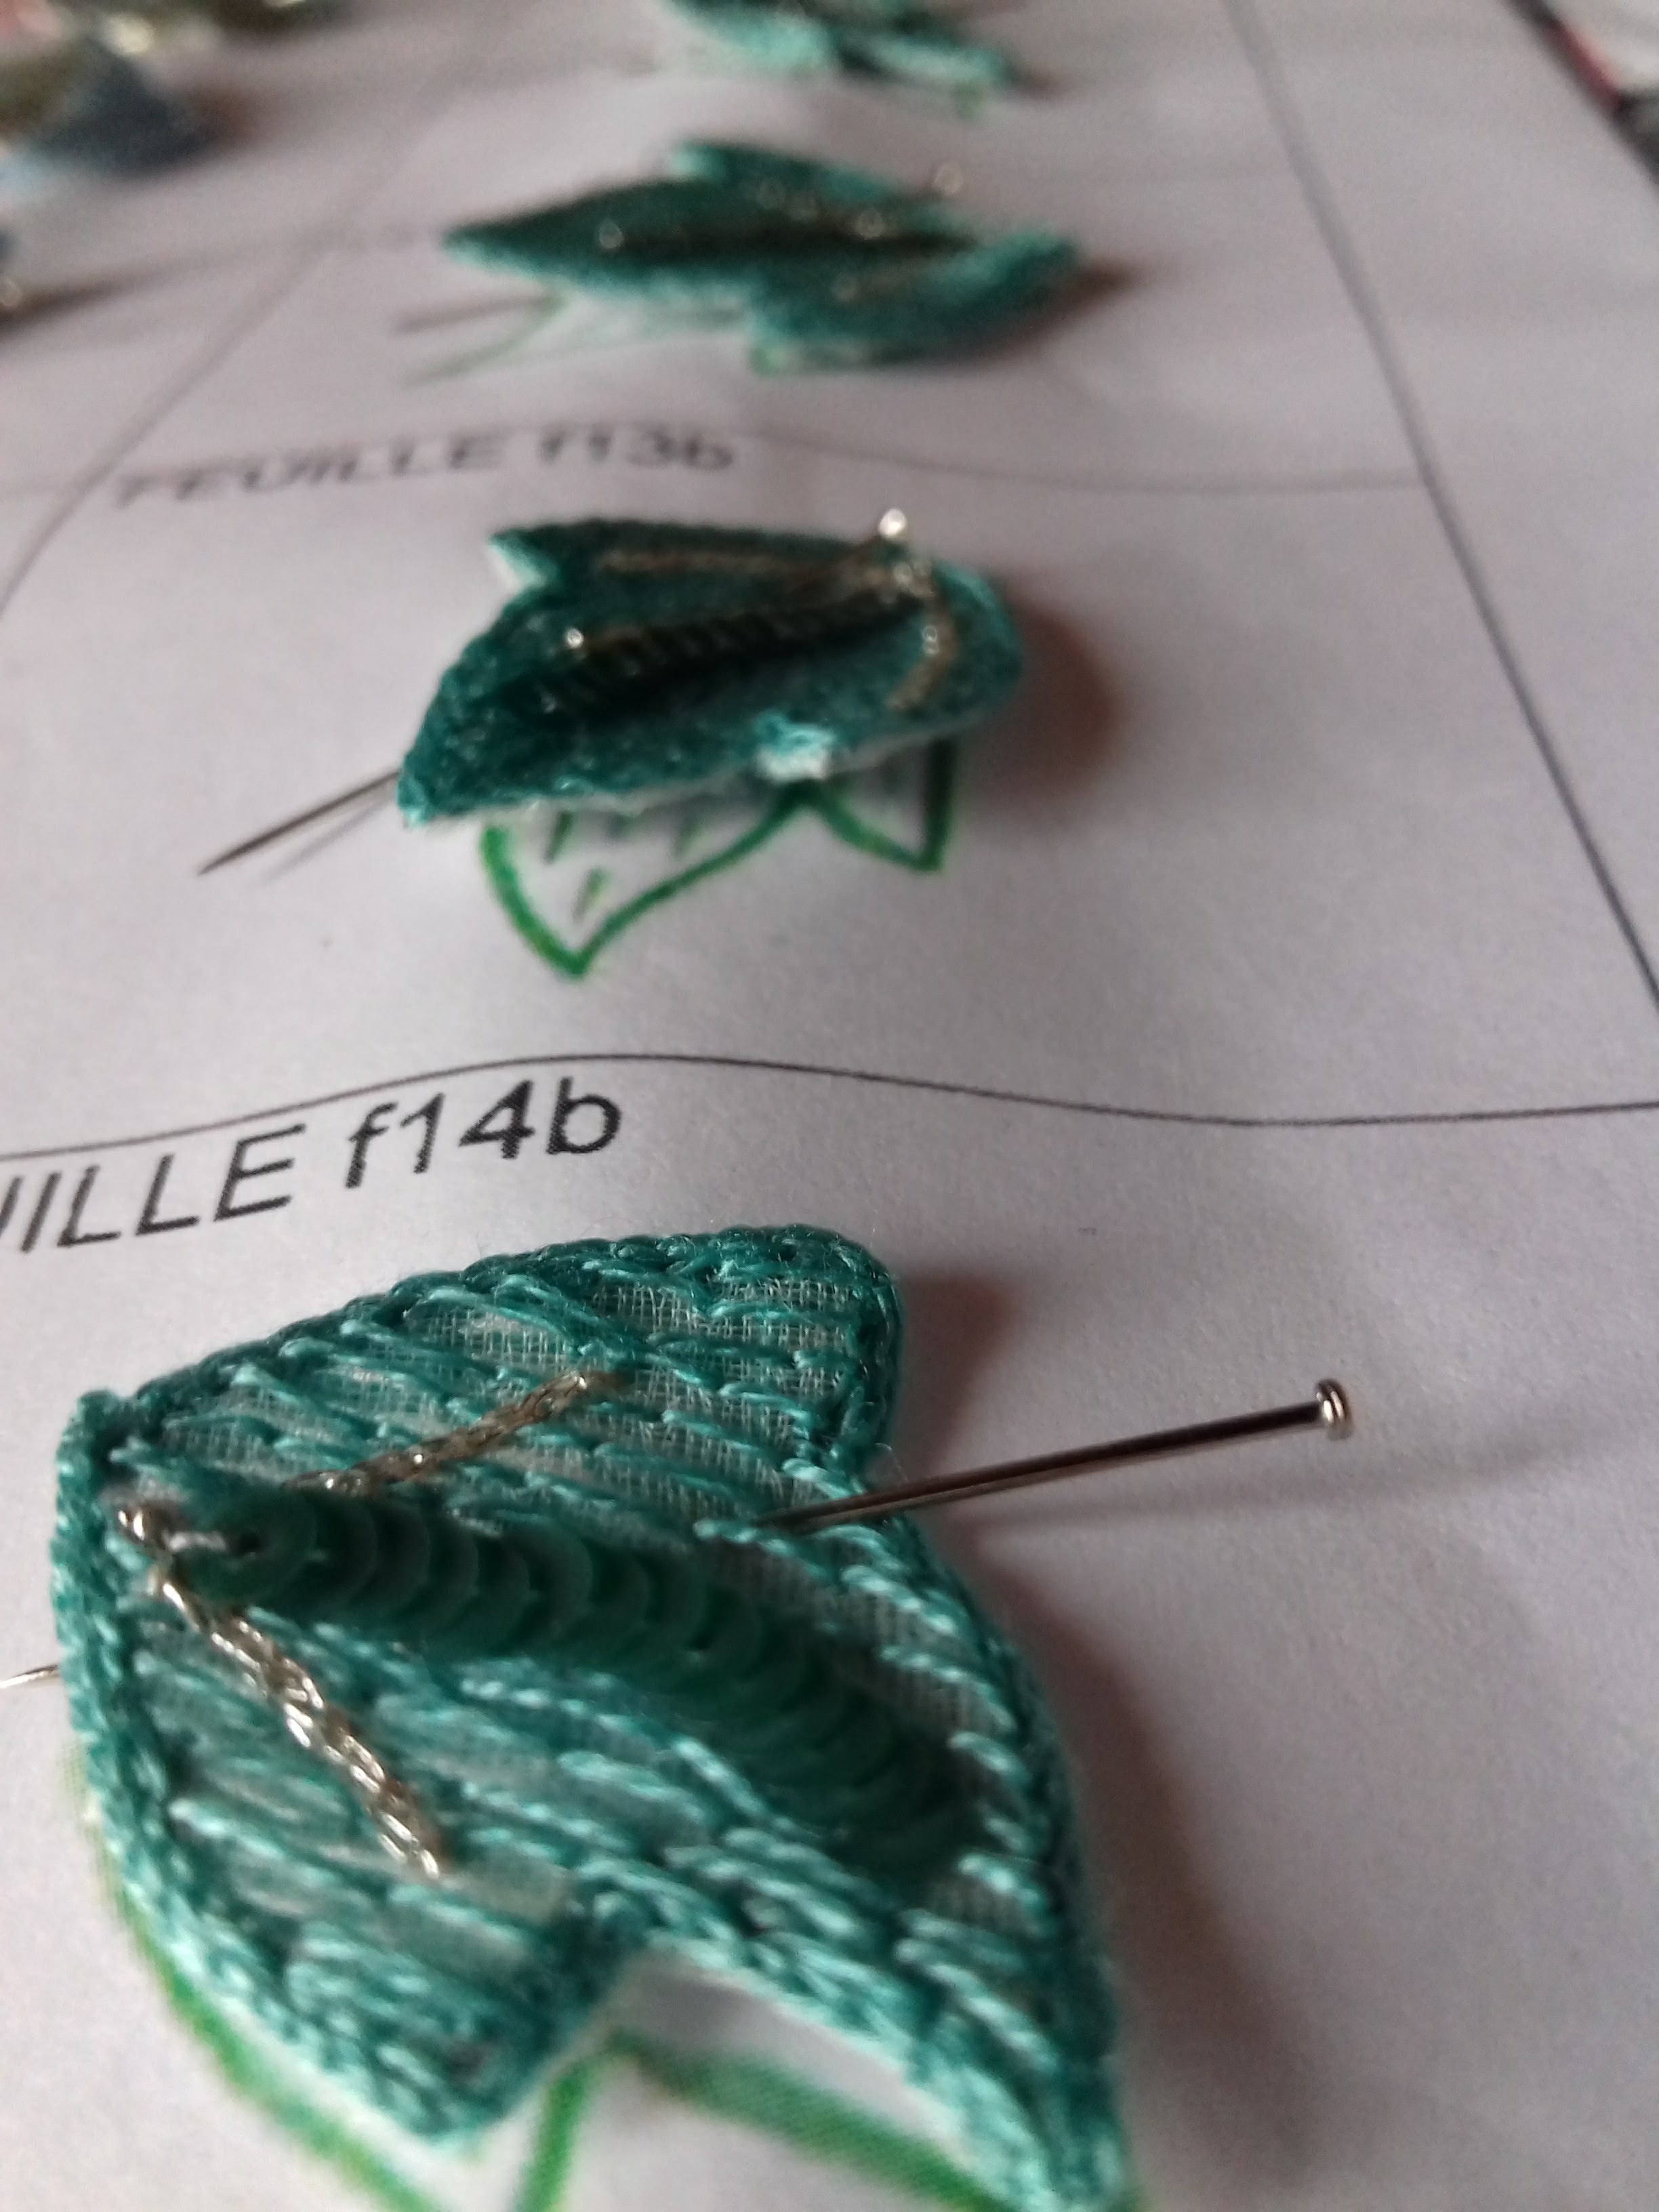
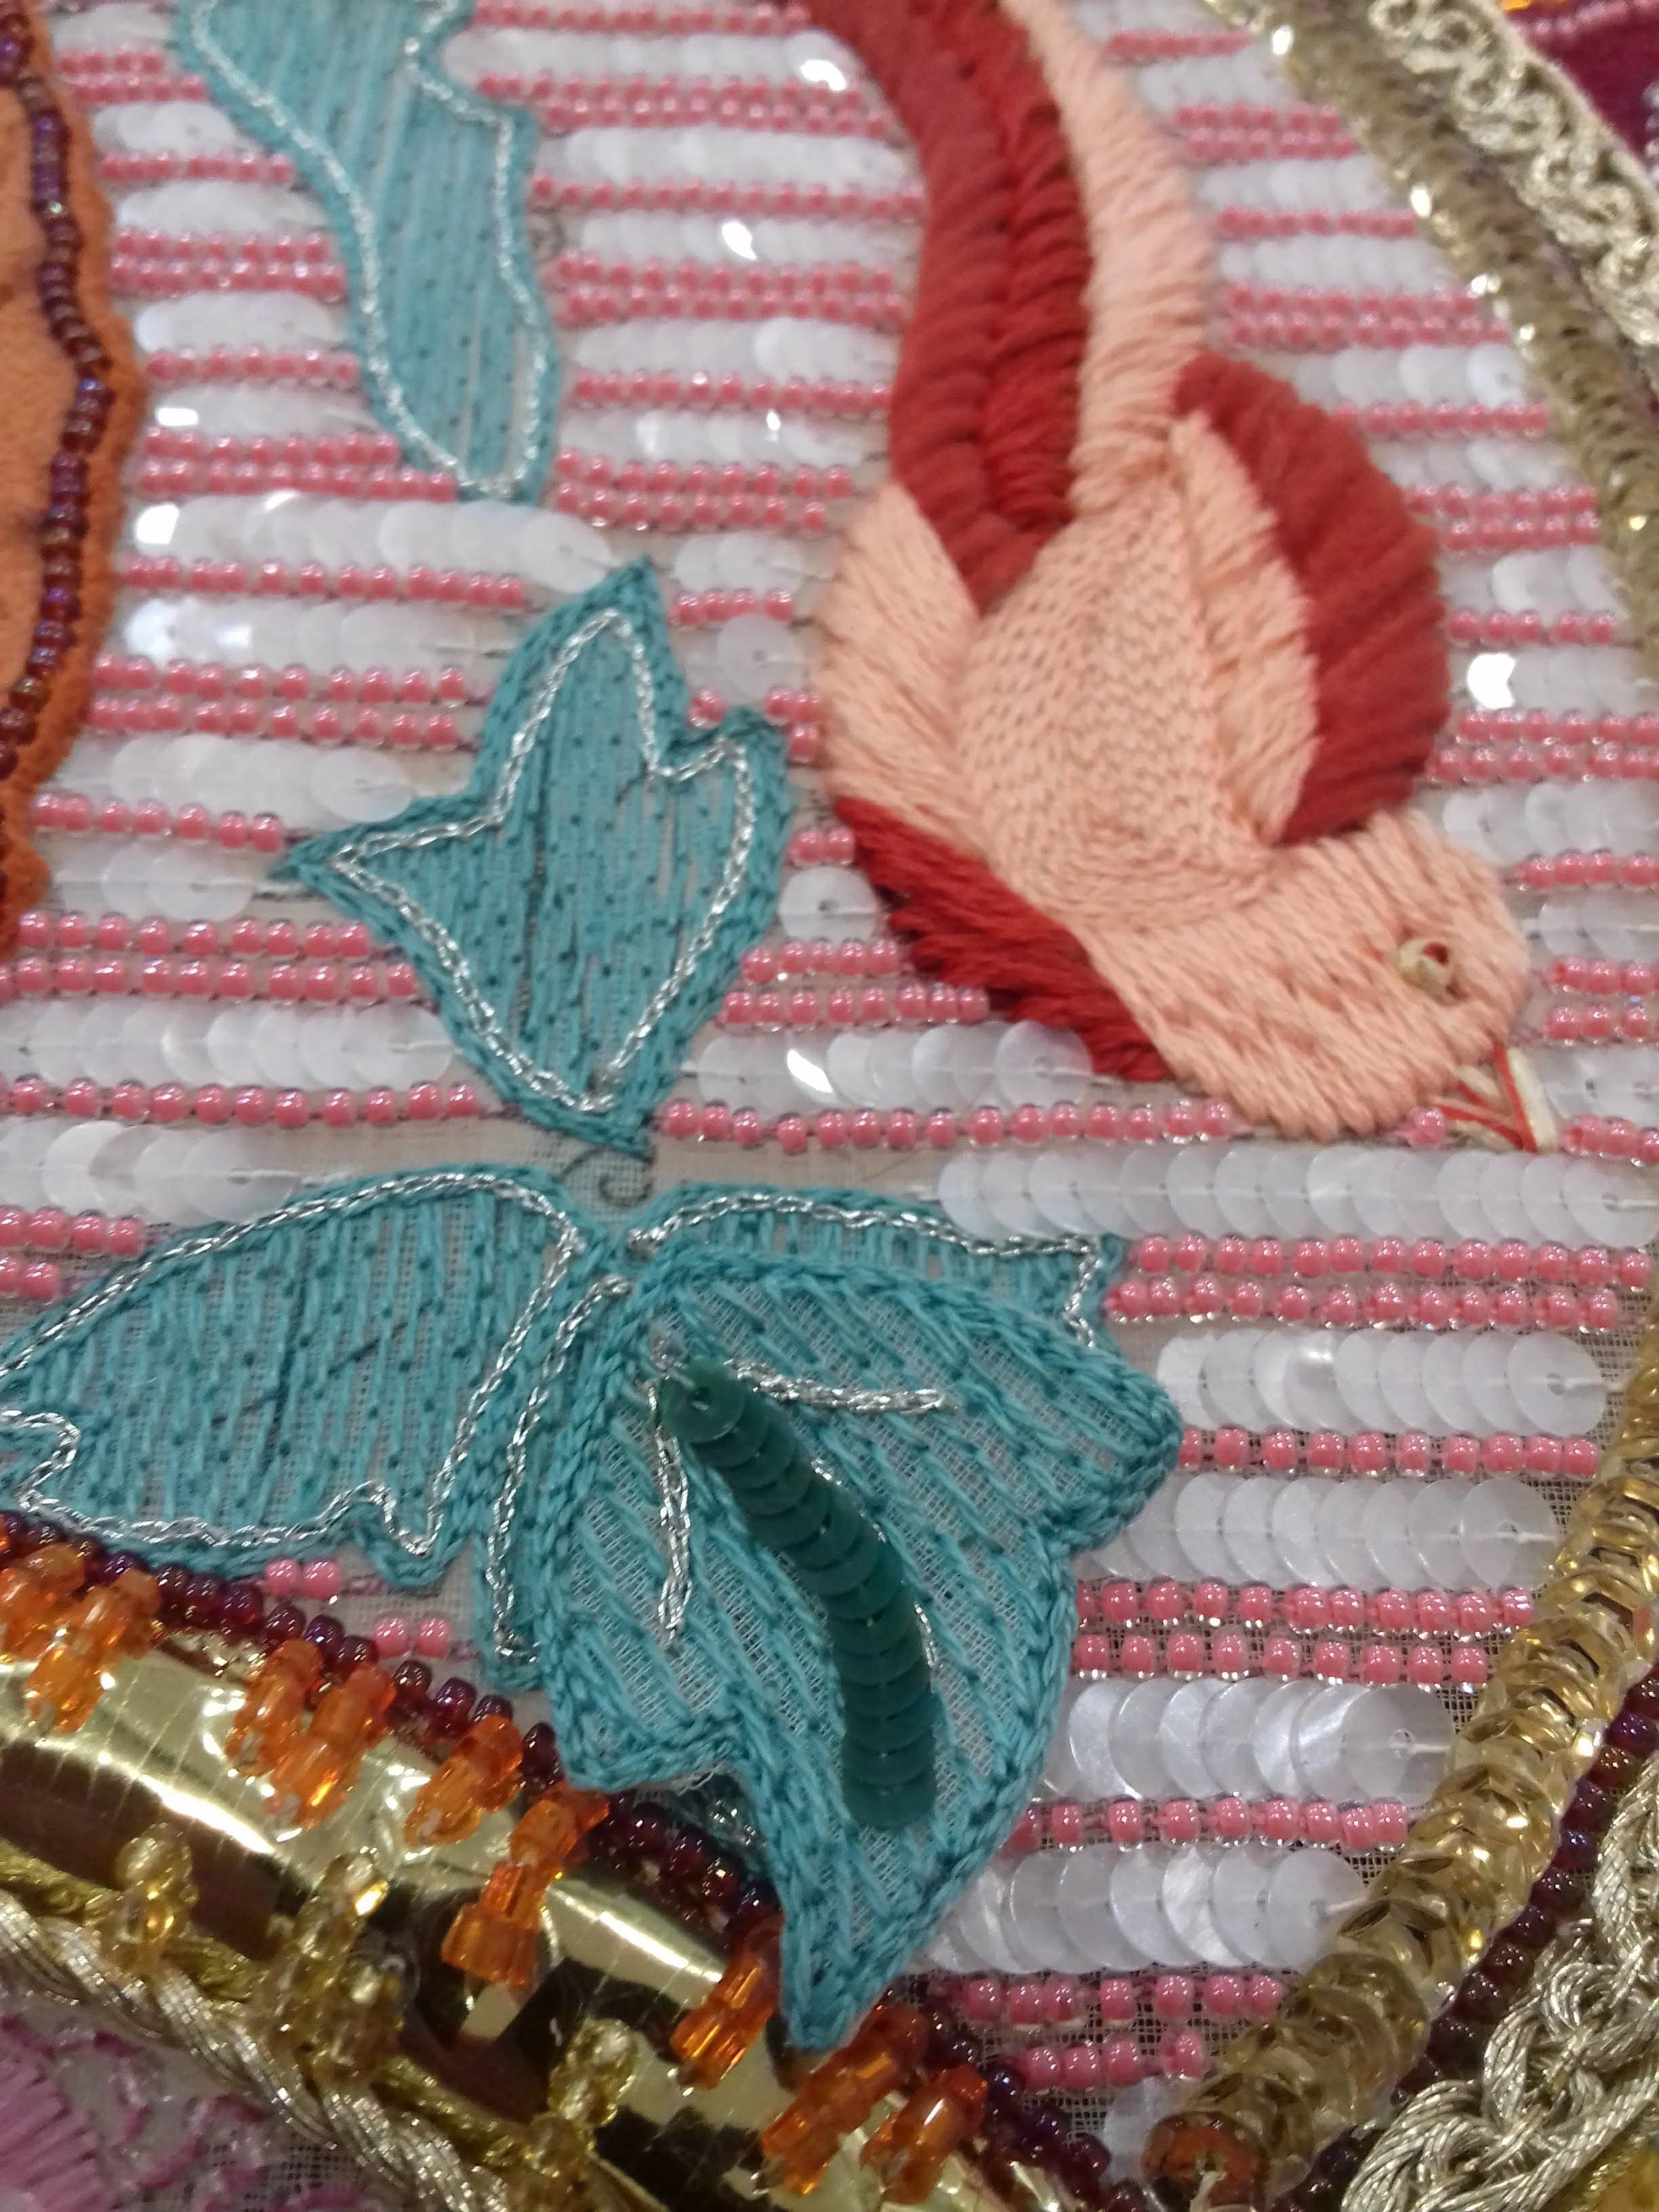
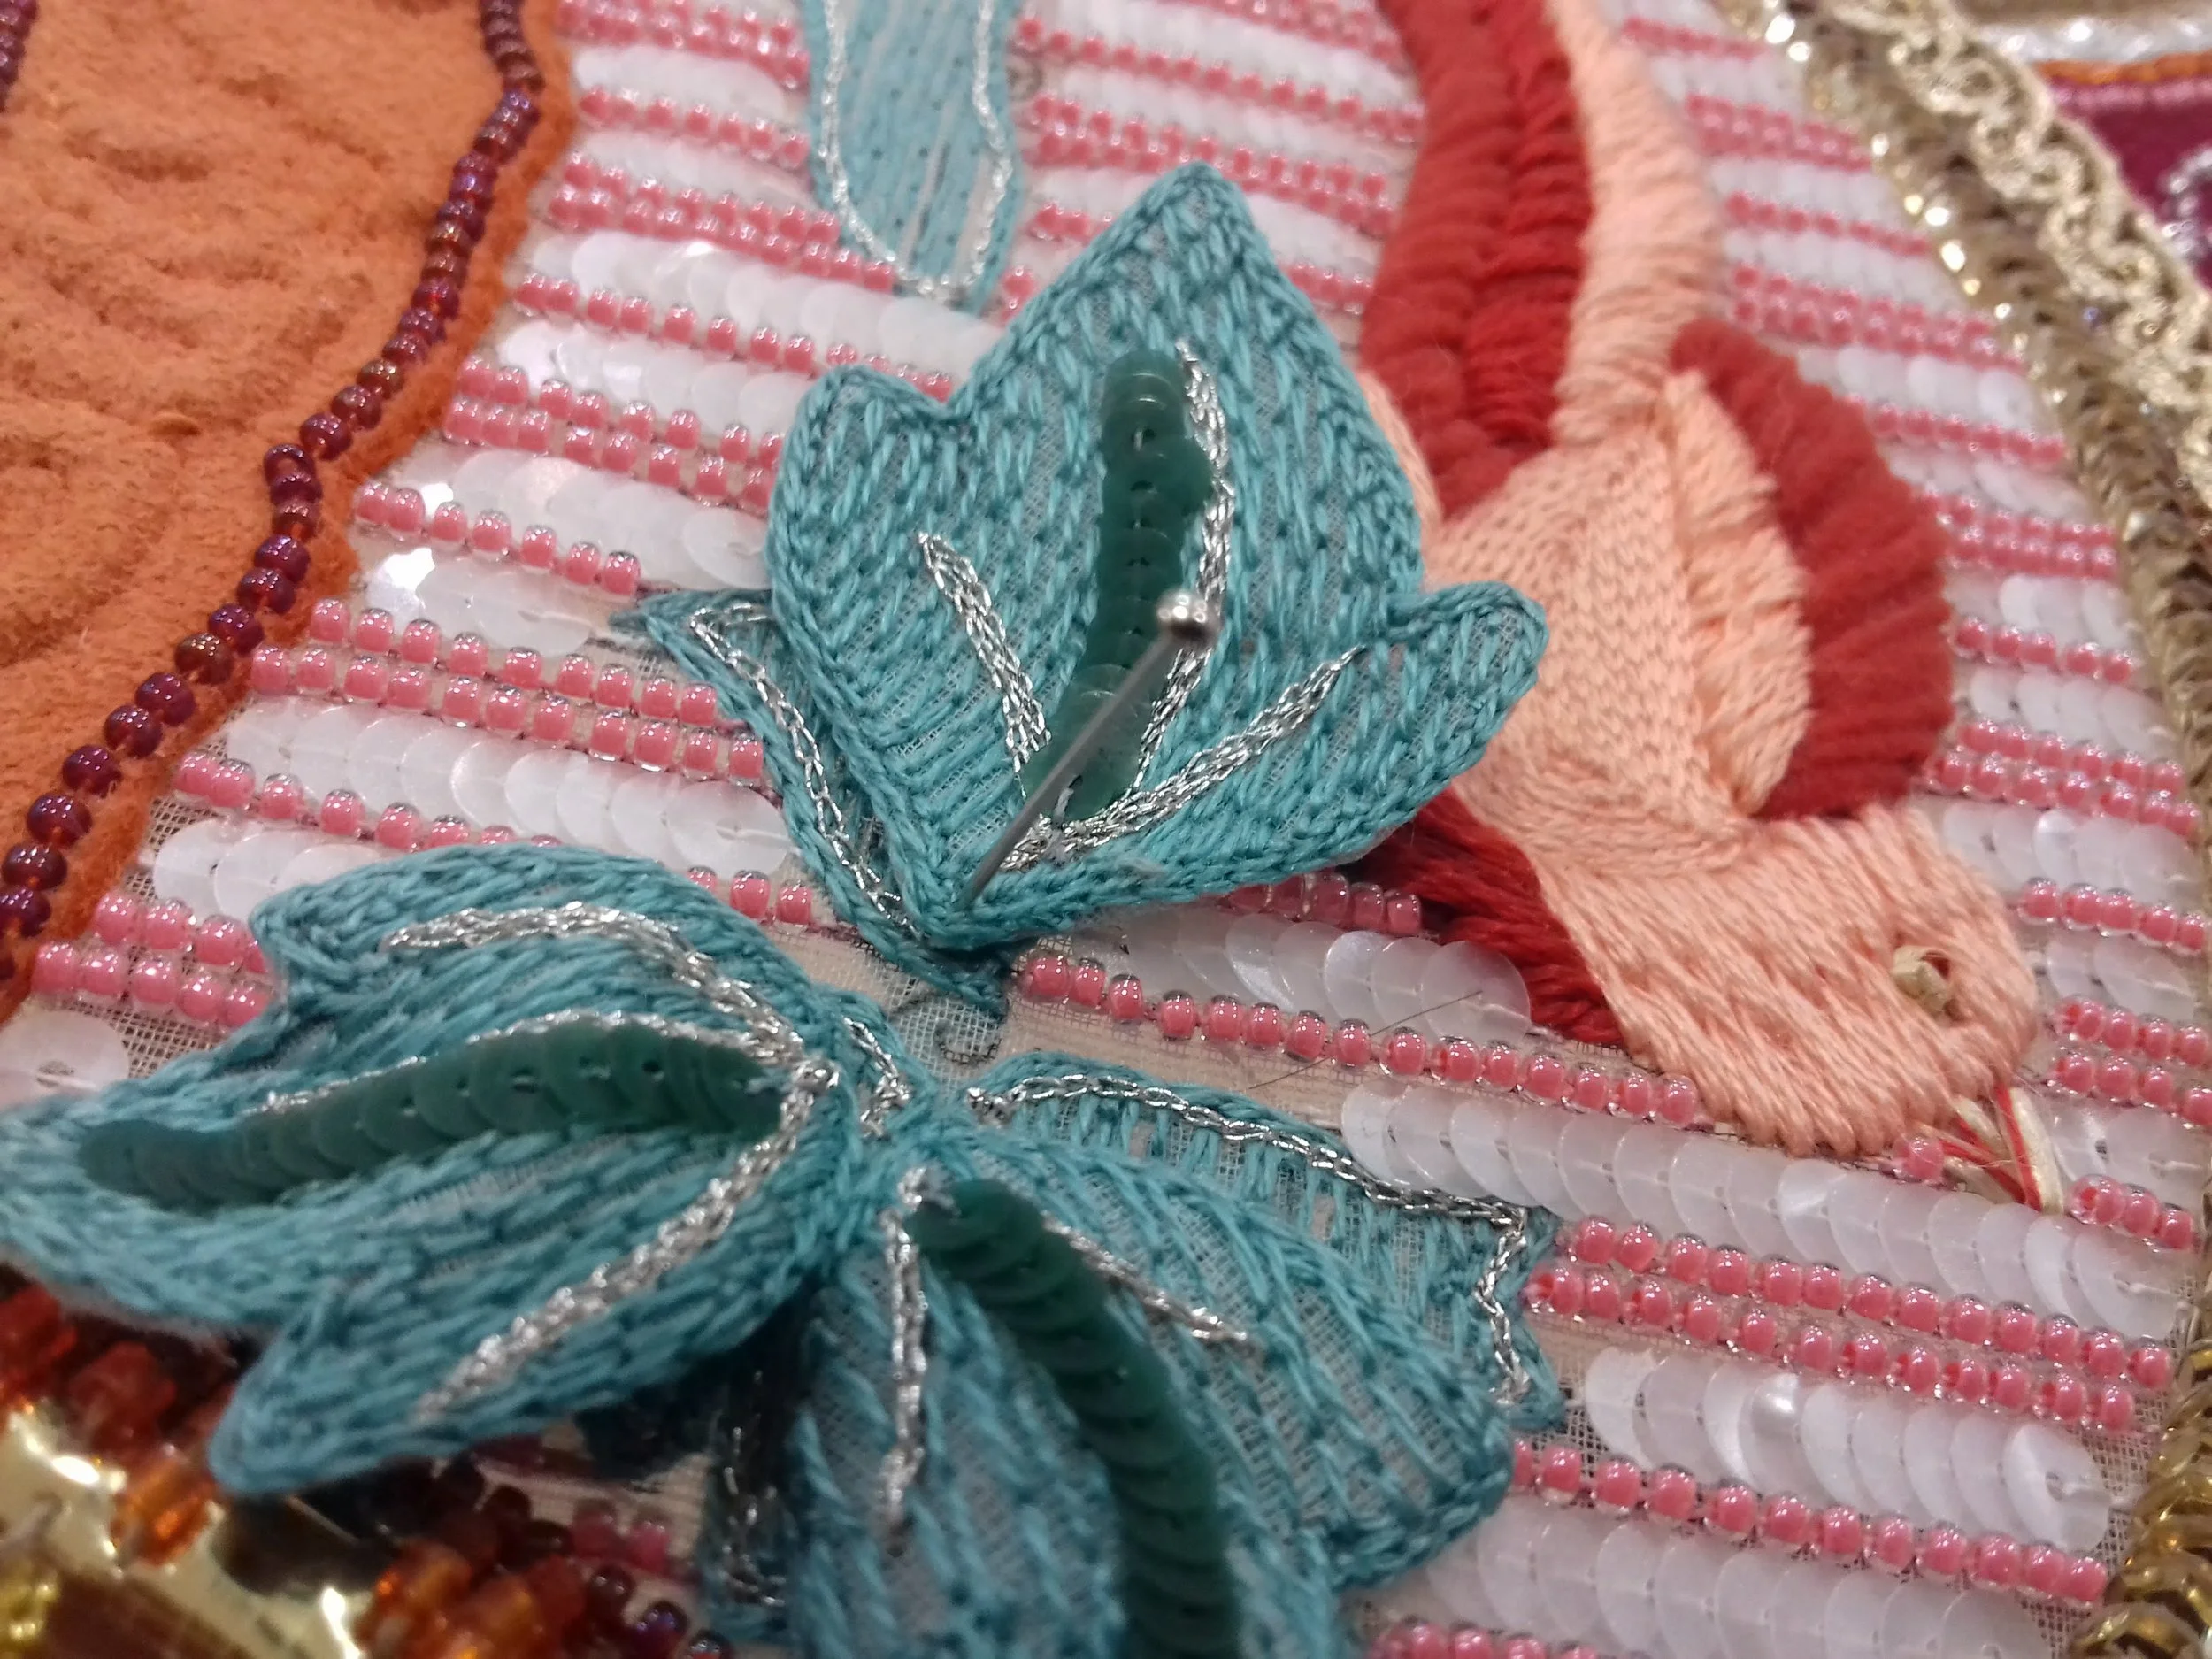
The background was created with lines of nacré sequins applied in a river that were accentuated by lines of tiny pink seed pearls. An individual strand of cotton embroidery floss was used with a filling chain stitch applied on the reverse for the leaves surrounding the bird. A decorative outline of chain stitch in embroidery floss and silver metallic thread was applied on the surface. Six additional leaves were created on the side of the frame and once the initial stages of the background, bird and leaves were completed it was time to remove the leaves from the frame. They were prepared using the same technique as before; first by steaming with an iron, then applying adhesive paper, they were cut out from the frame leaving a 7mm border around each leaf, the border was then cut and ironed onto the reverse side. The pattern indicated where each leaf was to be placed and pins were used to created tension and form. Each leaf was stitched in place at strategic points to create folds, dimples and flicks at the tips.
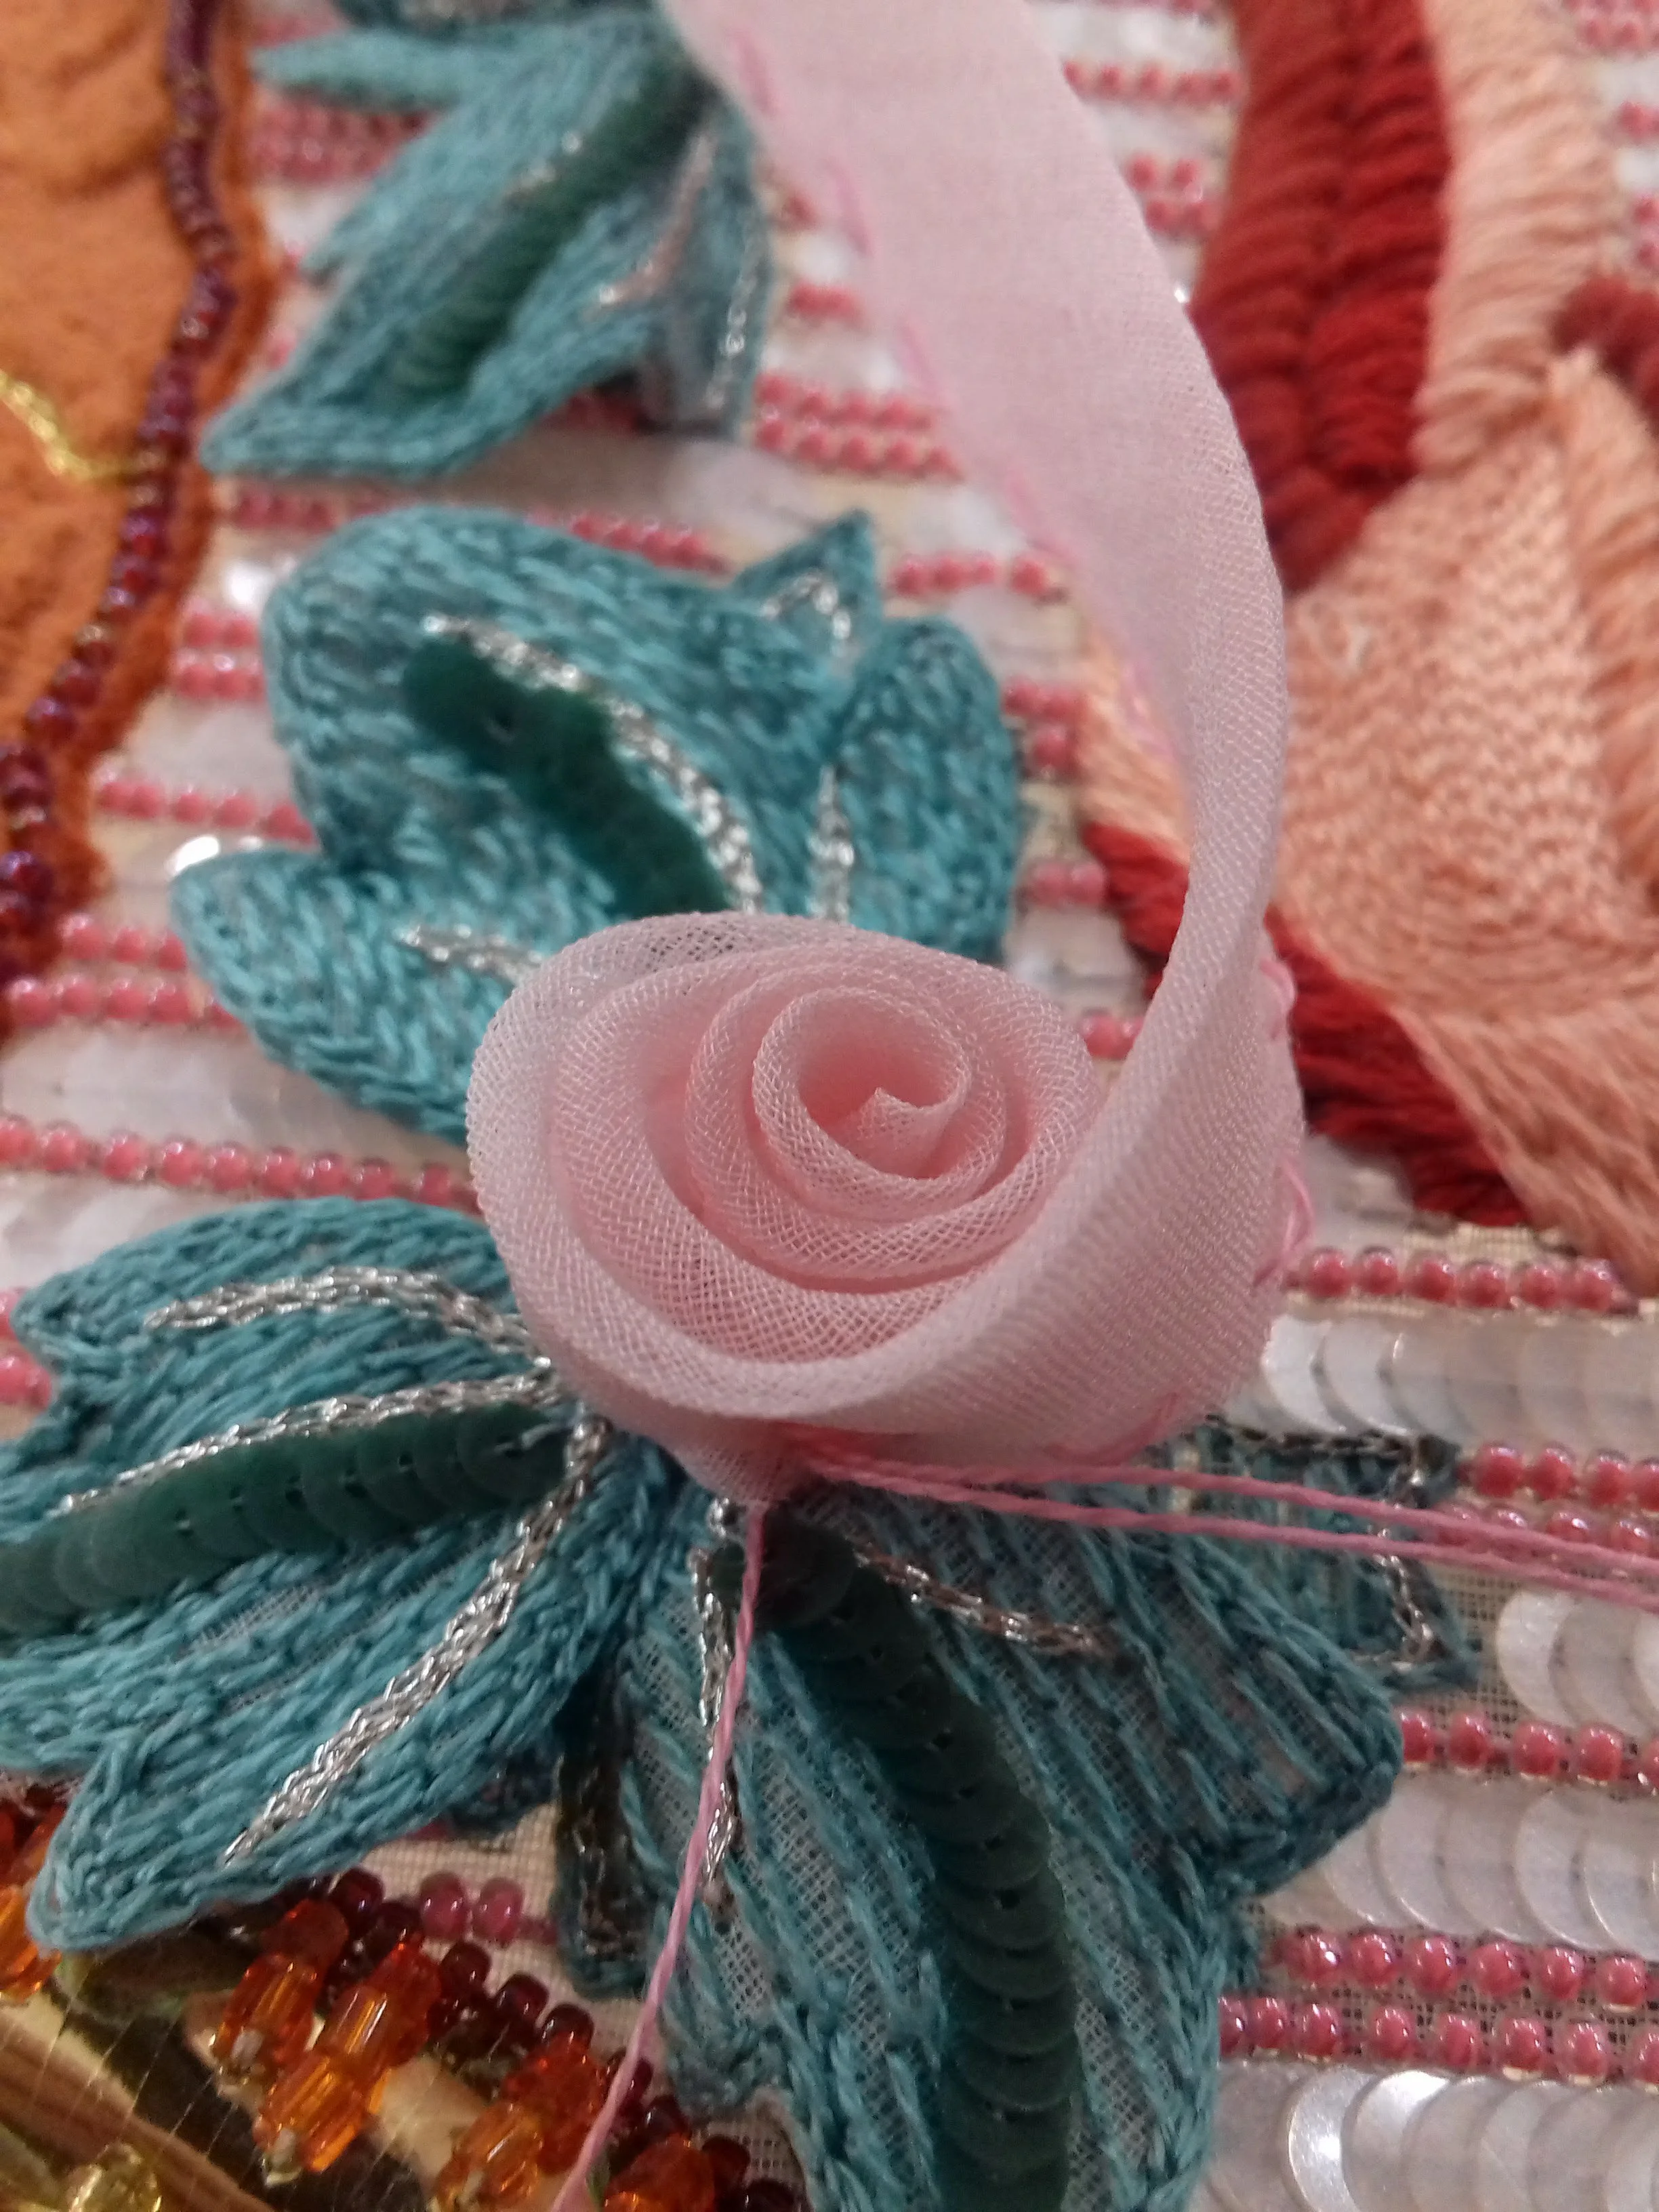
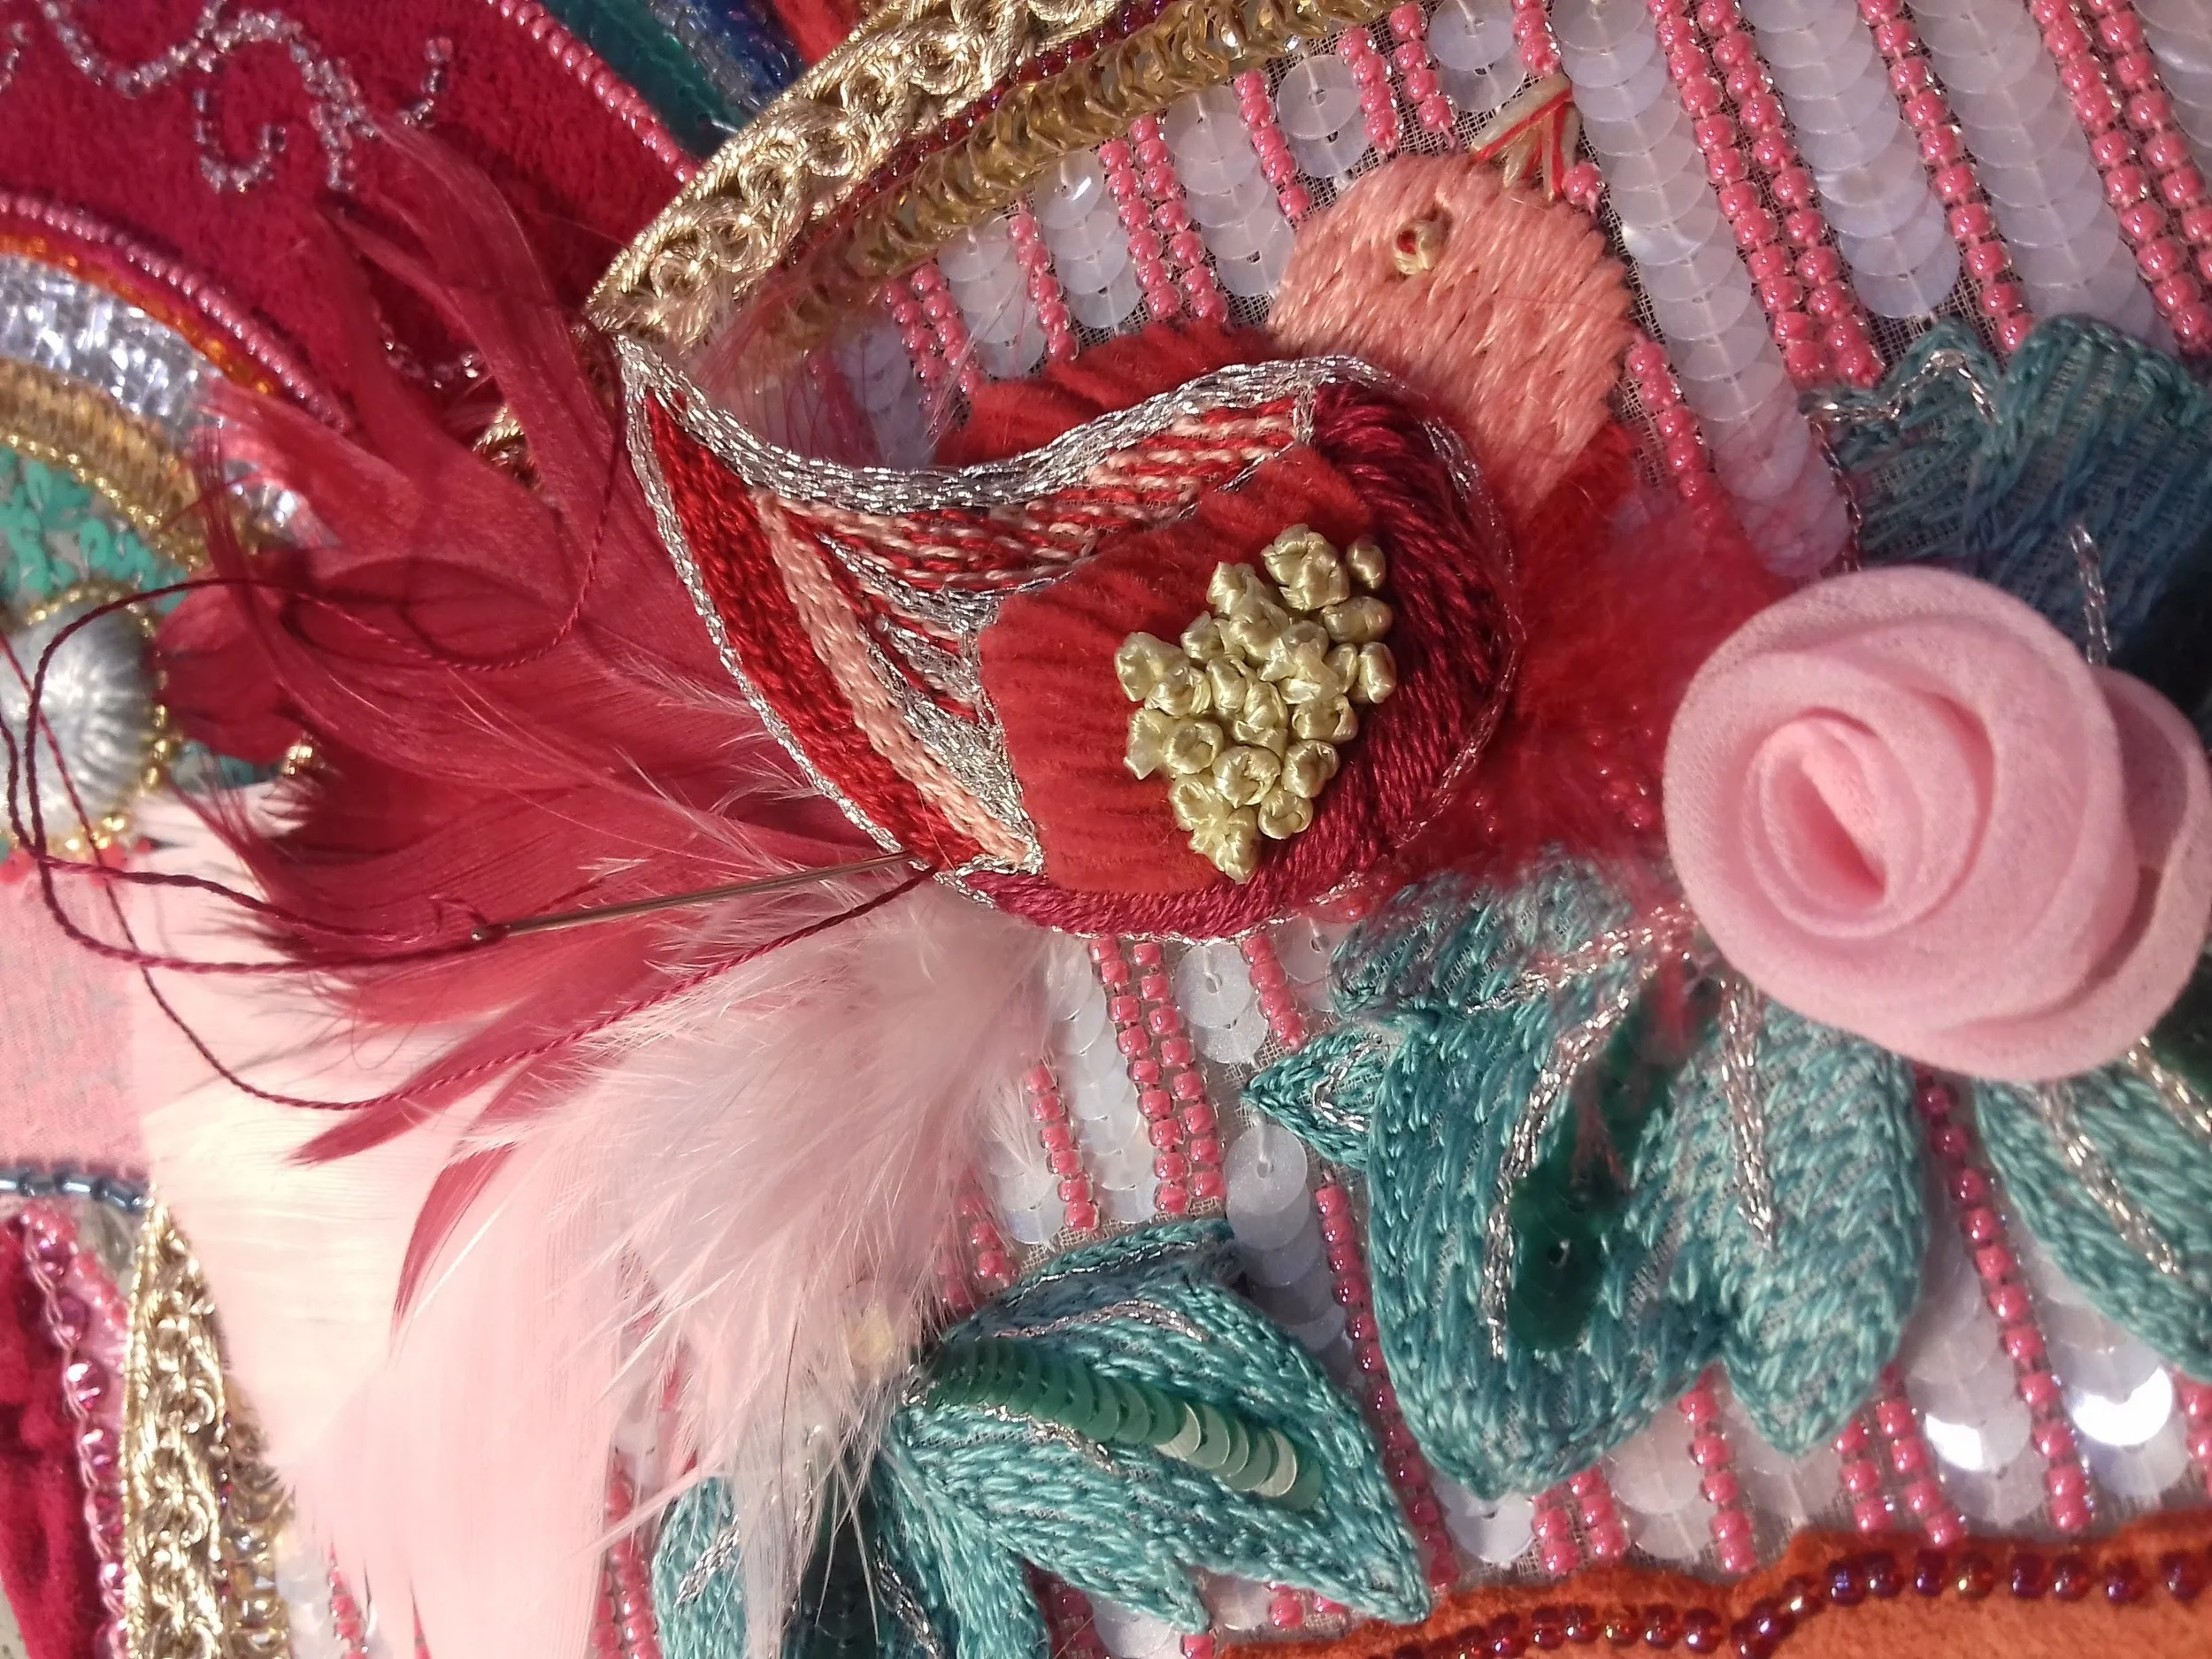
A delicate pink rose was made using mousseline that was folded on the bias and then cut into a double strip that tapered towards the end. The two sides of the fabric were basted together. The tapered end was was stitched in place first, creating an upright centre and then the strip was coiled around this and coaxed into position with tiny stitches to hold it in place. Swarovski jewels were applied at this stage to add a bit of sparkle!
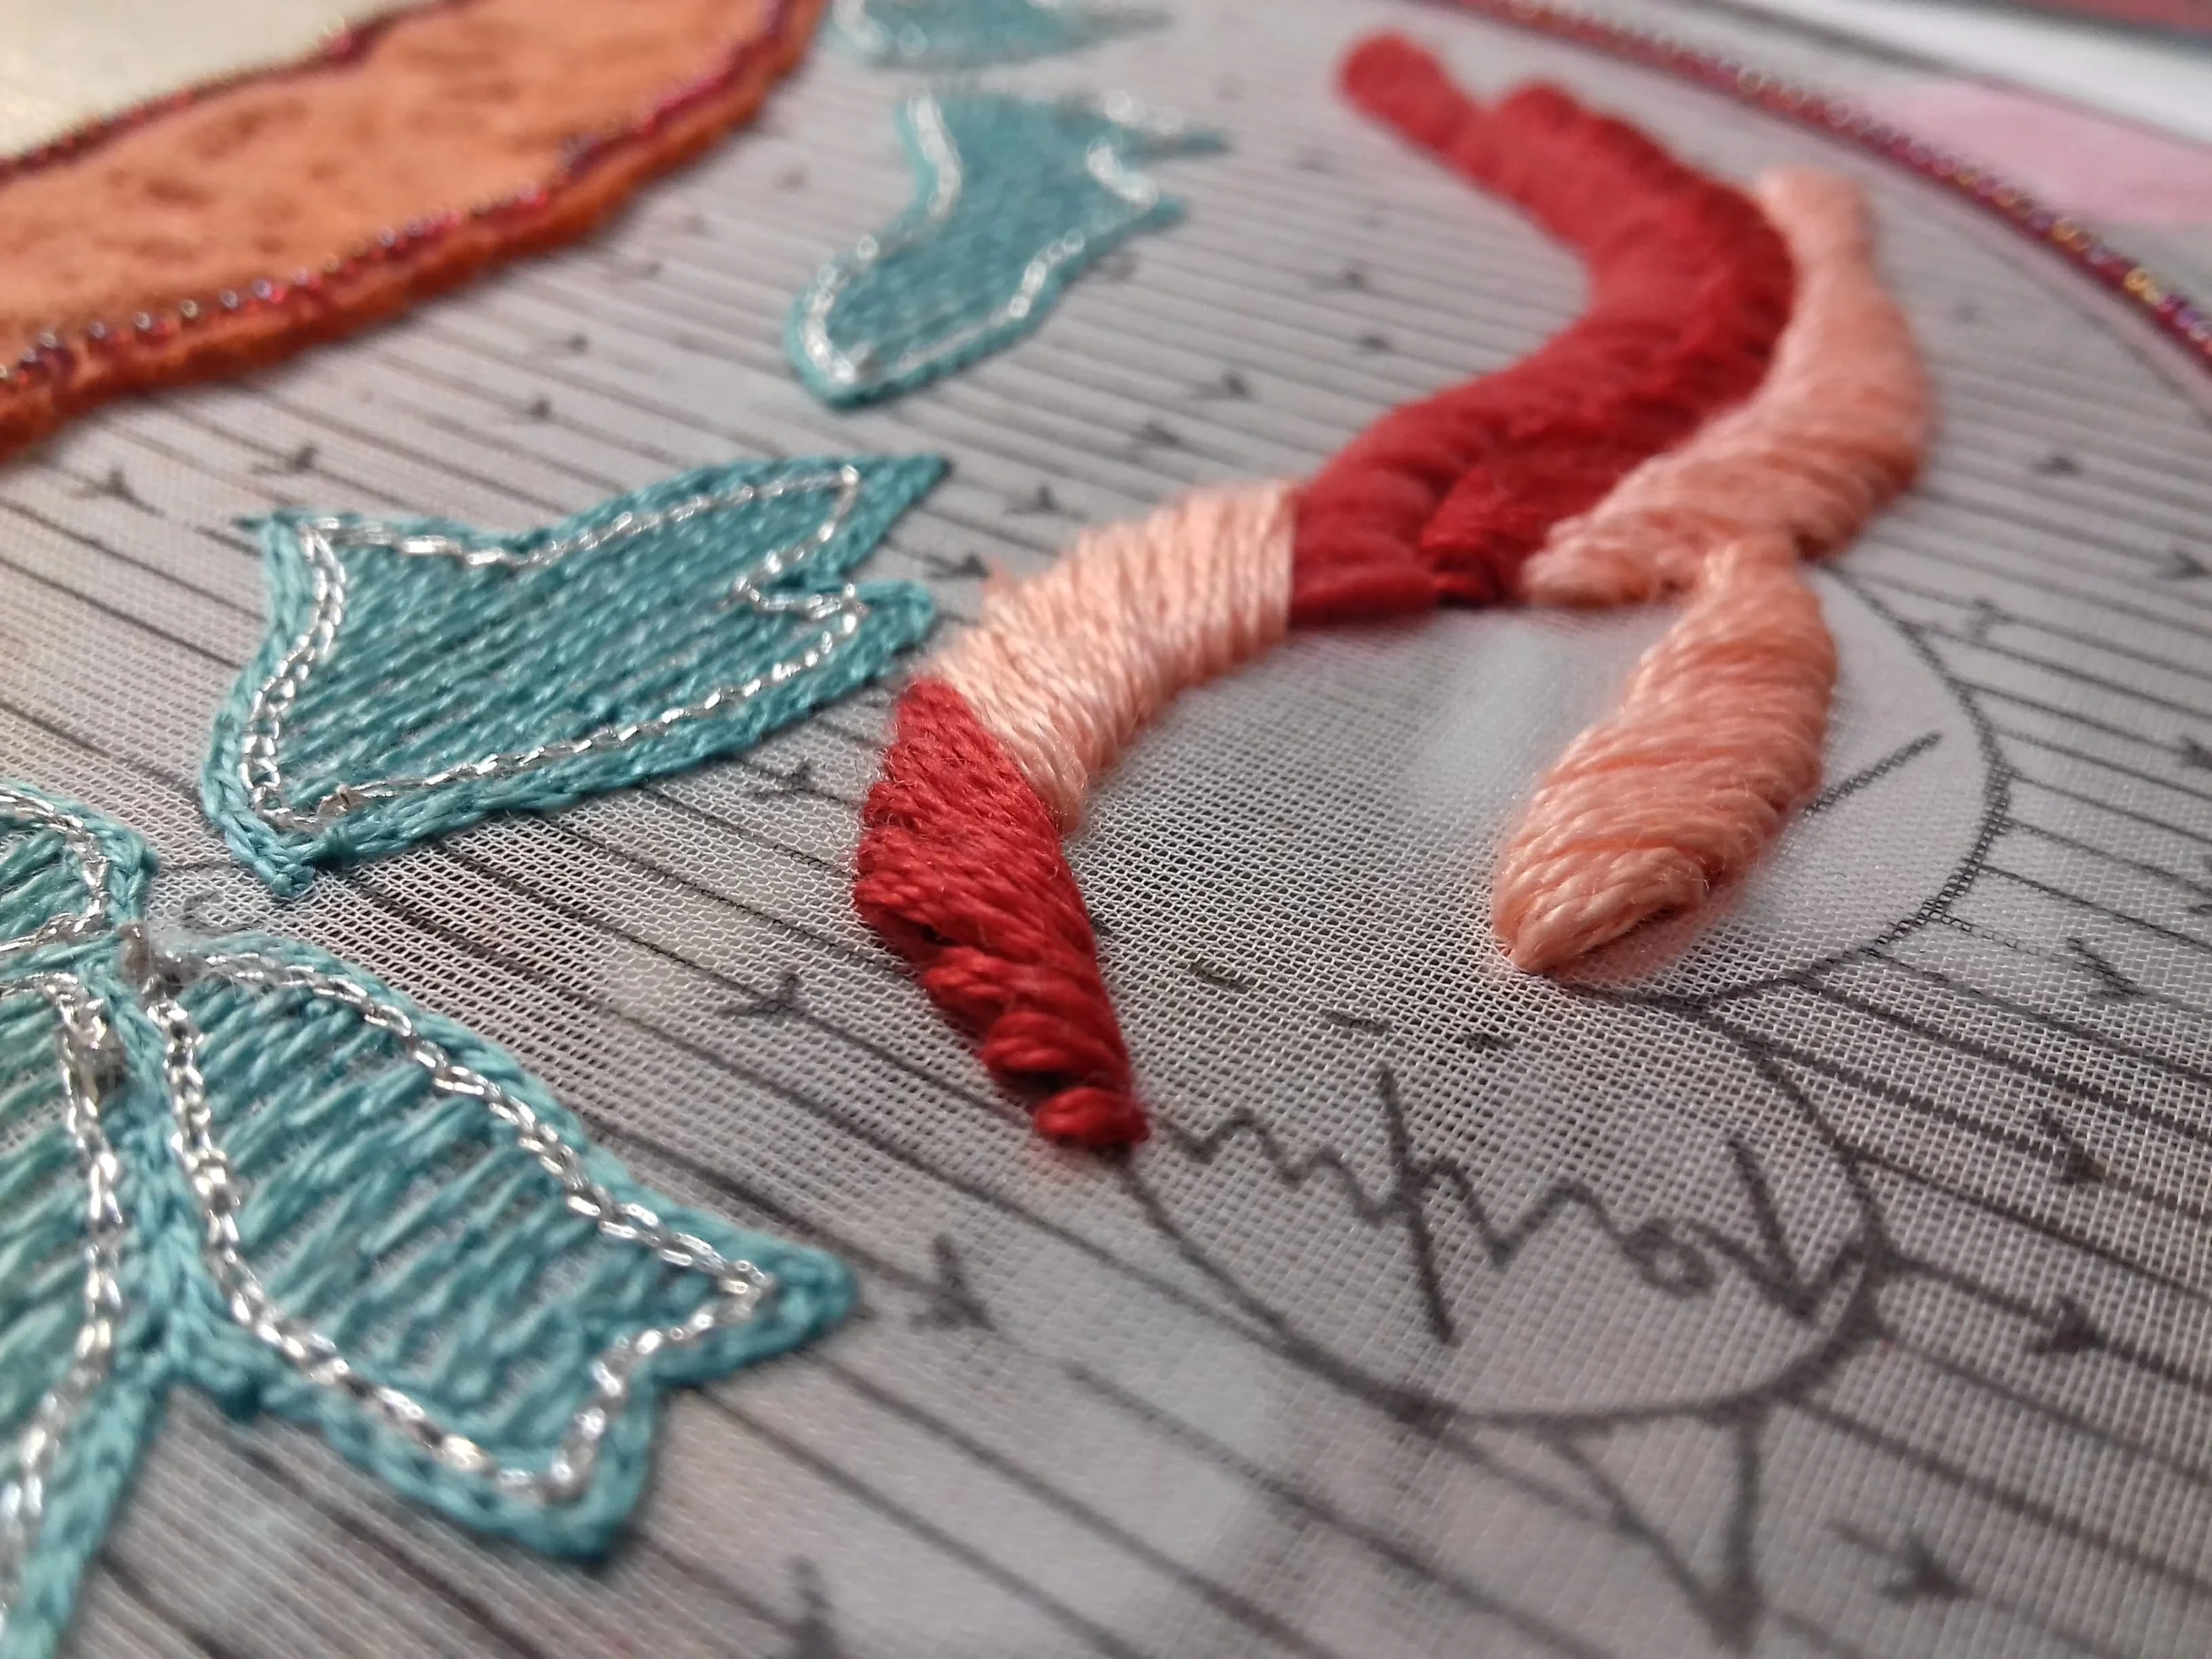
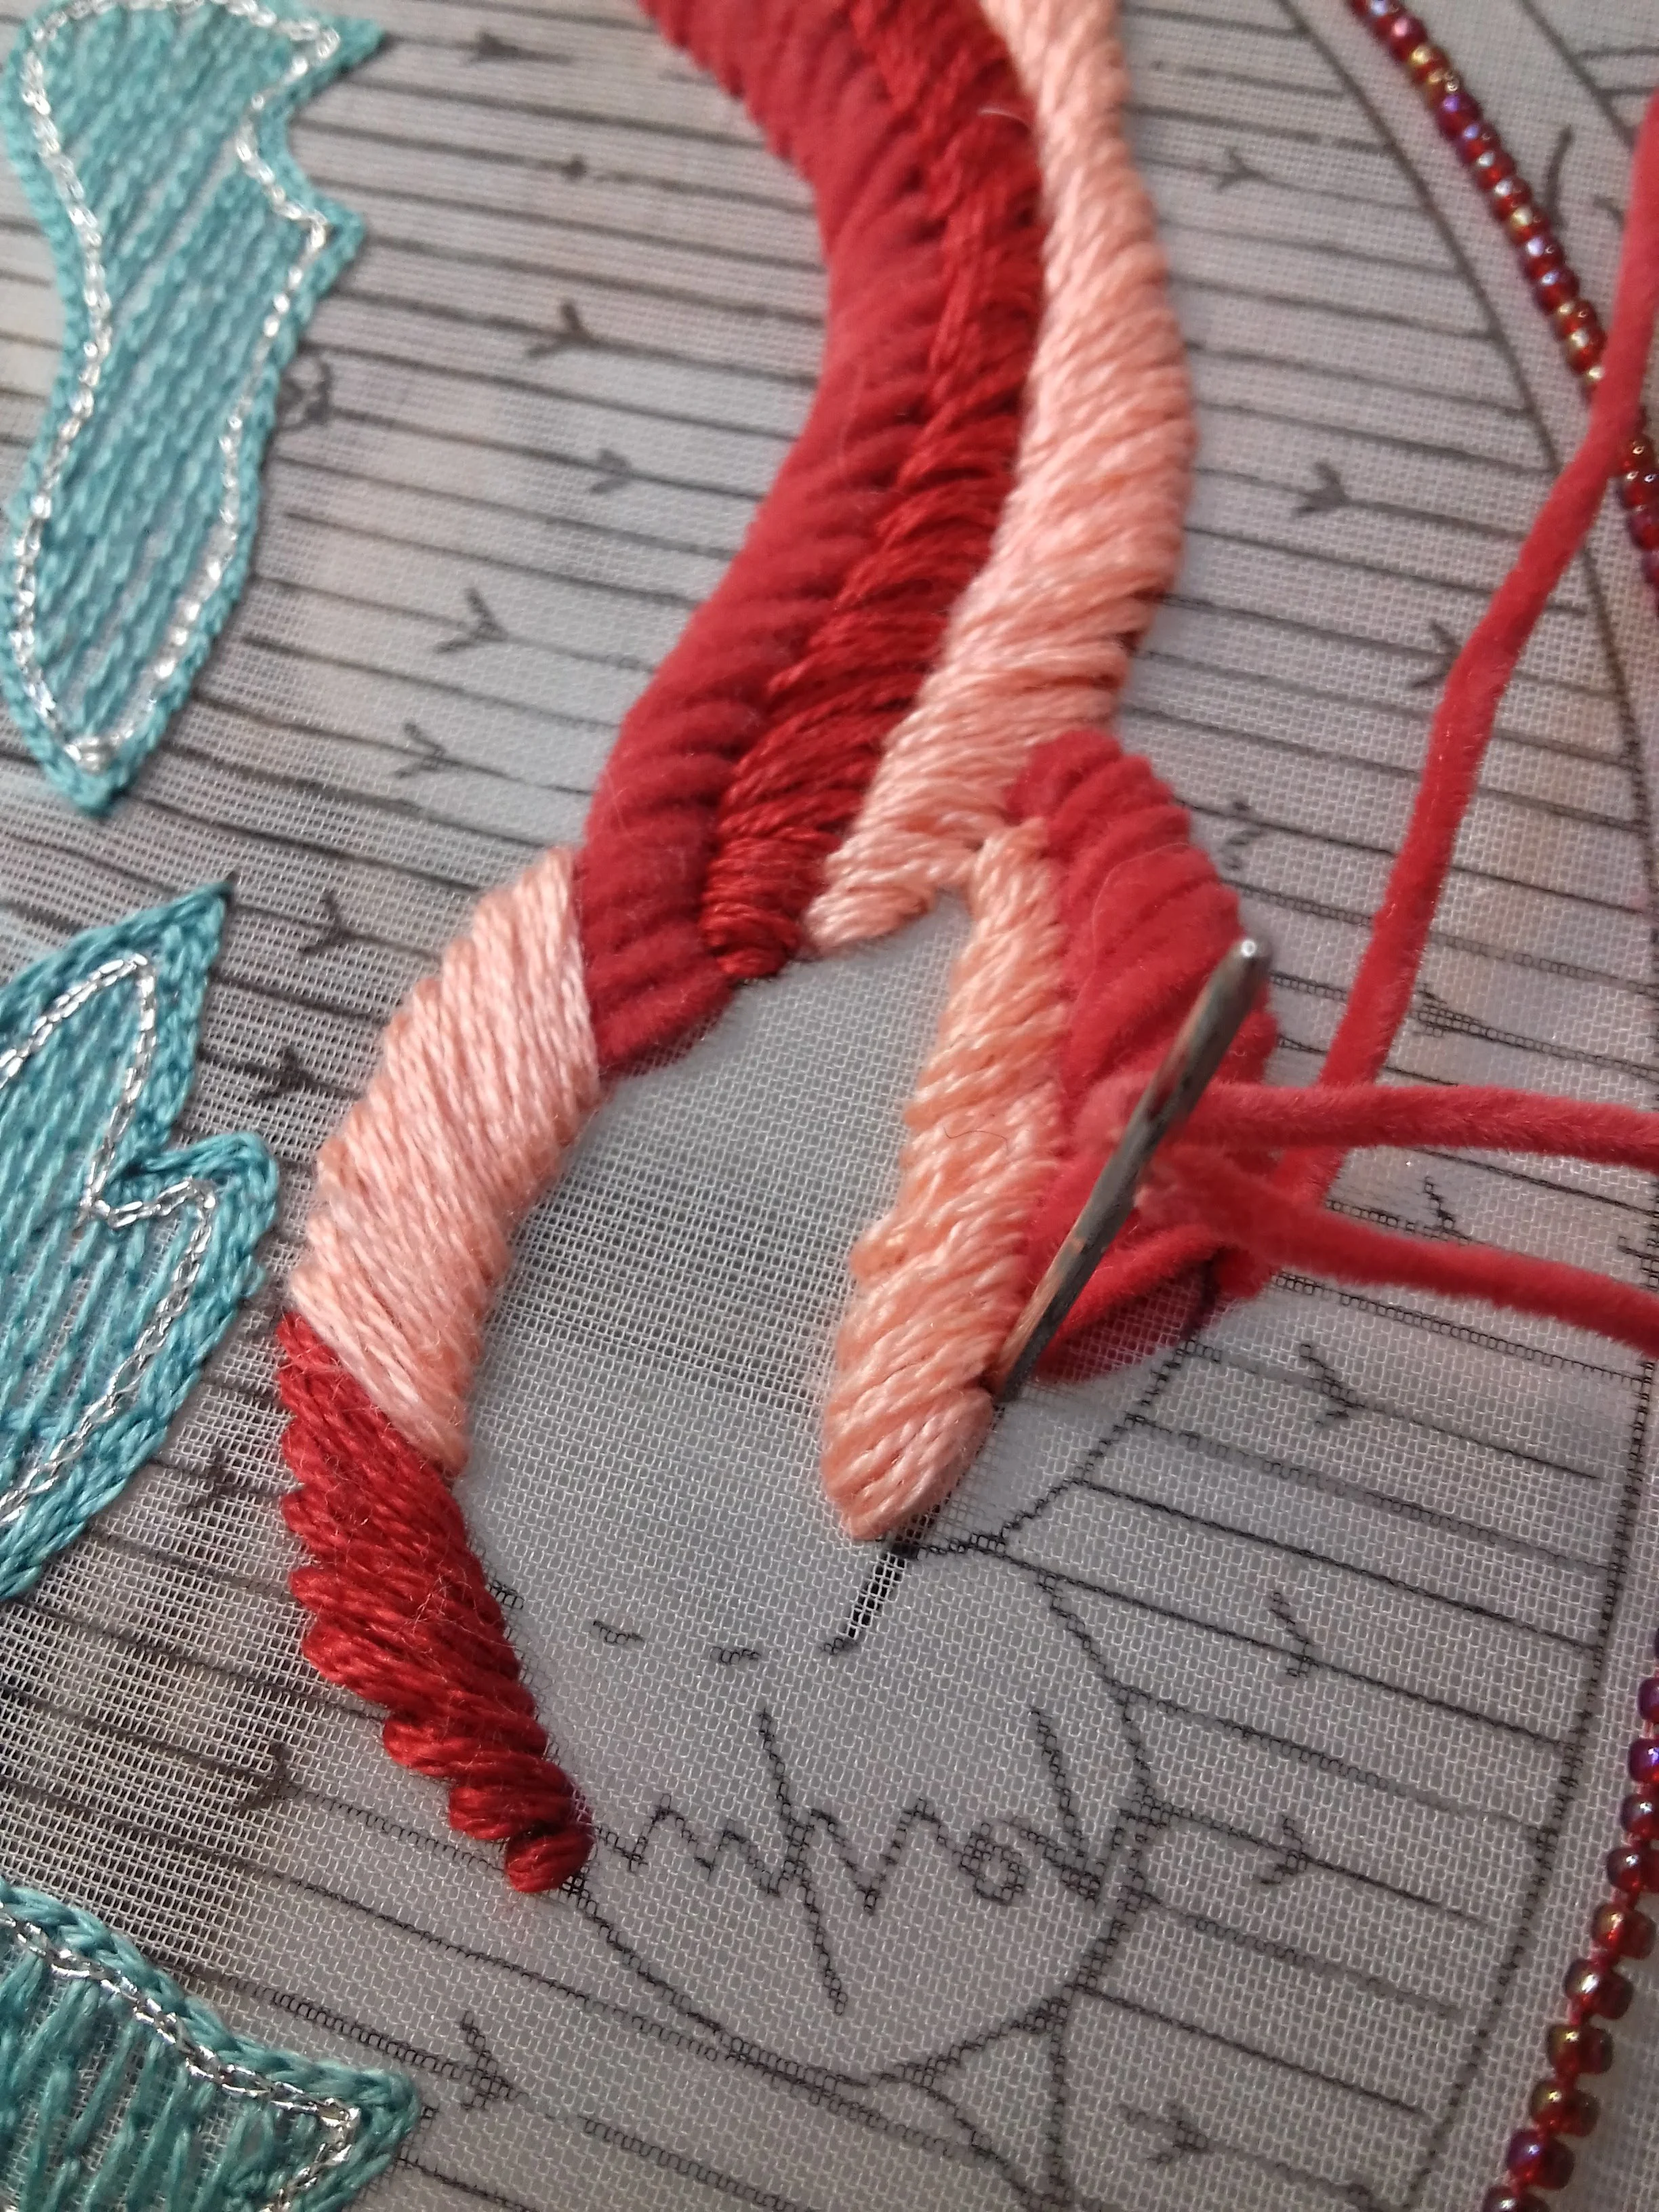
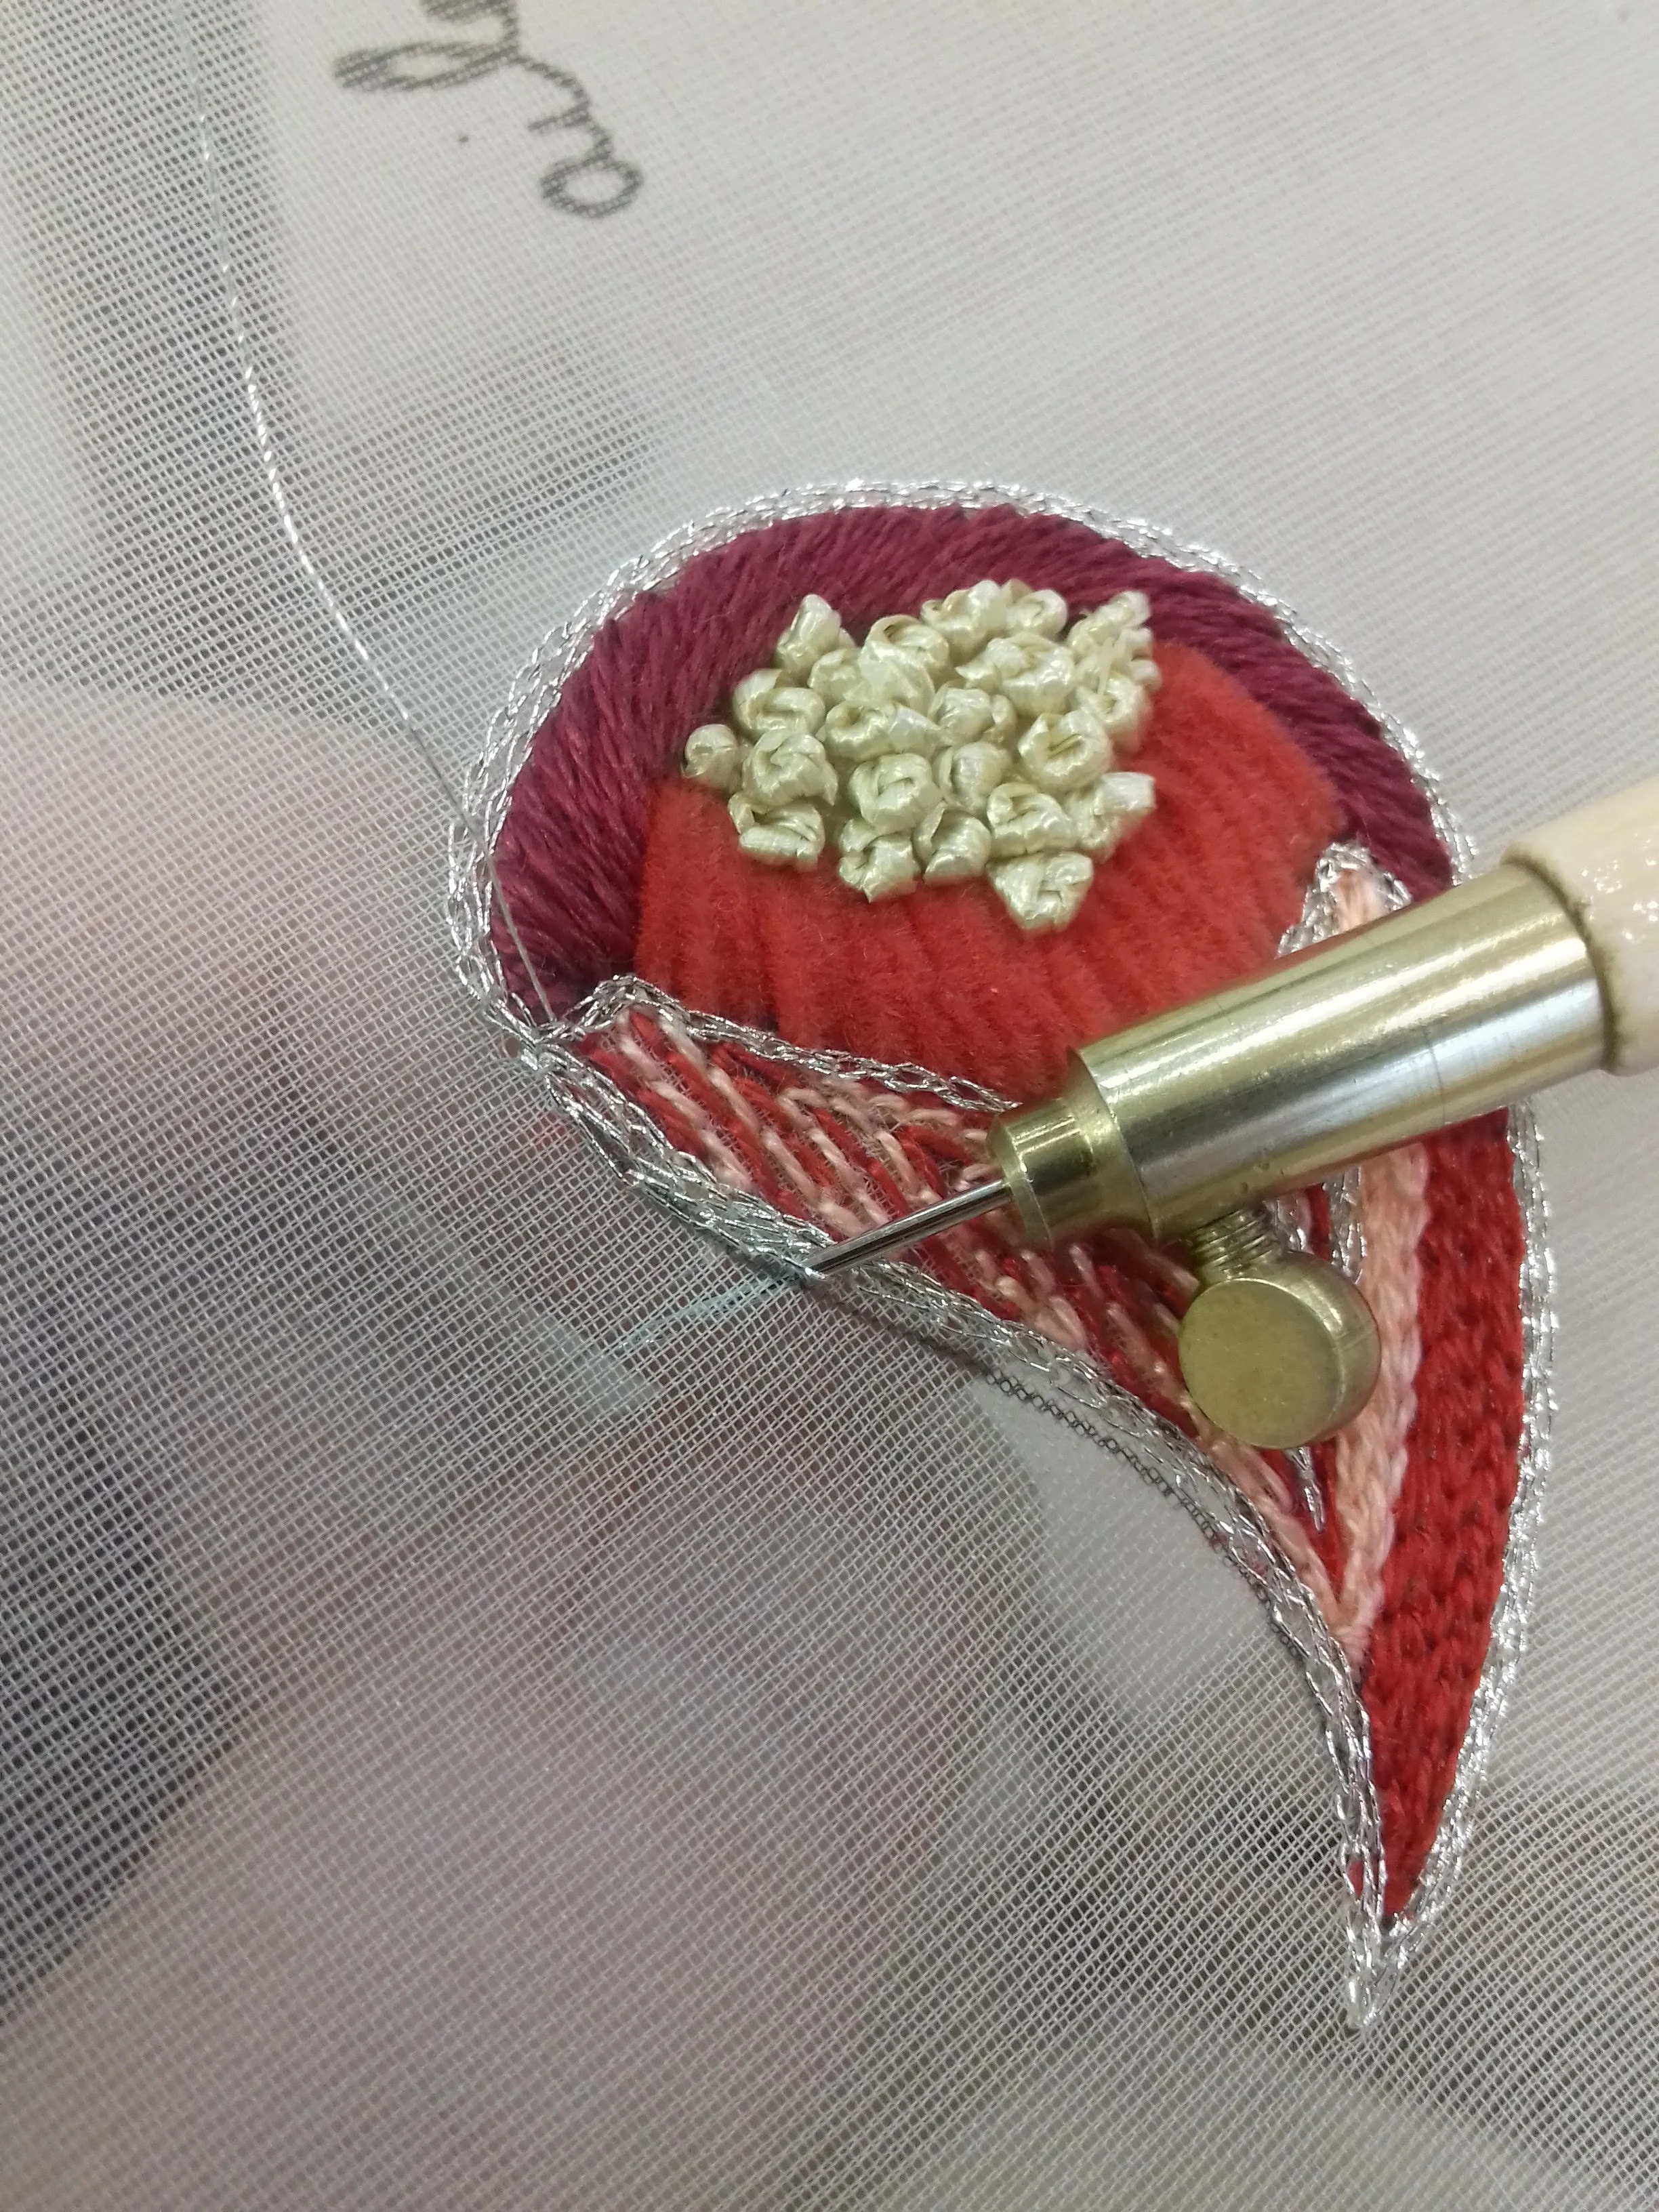
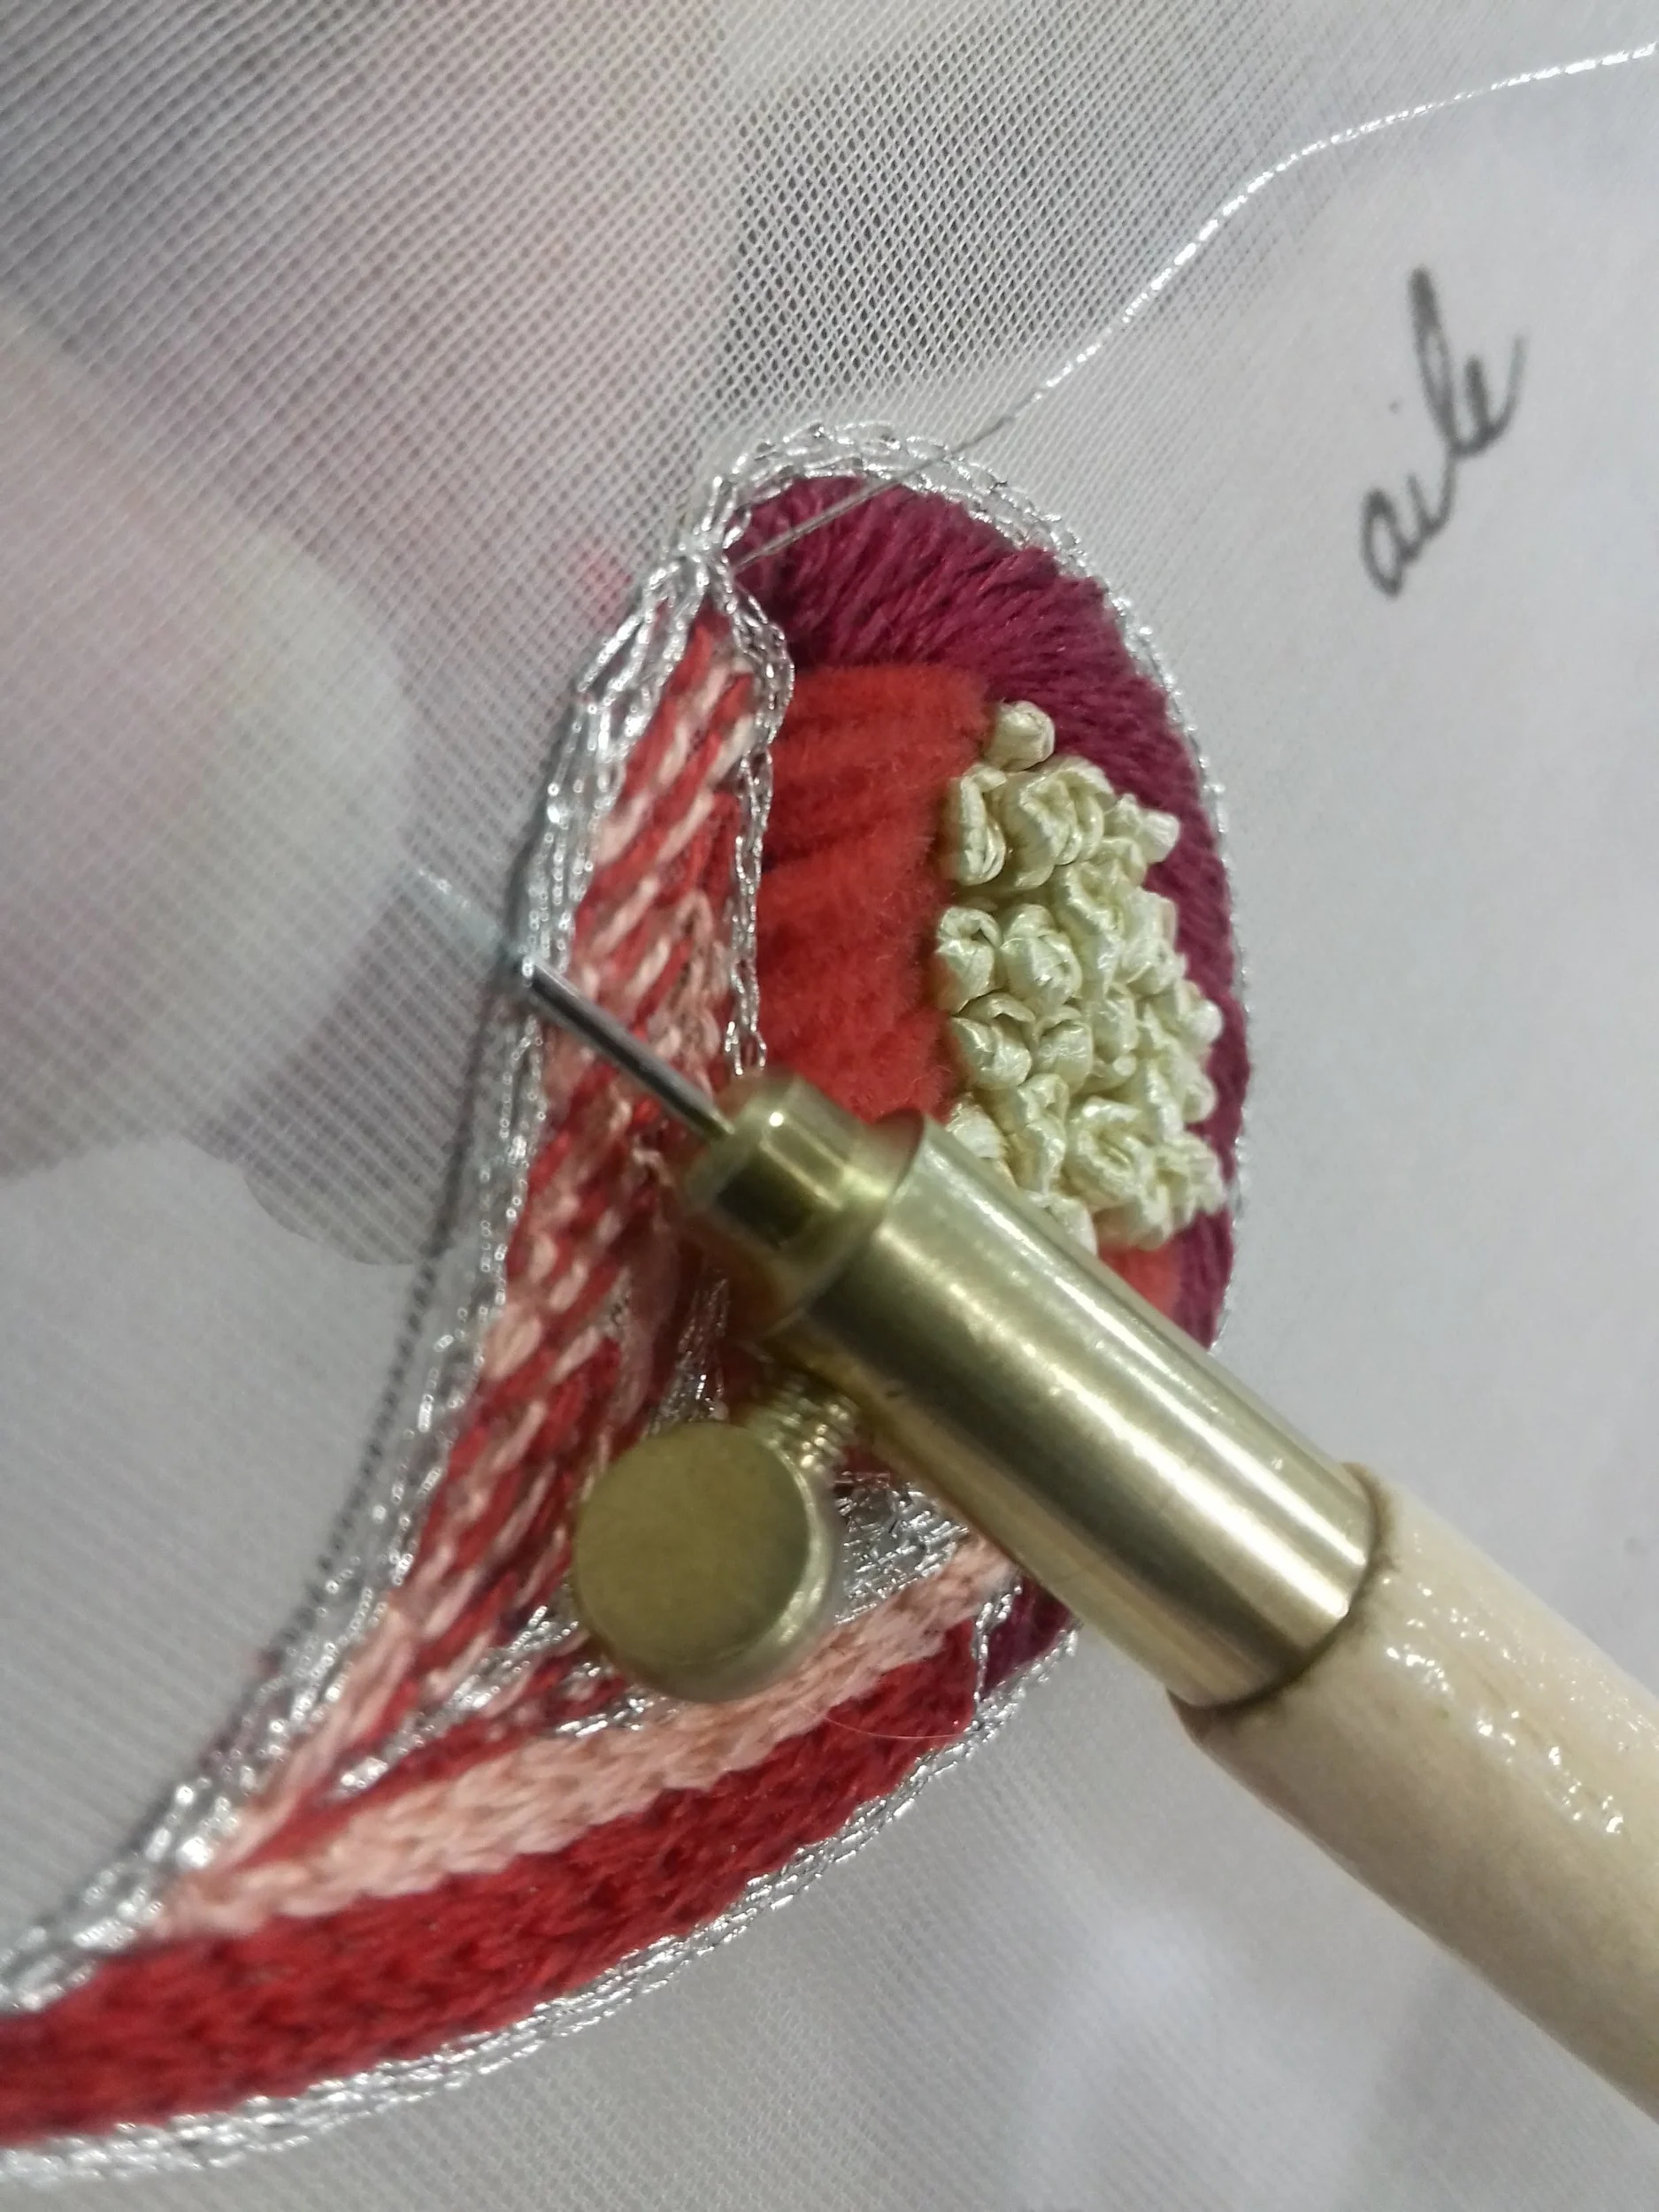
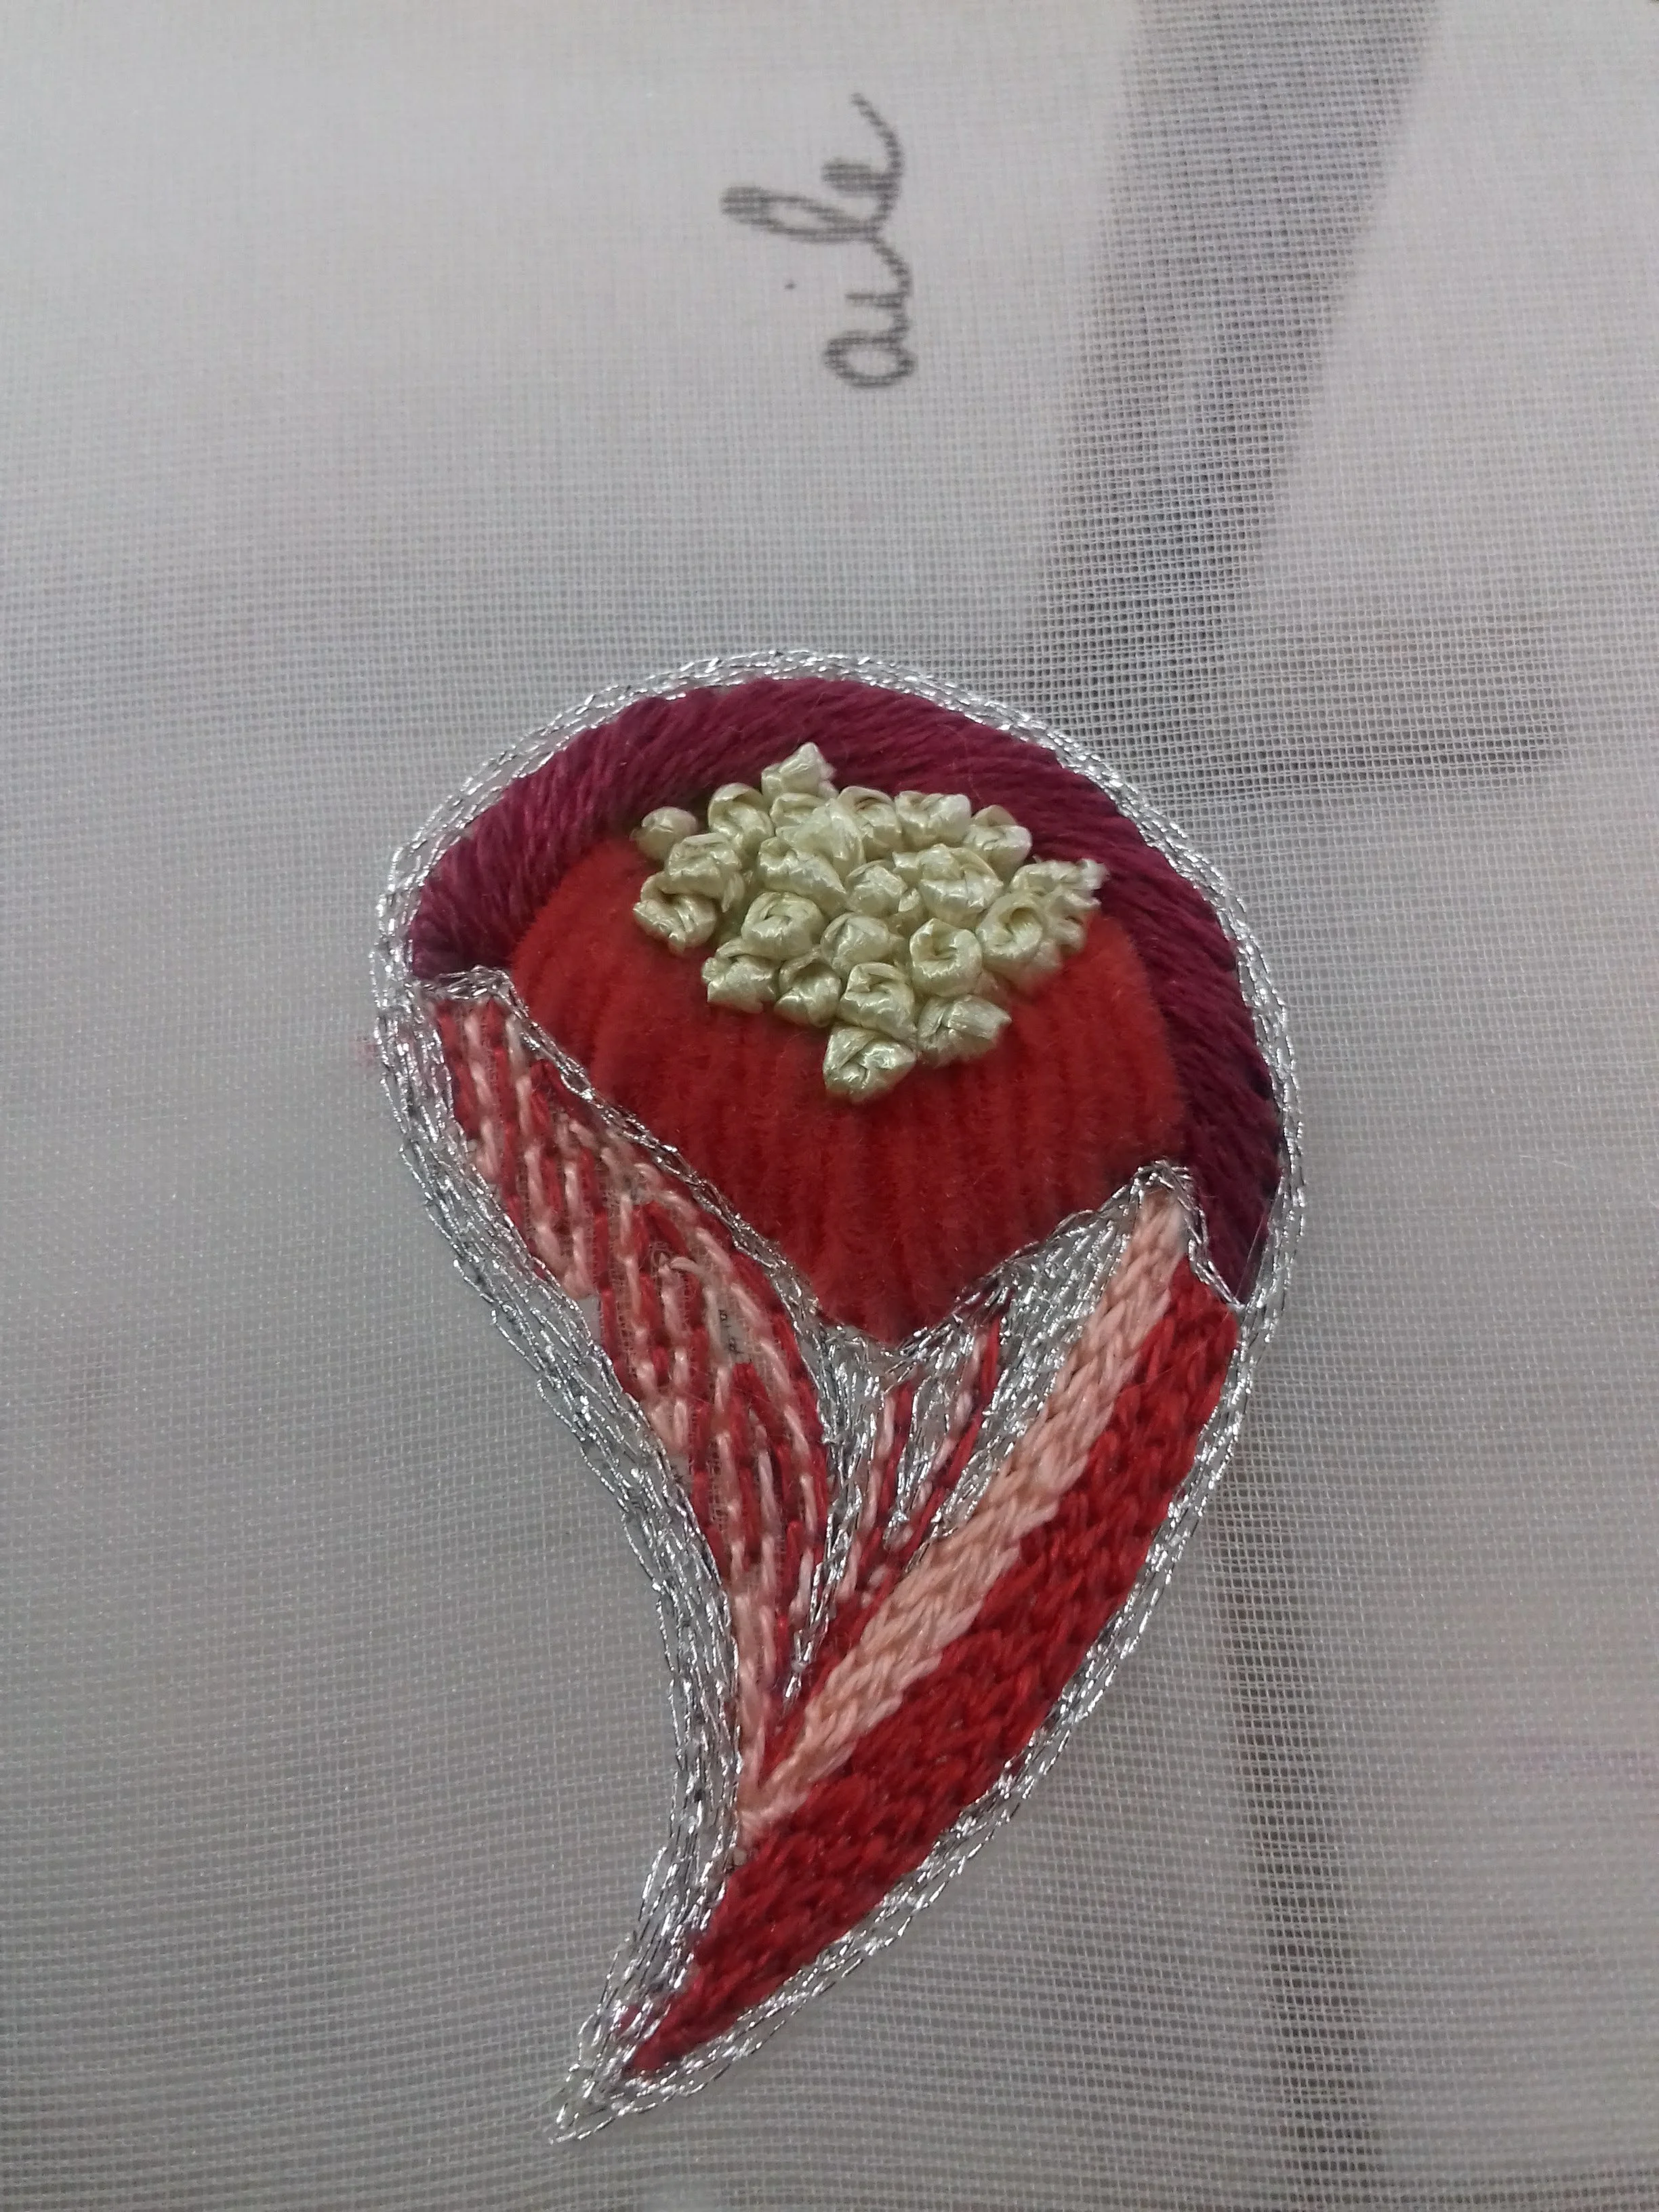
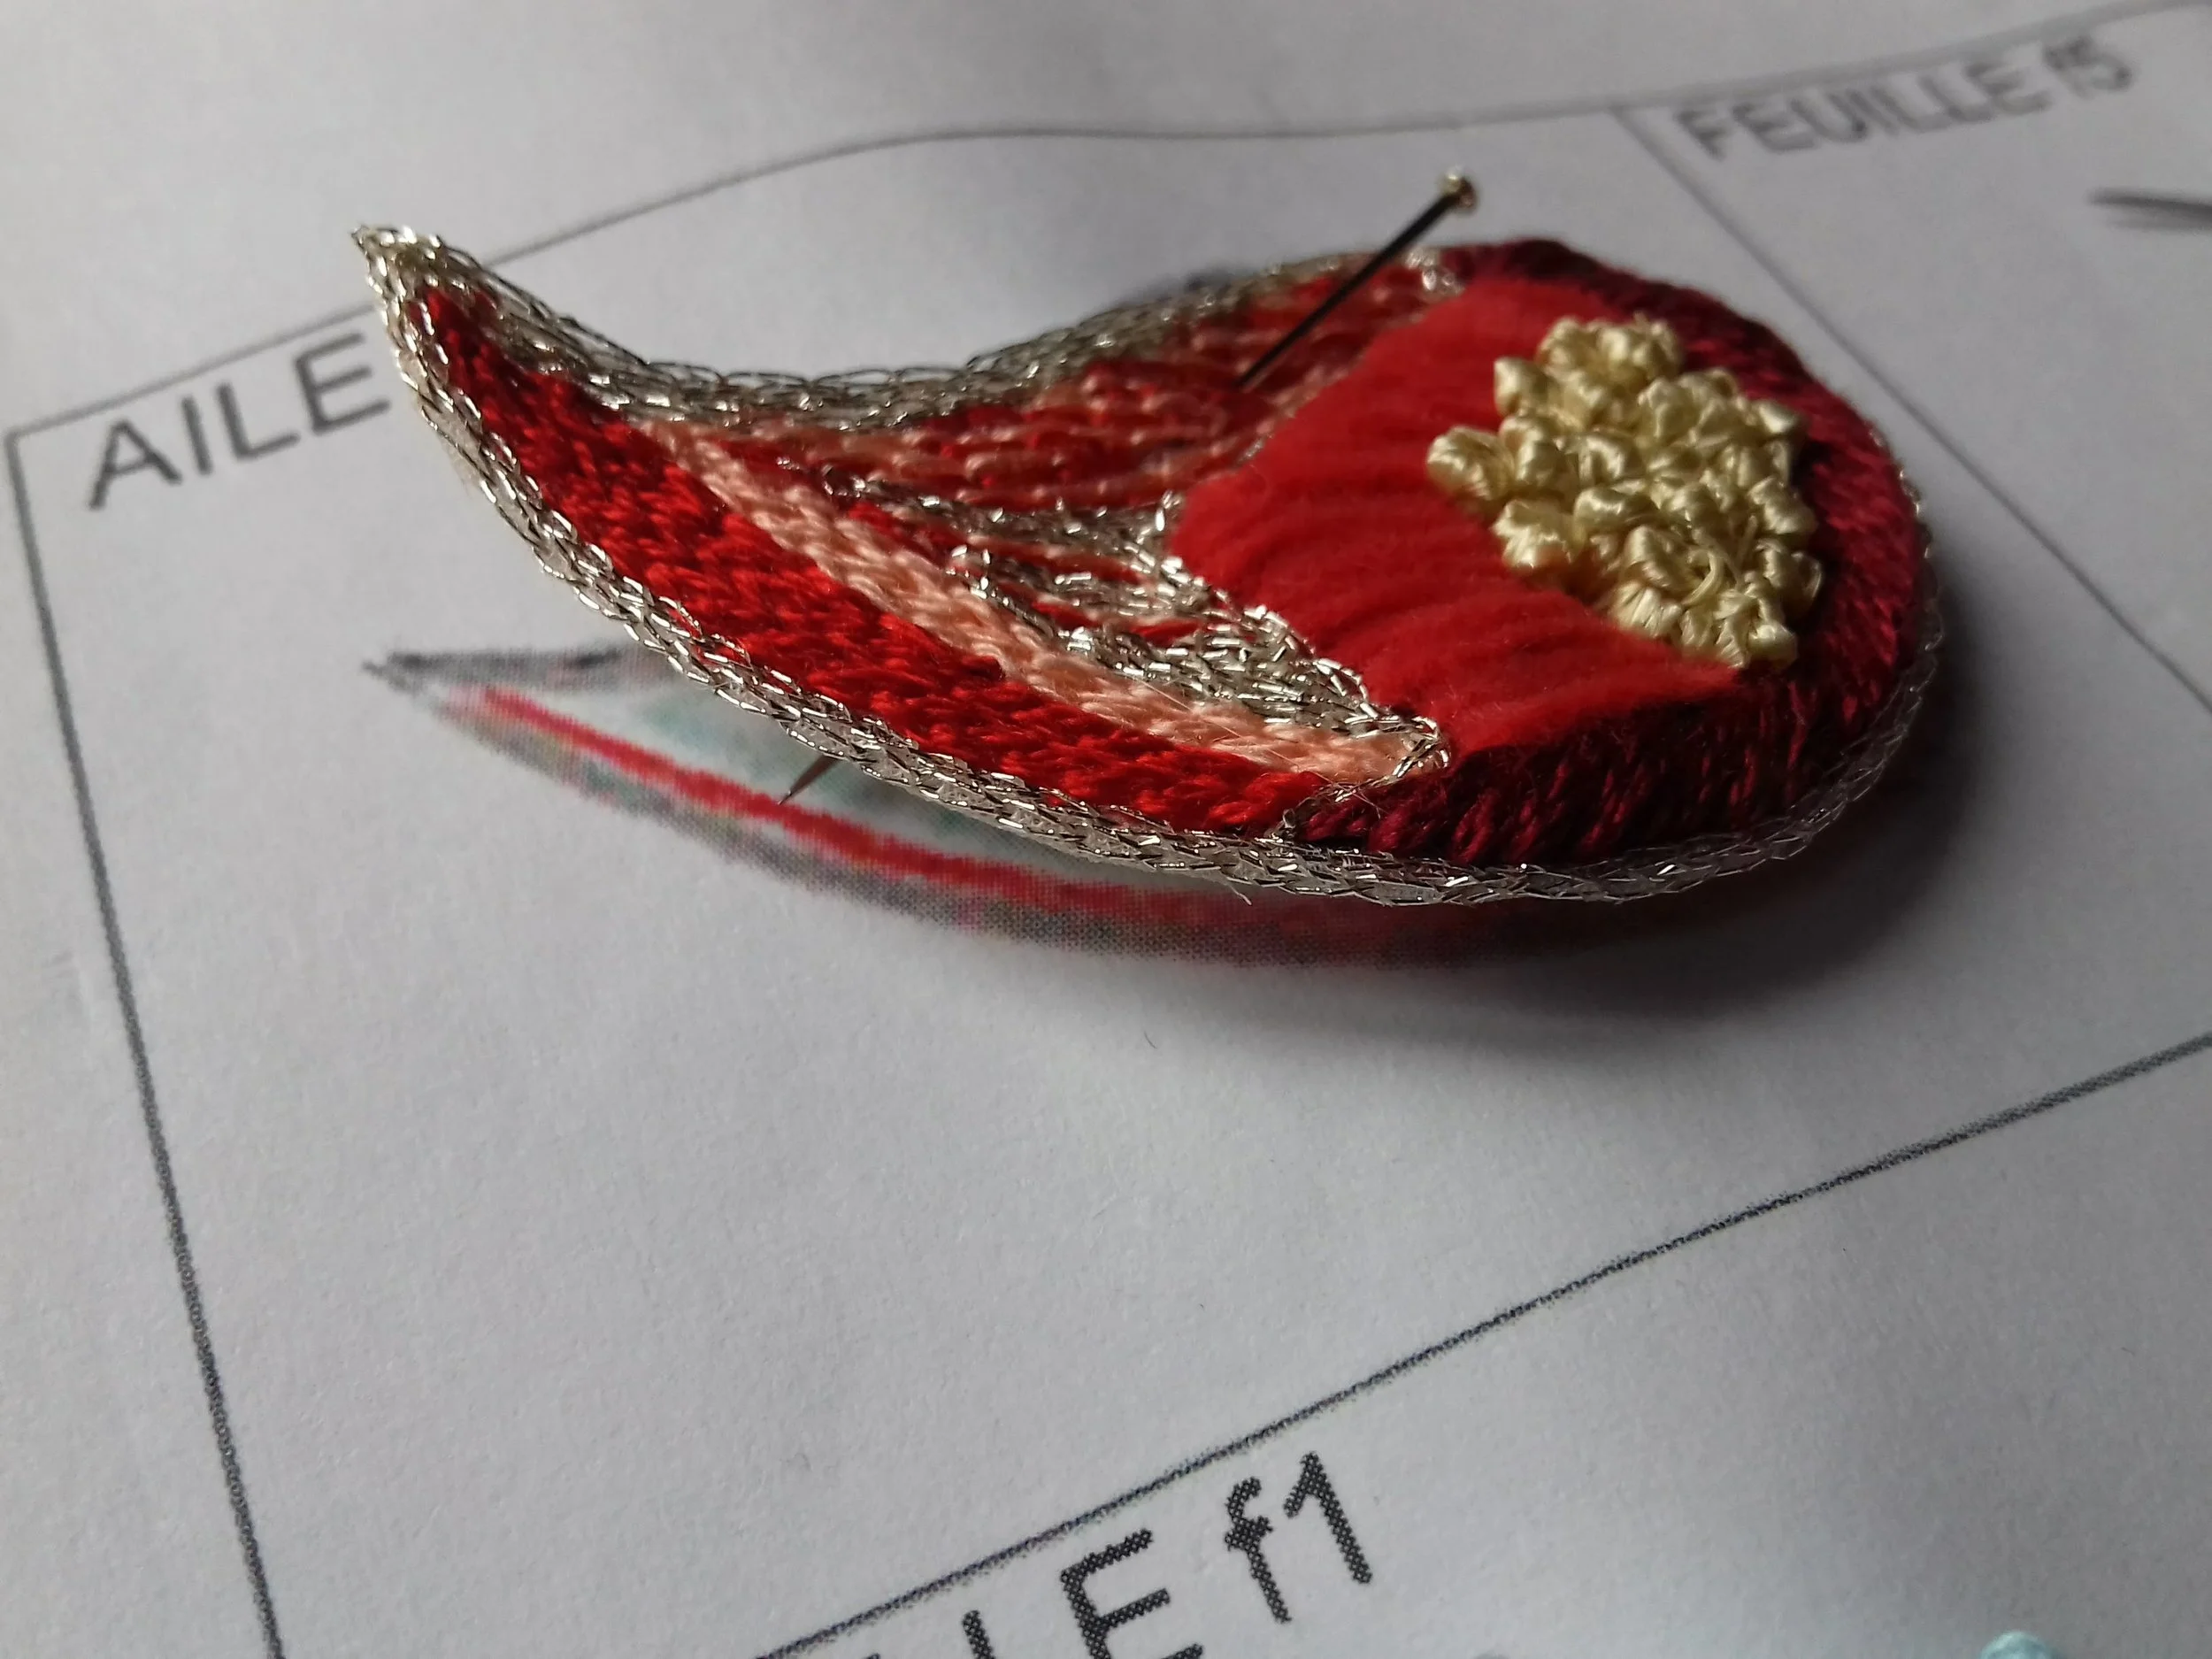
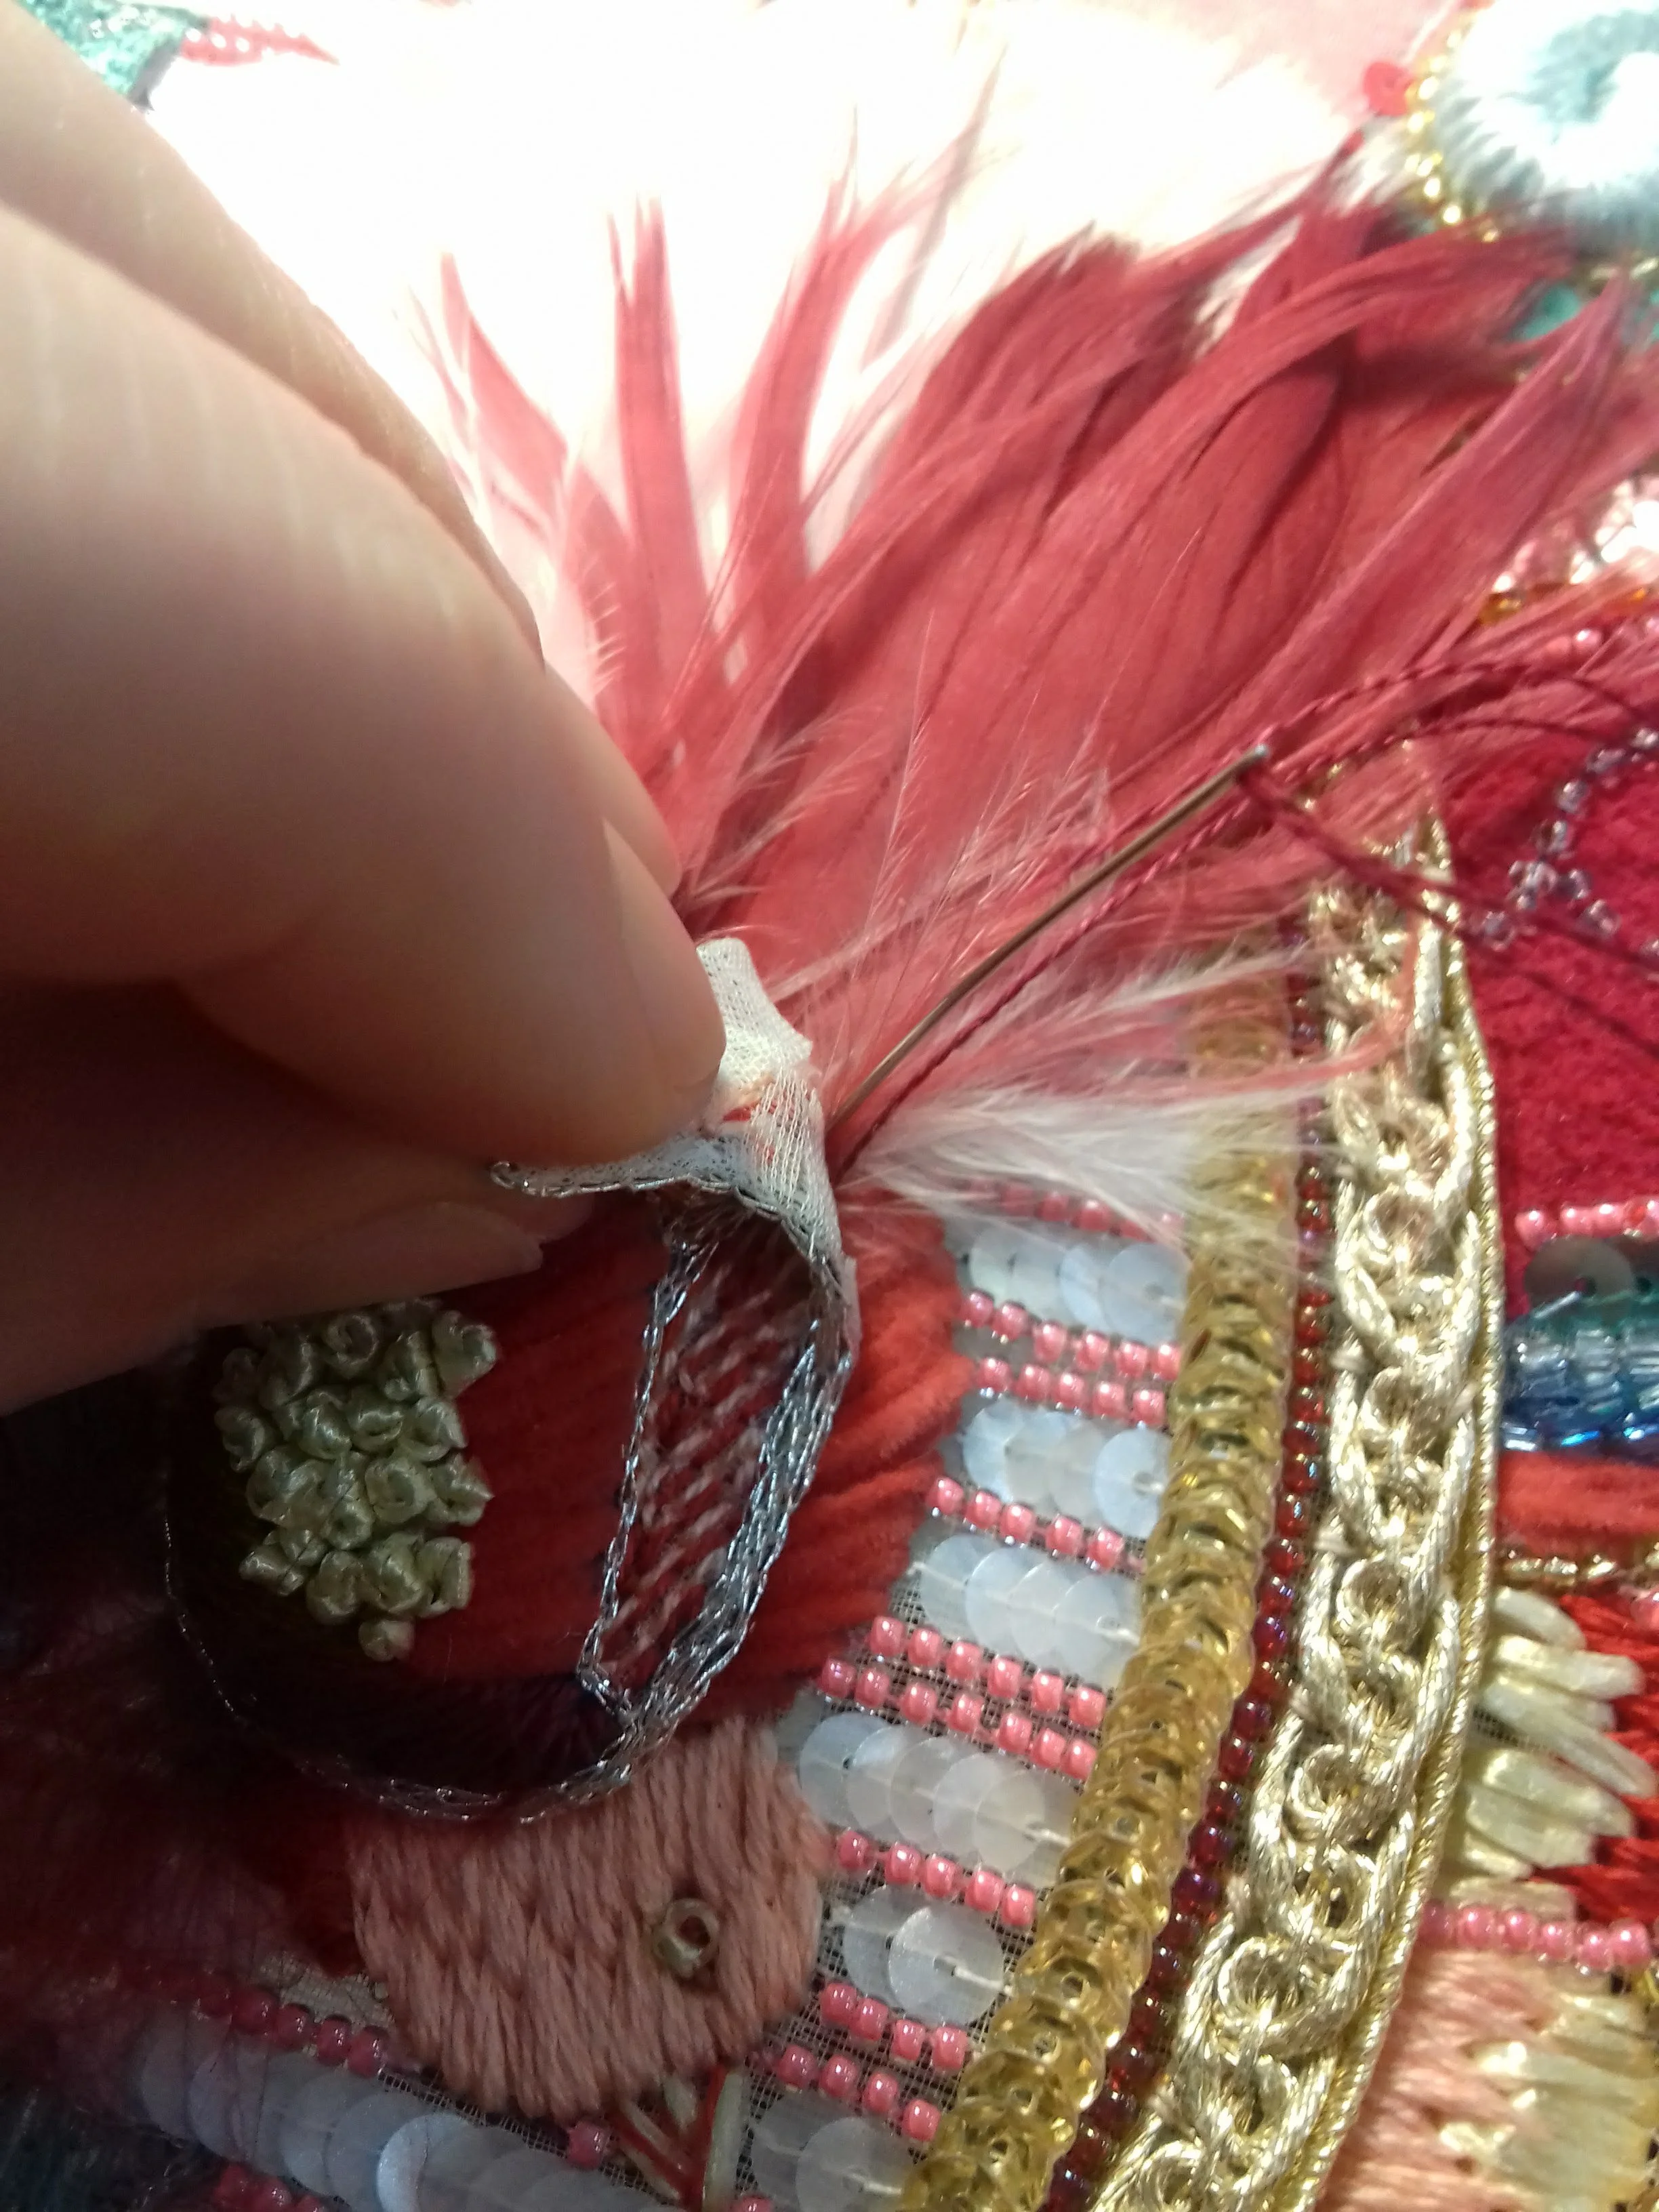
The wing was made on the side of the frame using similar colour tones in salmon and coral as well as burgundy. There was a lovely compliment of textures with the cotton embroidery floss in filling chain stitch, the chenille thread in satin stitch, a burst of raffia french knots and an outline of silver metallic thread. Once it was finished it was removed from the frame and I kept it safely pinned to the paper legend in a plastic folder.
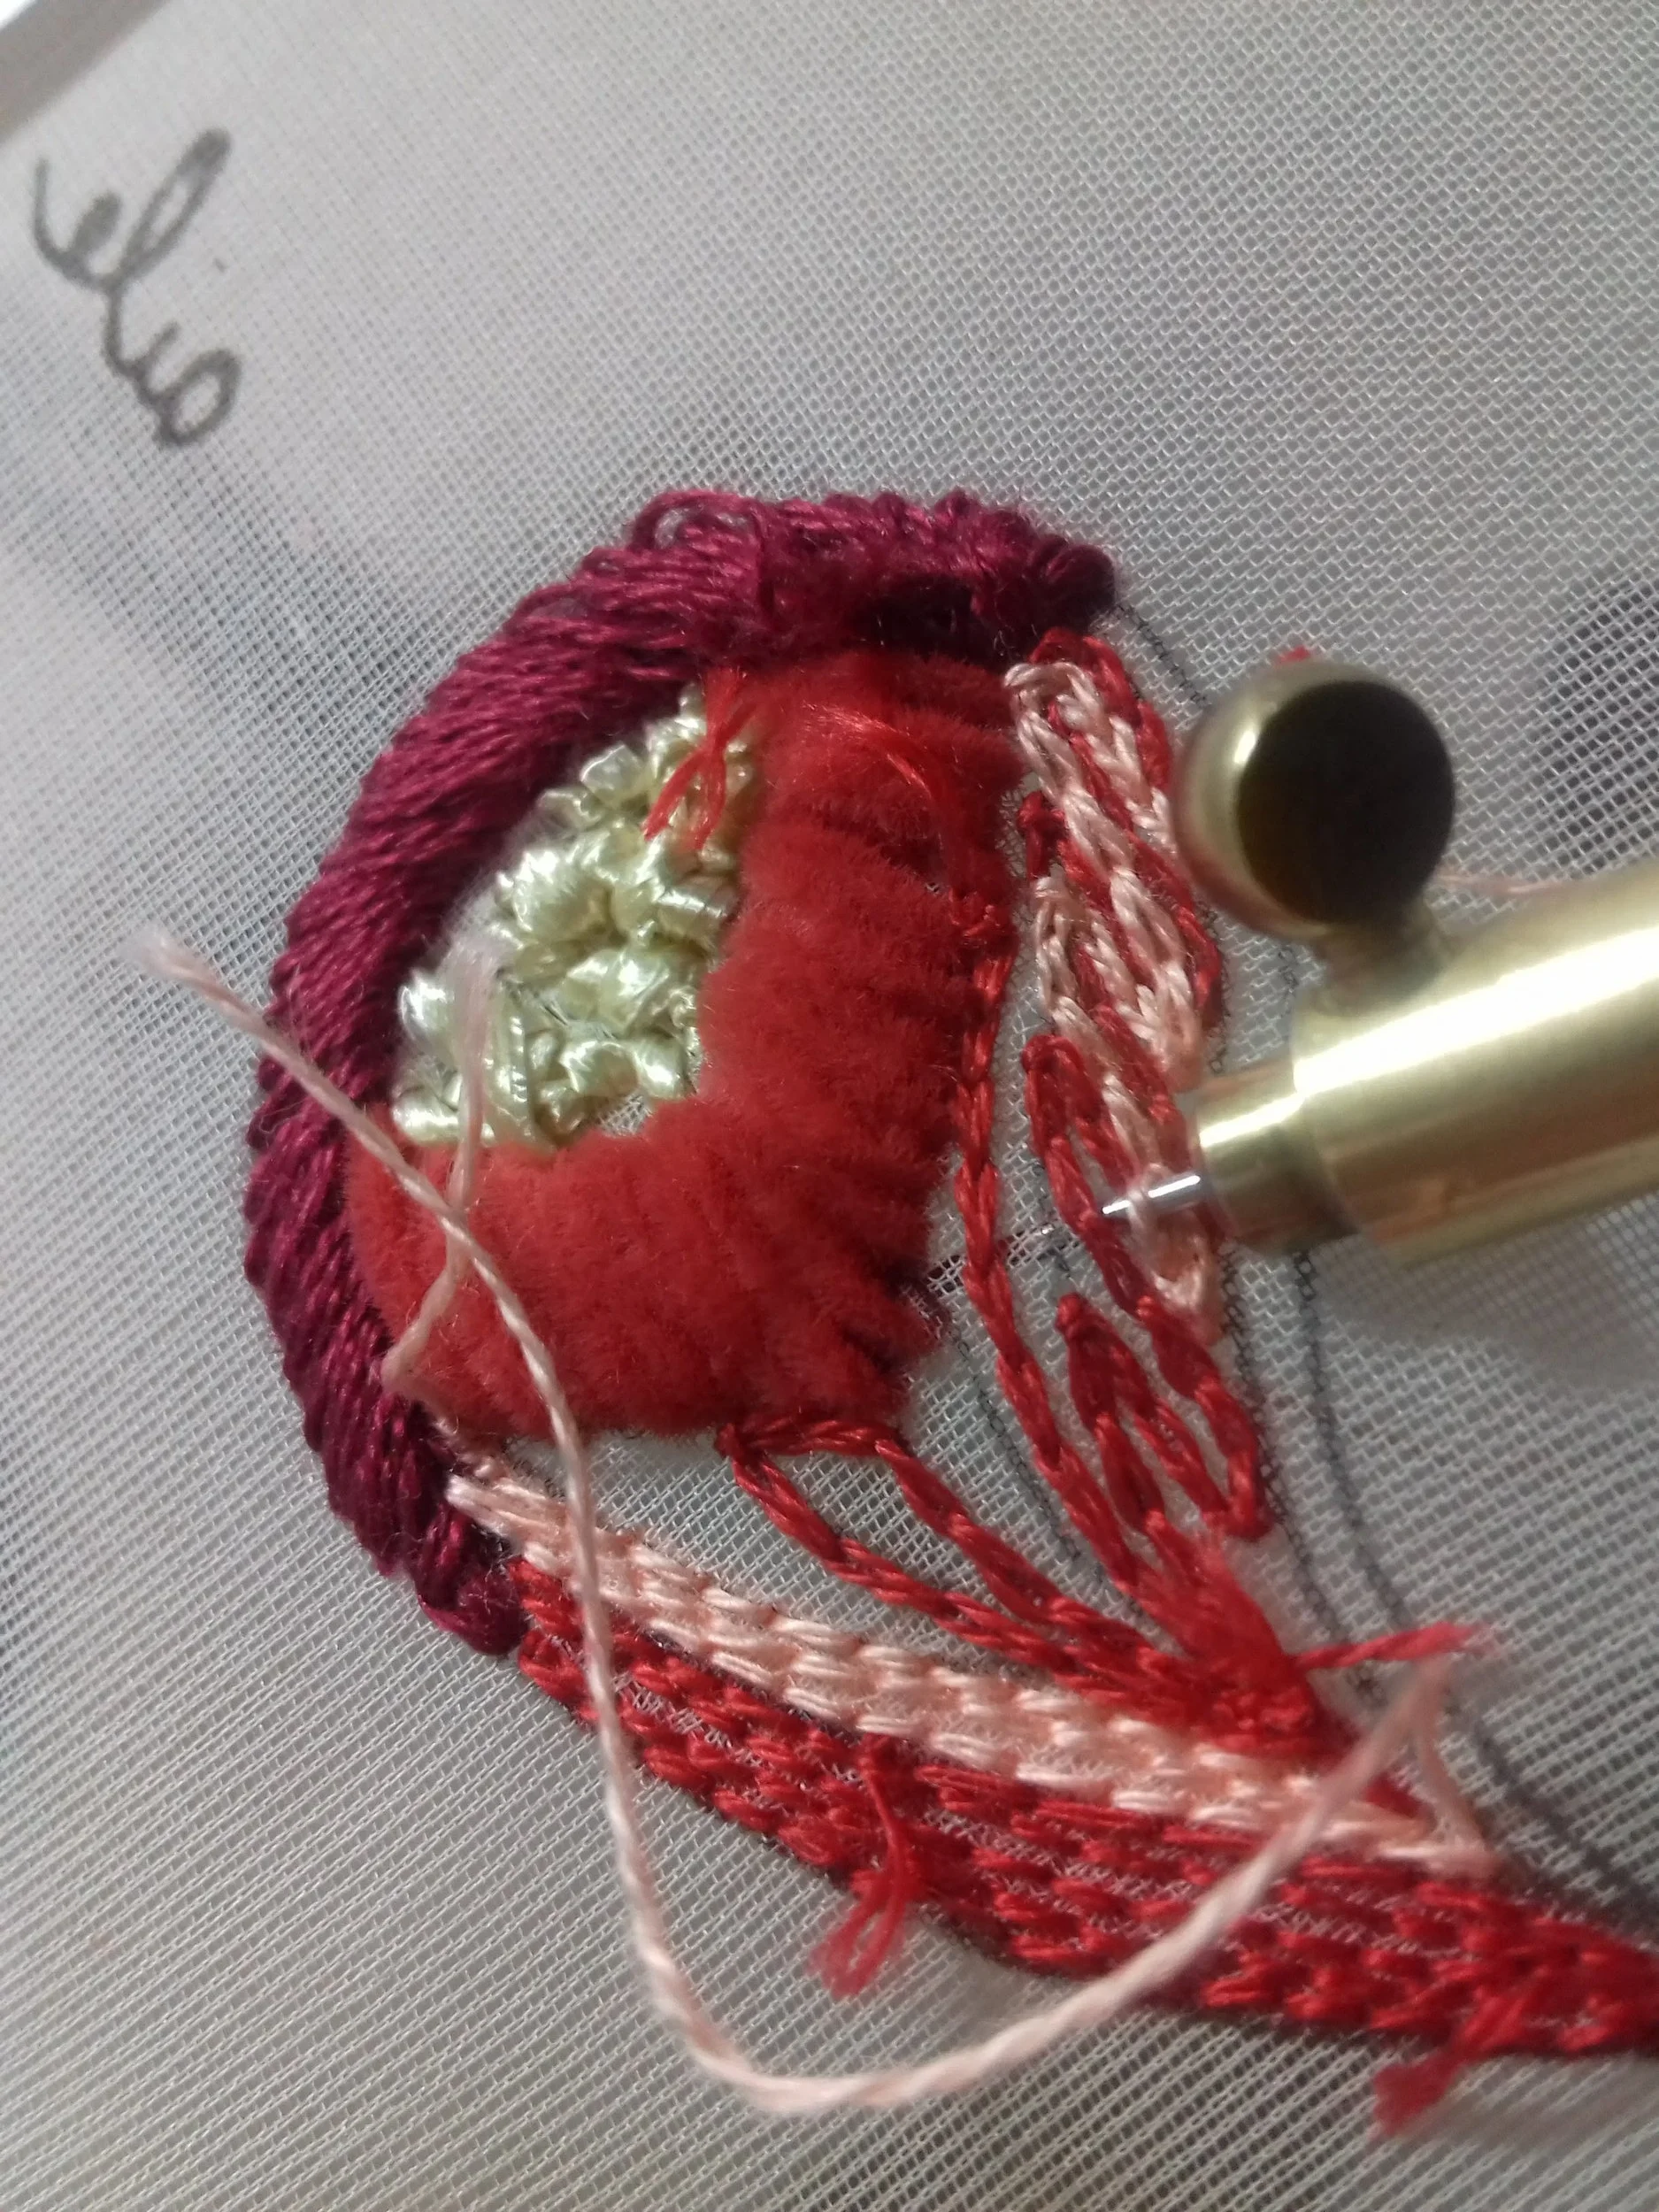
I had been given six feathers in my packet of materials and I didn't dare to open them in case I damaged them in some way! When the time came I I had to choose one of each colour but I couldn't decide which was the prettiest. Eventually after much discussion and vacillation I decided to go wild and use two of each colour! Normally in feather work the down is removed from the stalk but it was kept in place here to be used for texture at the neck and belly of the dove. The feathers were stitched in place at the base of the stalk, leaving the ends to flutter coquettishly.
Finally the wing was applied with an outline of stitches that began at the back of the bird and continued to the point where the feathers emerged at the tail. A tuft of whispy down was brushed forward at the the neck to add texture. The final few stitches encouraged the wing diagonally toward the head and this tension gave the wing it's flick.
I really enjoyed making this little dove, especially as it includes several methods for adding volume. At first glance, it seems like a charming detail but it is rich in materials, textures and techniques, much more than a simple flight of fancy!
Textile Tours of Paris
Join Rebecca on a tour of Paris’ charming haberdasheries nestled deep in the winding streets of Le Sentier, the city’s historic textile and fashion district. Enjoy a Sunday morning with Rebecca on a Flea Market Tour as she guides you through the labyrinth alleys of Paris’ oldest marché-aux-puces to uncover hidden treasure troves filled with vintage lace, linen, passementerie, golden threads and gossamer lingerie. To find out more visit Textile Tours of Paris.